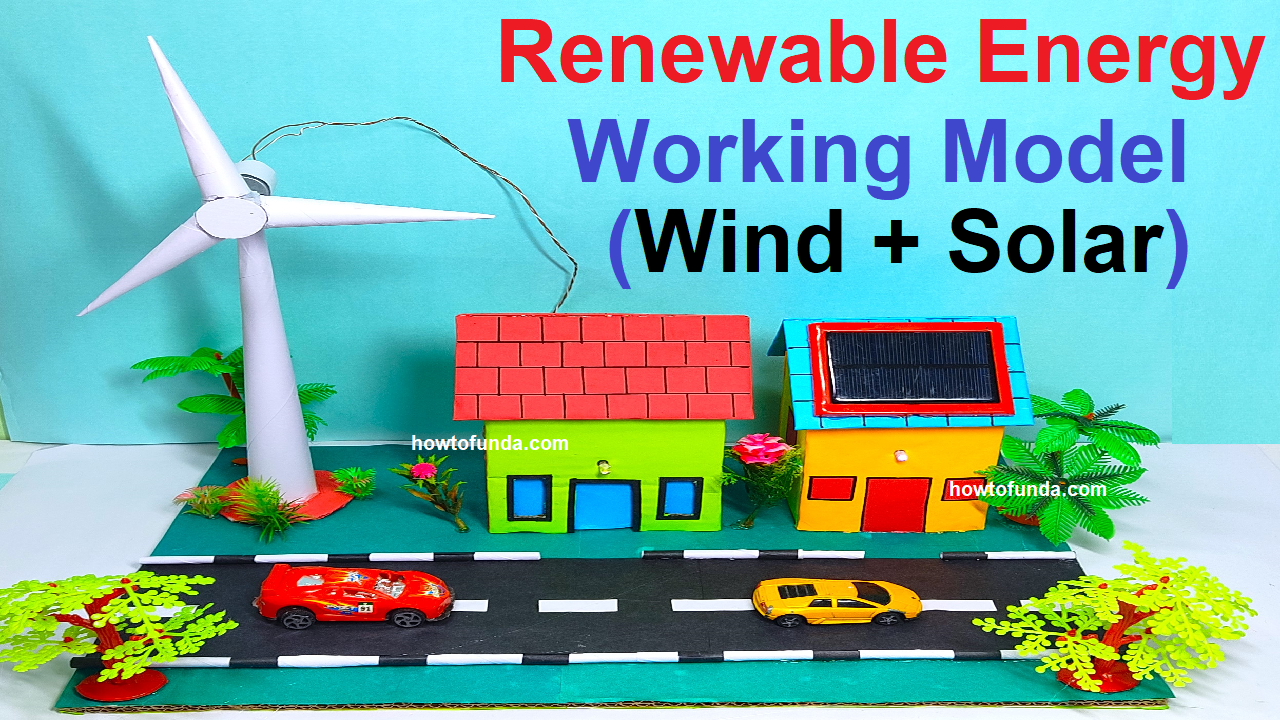
“Pavan Chakki,” also known as a windmill or wind turbine, is a device that converts the kinetic energy of the wind into mechanical energy.
The term “Pavan Chakki” is derived from Sanskrit, where “Pavan” means wind, and “Chakki” refers to a mill or machine.
Windmills have been used historically for various purposes, including milling grains, pumping water, and generating electricity in modern times.
These structures harness the power of the wind to perform mechanical work, showcasing the utilization of renewable energy.
Key Features of Pavan Chakki:
- Blades or Sails: The distinctive feature of a Pavan Chakki is its rotating blades or sails. These are designed to capture the wind’s energy effectively.
- Rotor: The blades are attached to a central rotor, which rotates as the wind pushes against them. The rotor is connected to a generator or mechanical system that converts the rotational energy into useful work.
- Nacelle: The central part of the windmill, often referred to as the nacelle, houses the machinery, including the generator and other components. It is positioned at the top of the tower to maximize exposure to the wind.
- Tower: The tower provides height to the windmill, placing the rotor at an optimal height to capture higher wind speeds. Modern wind turbines often have tall towers to access stronger and more consistent winds at higher altitudes.
- Generator: In the context of electricity generation, the Pavan Chakki includes a generator within the nacelle. The rotational energy from the blades is converted into electrical energy, which can be used to power homes, businesses, or the electrical grid.
Creating a science working model of a “Pavan Chakki” or windmill can be an engaging and educational project.
A windmill harnesses wind energy to perform mechanical work, typically converting it into rotational motion.

Here’s a simple guide on how to make a basic windmill model:
Materials Needed:
- Cardboard
- Wooden sticks or dowels
- A small DC motor
- Wires
- LED bulb or a small light
- Plastic propeller or lightweight blades
- Glue
- Tape
- Small pulley or wheel
- Small belt or rubber band
- Hot glue gun (optional)
- Small battery or a power source (such as a small solar panel)
Step by Step Video Instructions:
1. Build the Windmill Blades:
- Cut out three or four identical blade shapes from cardboard. The blades should be long and narrow, resembling sails. You can use a template to ensure consistency.
2. Attach Blades to Wooden Sticks:
- Glue or tape the blades to the ends of the wooden sticks, forming a cross shape. These sticks will act as the arms of the windmill.
3. Construct the Windmill Base:
- Create a sturdy base for your windmill using cardboard. Cut out a square or circular piece and attach the wooden sticks at the center, forming a cross.
4. Mount the DC Motor:
- Attach the small DC motor at the center of the base. The motor’s shaft should be perpendicular to the surface, allowing for rotational motion.
5. Connect Blades to Motor:
- Connect the blades to the motor shaft. You can either directly attach them using tape or use a small hub to secure them firmly.
6. Create a Belt System:
- If using a small pulley, attach it to the motor shaft. Connect the pulley to the small wheel using a belt or rubber band. This will allow the rotational energy to be transferred.
7. Attach LED Bulb:
- Attach the LED bulb to the base using cardboard or any other supporting material. Connect the LED to the motor through wires.
8. Connect the Power Source:
- Connect the DC motor to the small battery or power source. If you’re using a solar panel, connect it to the motor to harness energy from sunlight.
9. Test the Model:
- Place the windmill in an area with a good breeze or use a fan to simulate wind. Observe how the blades rotate and, in turn, generate power to light up the LED bulb.
10. Optional: Decorate the Windmill:
- Add colors, designs, or decorative elements to make your windmill visually appealing.