
To connect a solar panel to a DC motor fan with switches, you’ll need the following components:
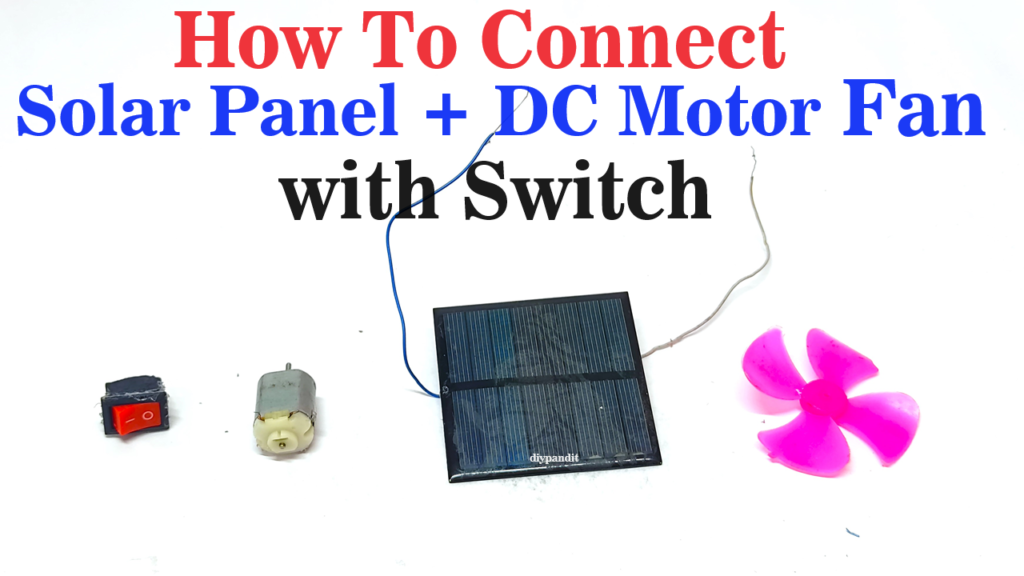
- Solar panel
- DC motor fan
- Switches (one for turning the fan on/off, and another for reversing the fan direction if needed)
- Diode (for preventing reverse current flow from the motor)
- Wires
- Battery (optional, for storing energy if you want the fan to operate when there’s no sunlight)
Here’s a step-by-step guide to connect them:
- Understand the Components:
- Solar Panel: Converts sunlight into electricity.
- DC Motor Fan: Runs on DC power.
- Switches: Control the flow of electricity.
- Connect the Solar Panel to the DC Motor:
- Connect the positive (+) terminal of the solar panel to the positive (+) terminal of the motor.
- Connect the negative (-) terminal of the solar panel to the negative (-) terminal of the motor.
- You can use wires or connectors to make these connections.
- Add a Switch for On/Off Control:
- Place a switch in series with one of the wires connecting the solar panel and the motor.
- When the switch is closed (turned on), electricity flows from the solar panel to the motor, activating the fan.
- When the switch is open (turned off), electricity flow is interrupted, and the fan stops.
- Test Your Setup:
- Before finalizing the connections, test the setup to ensure everything works as intended.
- Ensure the switches are properly functioning and that the fan operates in the desired way.