In this project post I will be demonstrating on how to make the projector working model for science physics project using convex lens at home easily for science exhibition – diy
#homemade #projector #workingmodel #scienceproject #scienceexhibition #howtofunda #diy #sciencefair

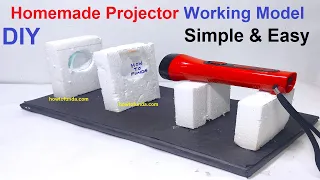
Creating a working model of a projector using a convex lens, a torch, and an image or text to display can be a fun and educational project.
Here’s how you can make this simple projector:
Materials Needed
- Convex lens (focal length between 5 to 10 cm)
- Torch (LED flashlight works best)
- Cardboard box (shoe box or similar)
- White paper or transparent sheet (for the image or text)
- Black construction paper or paint (optional, to darken the inside of the box)
- Scissors or craft knife
- Glue or tape
- Ruler
- Marker or pen
Tools Needed
- Craft knife (for cutting cardboard)
- Hot glue gun (for secure attachments)
Step By Step Guide on projector working model for science project
1. Prepare the Cardboard Box
- Select the Box:
- Choose a cardboard box that is large enough to hold the torch and allow some distance between the torch and the lens for focusing the image.
- Darken the Interior (Optional):
- To improve image quality, you can paint the inside of the box black or line it with black construction paper. This will reduce light reflections inside the box.
2. Create the Lens Holder
- Cut a Hole for the Lens:
- On one end of the box, cut a circular hole slightly smaller than the diameter of the convex lens. This hole will hold the lens in place.
- Secure the Lens:
- Insert the convex lens into the hole. Use glue or tape to secure the lens so it fits snugly and doesn’t move. Ensure the lens is centered and stable.
3. Prepare the Image or Text
- Create the Image or Text:
- Print or draw the image or text you want to project on white paper. The image should be small enough to fit inside the box but large enough to be seen clearly.
- Transparency Option:
- For better projection quality, print the image or text on a transparent sheet. This will allow more light to pass through and create a clearer projection.
4. Set Up the Torch and Image Holder
- Position the Torch:
- Place the torch inside the box, opposite the lens. The light should shine directly through the image and the lens.
- Create an Image Holder:
- Cut a rectangular hole on the side of the box to insert the image or text. Position this hole so the image or text will be directly in the path of the light from the torch.
- You can create a slot or a frame inside the box to hold the image or text in place. Ensure it is positioned between the torch and the lens.
5. Assemble the Projector
- Final Assembly:
- Insert the image or text into the holder. Turn on the torch and point it towards the lens through the image or text.
- Adjust Focus:
- Move the torch and the image holder back and forth inside the box to adjust the focus. The distance between the torch, image, and lens will determine the clarity and size of the projected image.
6. Testing and Adjustments
- Projection Surface:
- Point the lens towards a white wall or a white piece of paper to see the projected image. Ensure the room is dark for the best projection quality.
- Fine-Tuning:
- Adjust the distances and angles as necessary to achieve a clear and sharp projection. You might need to experiment with different positions of the torch and the image holder to get the best results.
By following these steps, you can create a functional and educational projector model using simple materials.