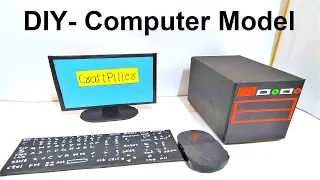
In this post we have written on how to make computer model with waste material | CPU | Keyboard | Mouse | Monitor

Creating a computer model using waste materials like cardboard and color paper is a fun and eco-friendly project. This model won’t be functional but will serve as a great educational and decorative item. Here’s a step-by-step guide to making a computer model:
Materials Needed:
- Cardboard: Recycled from old boxes.
- Color Paper: For decorating the model.
- Markers or Paint: For additional details.
- Glue: Hot glue or any strong adhesive.
- Scissors and Craft Knife: For cutting the cardboard and paper.
- Ruler: For measuring.
- Pencil: For marking.
Video steps on how to make computer model:
1. Create the Computer Monitor:
- Cut the Cardboard:
- Cut two rectangular pieces of cardboard for the front and back of the monitor. The size depends on your preference (e.g., 30 cm x 20 cm).
- Cut strips of cardboard (around 4-5 cm wide) for the sides of the monitor to give it depth.
- Assemble the Monitor:
- Glue the side strips between the front and back pieces to form a box shape.
- Cut a smaller rectangle from the center of the front piece to represent the screen.
- Decorate the Monitor:
- Cover the exterior of the monitor with color paper. Use black or dark gray for a realistic look.
- Add a piece of black or dark blue paper inside the screen cut-out to represent the screen.
- Use markers to draw buttons, logos, and other details on the monitor frame.
2. Create the Computer Base (CPU):
- Cut the Cardboard:
- Cut a rectangular piece for the front of the CPU (e.g., 20 cm x 15 cm).
- Cut additional pieces for the sides, top, bottom, and back to form a box.
- Assemble the CPU:
- Glue the pieces together to form a rectangular box.
- Ensure the front piece is attached last, so you can add details.
- Decorate the CPU:
- Cover the CPU box with color paper.
- Use markers to draw a power button, USB ports, ventilation grills, and other details.
3. Create the Keyboard:
- Cut the Cardboard:
- Cut a rectangular piece for the keyboard base (e.g., 25 cm x 10 cm).
- Cut small square pieces for the keys.
- Assemble the Keyboard:
- Glue the small squares onto the base, leaving small gaps between them to represent keys.
- Decorate the Keyboard:
- Cover the base and keys with color paper.
- Use markers to draw letters, numbers, and symbols on the keys.
4. Create the Mouse:
- Cut the Cardboard:
- Cut a small, rounded shape for the mouse base.
- Cut two small buttons from cardboard.
- Assemble the Mouse:
- Glue the buttons onto the mouse base.
- Decorate the Mouse:
- Cover the mouse with color paper.
- Use markers to add details like a scroll wheel and buttons.
5. Final Assembly:
- Arrange the Components:
- Place the monitor, CPU, keyboard, and mouse in a realistic setup.
- You can glue them onto a larger piece of cardboard to keep them together as a single model.
- Add Additional Details:
- Use extra color paper or markers to add cables connecting the monitor to the CPU, the keyboard, and the mouse.
- Draw or glue additional decorative elements like a mouse pad, desk items, or a background scene.
Conclusion:
This project is a great way to recycle materials and create a realistic-looking computer model. It’s perfect for school projects, educational displays, or just as a fun craft activity. Enjoy building your computer model!
#computermodel #bestoutofwaste #craftpiller #computer #scienceexhibition #scienceproject #sciencemodel