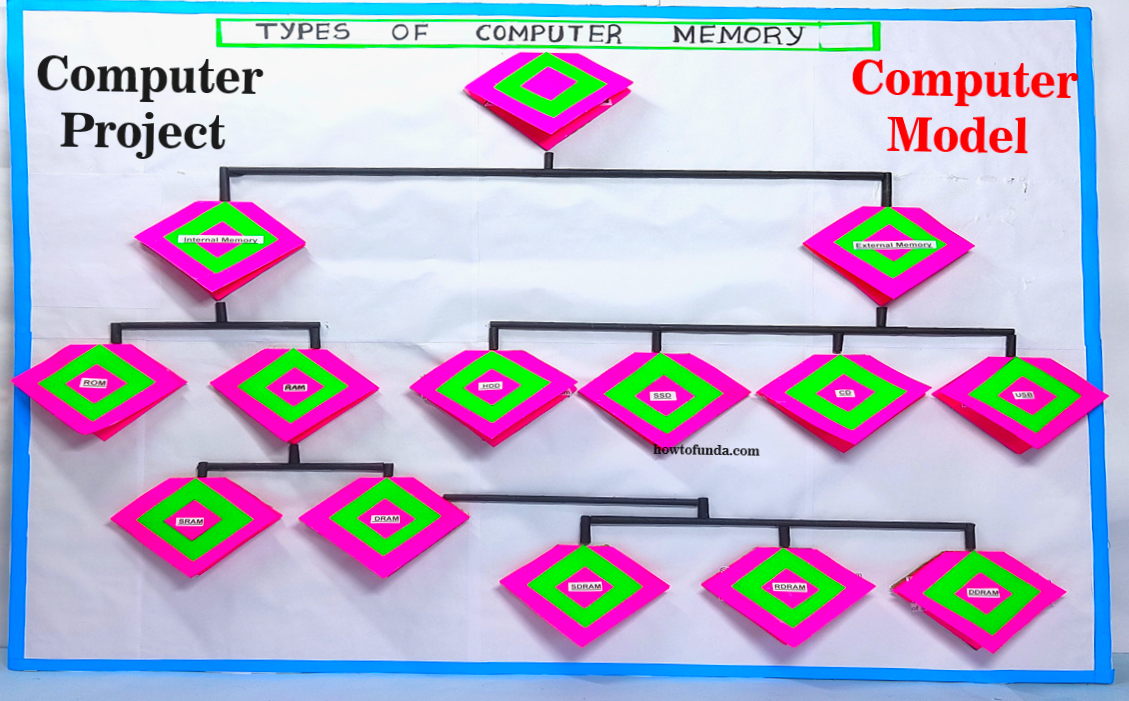
types of computer memory model making – computer project – computer model | howtofunda #types #computermemory #modelmaking #computerproject #howtofunda #memory
Creating a model of computer memory hierarchy using cardboard and color paper can be an effective way to understand the different types of memory and their hierarchy in a computer system.

Here’s a step-by-step guide to making one:
Materials Needed:
- Cardboard
- Color paper (various colors)
- Scissors
- Glue
- Markers
- Labels (optional)
Types of Memory to Represent:
- Cache Memory
- RAM (Random Access Memory)
- Virtual Memory
- Hard Disk Drive (HDD)
- Solid State Drive (SSD)
Step by Step Video Instructions
- Prepare the Base:
- Cut out a large rectangular piece of cardboard to serve as the base of your model.
- Cover the cardboard with blue color paper to represent the background.
- Create Cache Memory:
- Cut out a small square piece of cardboard to represent cache memory.
- Cover it with yellow color paper.
- Write “Cache Memory” on it using a marker.
- Glue this piece onto the top of the base, indicating that cache memory is the fastest and closest to the processor.
- Add RAM (Random Access Memory):
- Cut out a larger rectangle to represent RAM.
- Cover it with green color paper.
- Write “RAM” on it.
- Glue it below the cache memory, indicating that RAM is slower than cache but faster than other types of memory.
- Include Virtual Memory:
- Cut out another rectangle slightly larger than the RAM to represent virtual memory.
- Cover it with orange color paper.
- Write “Virtual Memory” on it.
- Glue it below the RAM, indicating that virtual memory serves as an extension of RAM and is used when RAM is full.
- Represent Secondary Storage (HDD and SSD):
- Cut out two larger rectangles to represent secondary storage devices: one for HDD and one for SSD.
- Cover them with gray color paper.
- Write “HDD” and “SSD” on them, respectively.
- Glue them below the virtual memory, indicating that they are the slowest types of memory in the hierarchy.
- Labeling (Optional):
- Optionally, you can add labels to each memory type to provide more information about their characteristics and usage.
- Assemble and Display:
- Arrange all the memory types in a hierarchical order on the base according to their speed and proximity to the processor.
- Glue them onto the base in the appropriate positions.
- Once completed, you can display your model in the classroom or on your desk for reference.
- This model visually represents the hierarchy of computer memory, helping to understand the speed and accessibility of different types of memory in a computer system.