
generation of computer project working model(1 – 5) – computer exhibition – diy | howtofunda #generation #computermodel #computerproject #workingmodel #workingproject #computer #diy #howtofunda
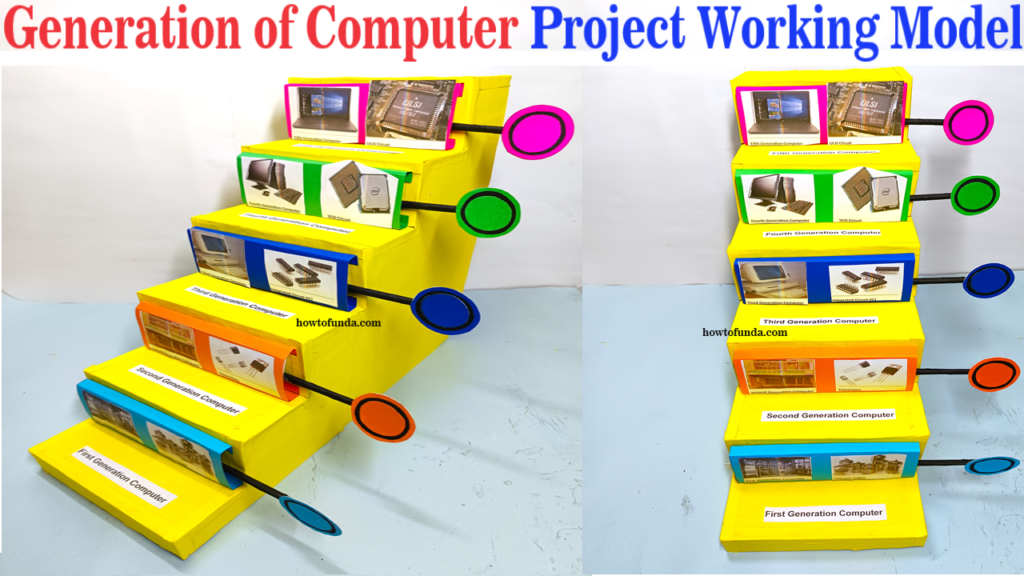
Creating a working model representing the five generations of computers using cardboard, color paper, and pictures can be an exciting project for a computer exhibition.
Here’s a step-by-step guide:
Materials Needed:
- Cardboard
- Color paper (various colors)
- Scissors
- Glue
- Markers
- Printed pictures or illustrations of computers from each generation
Video Steps by Steps :
- Prepare the Base:
- Cut out five large rectangular pieces of cardboard. Each piece will represent a generation of computers.
- Cover each cardboard piece with color paper of a different color to distinguish between generations.
- First Generation – Vacuum Tubes:
- Print or draw a picture of a computer using vacuum tubes.
- Cut out the picture and glue it onto the first cardboard piece.
- Write “First Generation” on the top of the cardboard using a marker.
- Add a brief description of first-generation computers below the picture.
- Second Generation – Transistors:
- Print or draw a picture of a computer using transistors.
- Cut out the picture and glue it onto the second cardboard piece.
- Write “Second Generation” on the top of the cardboard.
- Add a brief description of second-generation computers.
- Third Generation – Integrated Circuits:
- Print or draw a picture of a computer using integrated circuits (ICs).
- Cut out the picture and glue it onto the third cardboard piece.
- Write “Third Generation” on the top of the cardboard.
- Add a brief description of third-generation computers.
- Fourth Generation – Microprocessors:
- Print or draw a picture of a computer using microprocessors.
- Cut out the picture and glue it onto the fourth cardboard piece.
- Write “Fourth Generation” on the top of the cardboard.
- Add a brief description of fourth-generation computers.
- Fifth Generation – AI and Beyond:
- Print or draw a picture representing modern computers with AI capabilities.
- Cut out the picture and glue it onto the fifth cardboard piece.
- Write “Fifth Generation” on the top of the cardboard.
- Add a brief description of fifth-generation computers, highlighting AI and advancements.
- Decorate and Arrange:
- Use markers to add any additional details or decorations to the cardboard pieces.
- Arrange the five generations of computers in sequential order on a table or display board.
- Make sure each piece is clearly labeled with the generation number and a brief description.
This project not only demonstrates the evolution of computers but also offers an engaging and informative exhibit for viewers to explore.