
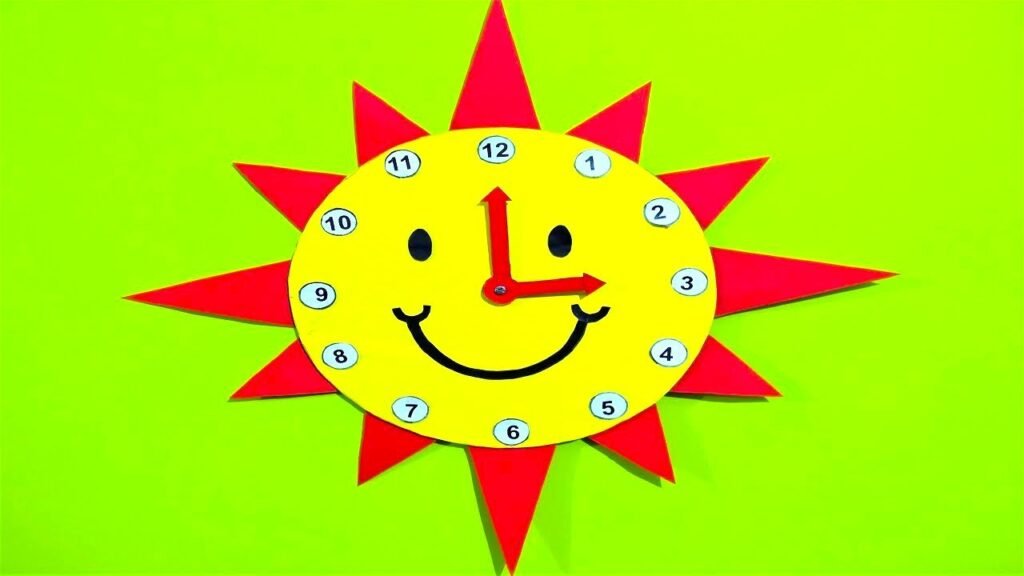
Creating a sun-resembling wall clock craft model using cardboard and colored paper can be a fun and creative project.
Here’s a step-by-step guide to help you make it:
Materials Needed:
- Cardboard sheets
- Colored paper (yellow, orange, and red)
- Craft knife or scissors
- Ruler and pencil
- Clock mechanism kit (including clock hands)
- Glue or a hot glue gun and glue sticks
- Brad fasteners or paper fasteners
- Acrylic paints (optional, for additional details)
- Paintbrushes (optional)
Video Steps by Steps on Making of Clock Craft Model:
- Design Your Clock:
- Draw a circular shape on a piece of cardboard to serve as the base for your clock. This will be the “sun” shape.
- Cut Out the Sun Shape:
- Use a craft knife or scissors to carefully cut along the outline of the sun shape.
- Create the Rays:
- Cut out long, narrow strips of yellow and orange colored paper to represent the rays of the sun. You can make them in various lengths for a dynamic effect.
- Attach the Rays:
- Glue the strips around the edge of the sun shape, evenly spacing them out. Ensure they are securely attached.
- Add Texture (Optional):
- For added texture and depth, you can crinkle the ends of the rays slightly before attaching them.
- Create the Clock Face:
- Cut a smaller circle from red colored paper to serve as the clock face. Ensure it fits within the center of the sun shape.
- Attach the Clock Face:
- Glue the red circle onto the center of the sun shape. Make sure it is centered and secure.
- Mark the Hours:
- Using a pencil or paint, mark the hours around the clock face. You can use traditional numbers or Roman numerals.
- Add Clock Hands:
- Attach the clock hands according to the instructions provided with the clock mechanism. Ensure they move freely.
- Attach Hanging Mechanism:
- Attach a piece of string, wire, or a hook to the back of the clock for hanging.