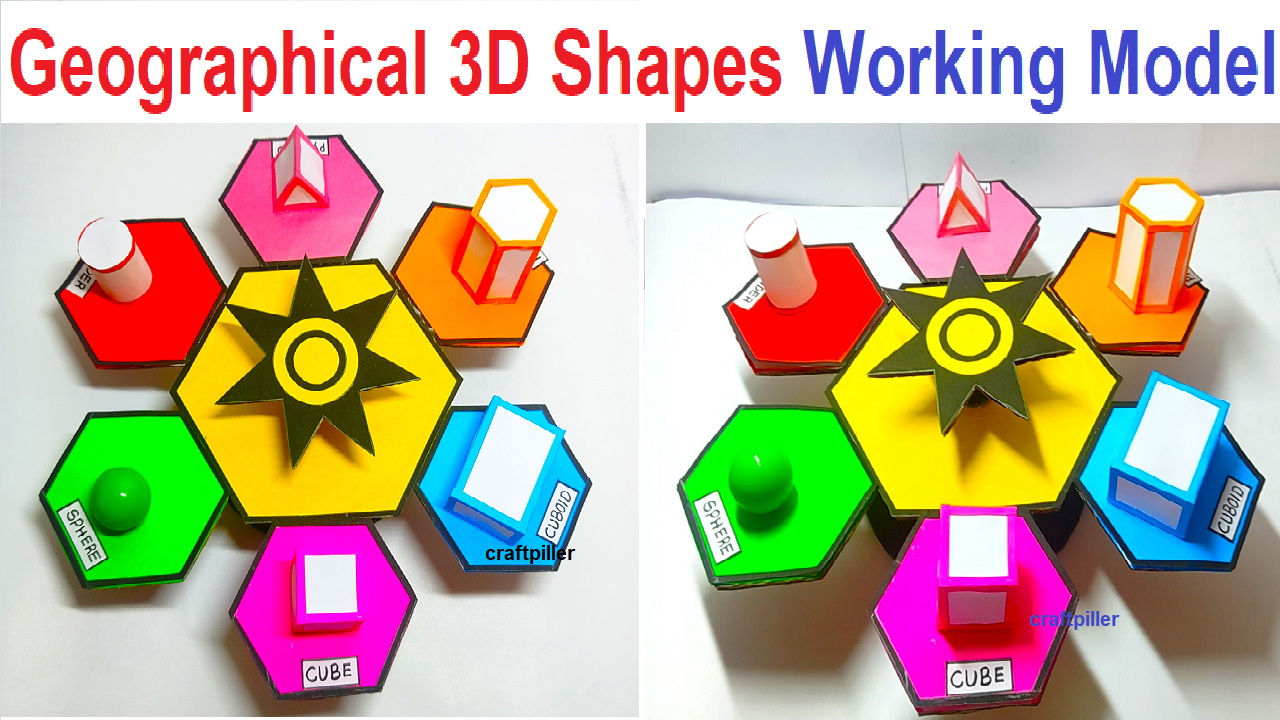
Creating a geometrical 3D shapes working model for a math project using cardboard and colored paper can be both educational and visually appealing.
Here’s a simple guide for making a 3D shapes :

Materials Needed:
- Cardboard
- Colored paper
- Ruler
- Pencil
- Craft knife or scissors
- Glue or tape
Instructions:
1. Prepare the Base:
a. Cut a square piece of cardboard. The size depends on how large you want your 3D cube to be. b. This square will be the base for your cube.
2. Create the 3d Geometric Shapes:
a. Cut six squares from colored paper. The size of each square should be the same. b. Choose different colors for each square to make your cube visually appealing.
3. Fold the Squares:
a. Fold each square in half diagonally, forming a triangle. b. Unfold the squares, and you will see a diagonal crease.
4. Create the 3D Effect:
a. Apply glue or tape along one half of the diagonal crease on each square. b. Attach the squares to the edges of the cardboard base, forming an open box shape. c. Make sure the squares are attached along the edges, creating a 3D effect.
5. Close the Cube:
a. Connect the loose edges of the squares to close the box. b. Apply glue or tape to secure the edges and complete the cube.
6. Reinforce and Decorate:
a. Check the seams to ensure they are secure. Add additional glue if needed. b. Decorate the cube by adding patterns or designs using colored paper.
7. Optional: Display Stand
a. Create a simple cardboard stand to display your 3D cube. This could be a small rectangular piece of cardboard attached to the bottom of the cube.
8. Additional Shapes (Optional):
a. To make the project more advanced, create additional 3D shapes like cylinders, cones, or pyramids using similar techniques.
9. Labeling (Optional):
a. Add labels to each face of the cube with the dimensions or other relevant information.