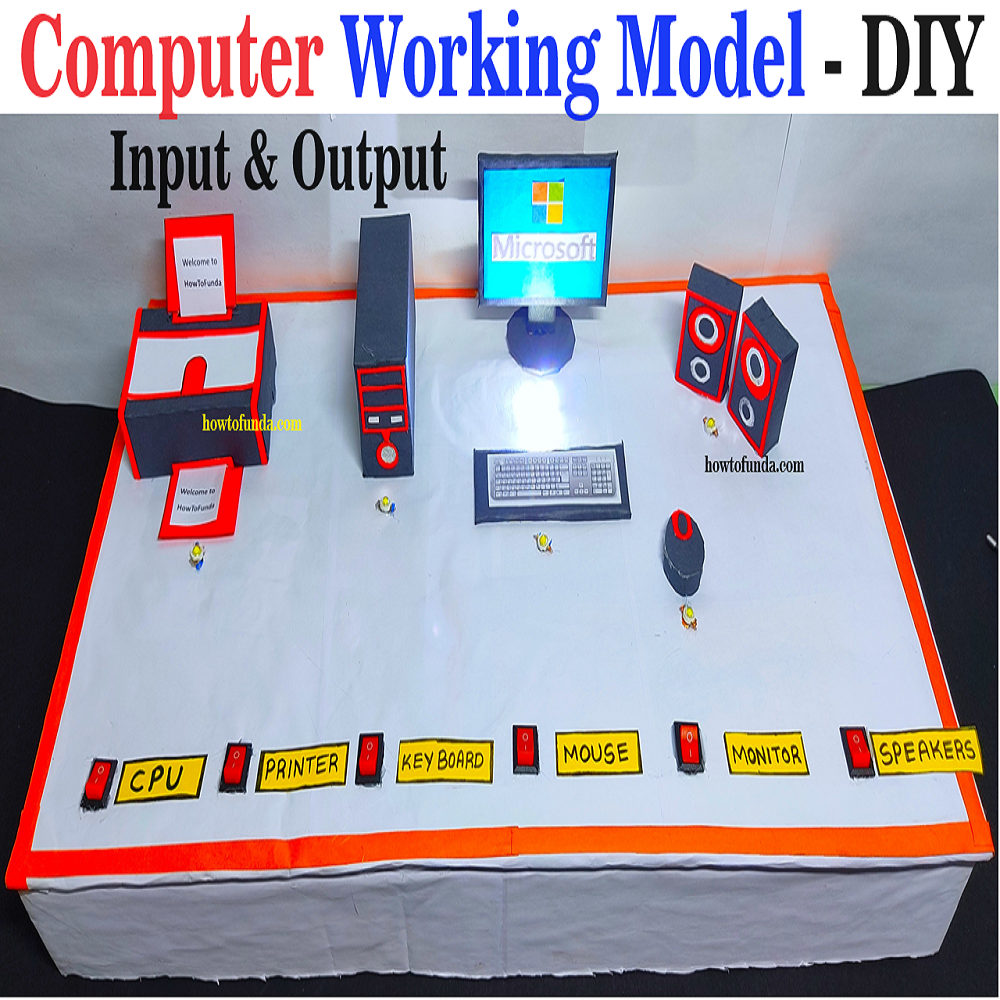
Creating a computer working model for an exhibition focusing on input and output devices using LED lights, cardboard, and color paper can be both educational and fun.
Here’s how you can do it:
Materials Needed:
- Cardboard
- Color paper (various colors)
- LED lights (different colors)
- Resistors (to limit LED current, if needed)
- Wires
- Batteries or a power source
- Switches (optional, for interactive elements)
- Glue
- Scissors
- Markers
Step by Step Video Instructions on computer working model:
- Prepare the Base:
- Cut out a large piece of cardboard to serve as the base for your model.
- Cover the cardboard with color paper to create a visually appealing background.
- Create Input Devices:
- Keyboard:
- Cut out a rectangular shape from cardboard to represent the keyboard.
- Use black color paper to cover the cardboard.
- Cut out small squares or rectangles from color paper to represent keys. You can use different colors for different key groups (letters, numbers, function keys, etc.).
- Write letters or symbols on each key using a marker.
- Mouse:
- Cut out a circular or oval shape from cardboard to represent the mouse.
- Cover it with gray color paper.
- Cut out two smaller circles from black paper for the mouse buttons.
- Attach these circles to the mouse.
- Other Input Devices (Optional):
- You can create additional input devices like a joystick, touchpad, or microphone using similar techniques.
- Keyboard:
- Add LED Lights for Output:
- Monitor/Display:
- Cut out a rectangular shape from cardboard to represent the monitor or display screen.
- Cover it with white color paper.
- Use markers to draw a screen frame and other details.
- Attach LED lights behind the screen to simulate pixels. You can use different colored LEDs to represent pixels (red, green, blue).
- Printer:
- Cut out a box-like shape from cardboard to represent the printer.
- Cover it with gray color paper.
- Draw details like paper trays and buttons using markers.
- Attach LED lights to simulate the printing process. For example, use yellow LEDs to represent paper feed and green LEDs to represent printing.
- Other Output Devices (Optional):
- You can create additional output devices like speakers, headphones, or projectors using LEDs and cardboard.
- Monitor/Display:
- Connect LEDs and Power Source:
- Connect the LEDs to the power source (batteries or power adapter) using wires.
- Use resistors to limit the current to the LEDs if necessary.
- Arrange the LEDs behind the input and output devices to create the desired lighting effects.
- You can use switches to control the LEDs, making some parts of the model interactive.
- Display Your Model:
- Once everything is assembled and connected, display your computer working model at the exhibition.
- Consider adding labels or signs to explain each device and its function.
- Encourage visitors to interact with the model and learn about input and output devices.
This DIY computer working model effectively demonstrates the functions of input and output devices in a fun and interactive way. It’s a great educational tool for exhibitions or classroom demonstrations!