
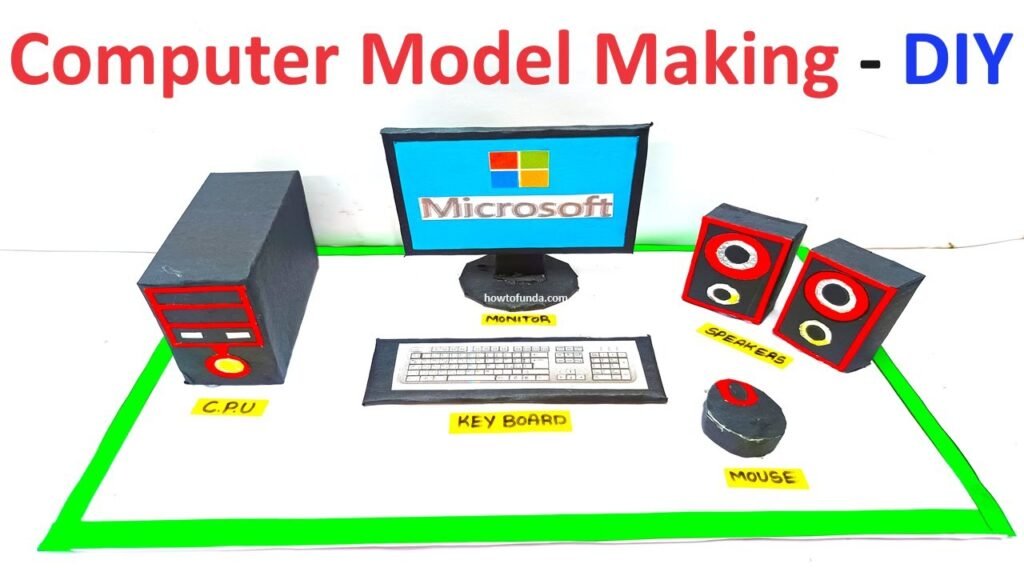
Creating a computer model using cardboard, a CPU box, speaker boxes, a mouse, and a keyboard is a fantastic project.
Here’s a step-by-step guide to making it:
Materials Needed:
- Cardboard
- CPU box (can be an empty one)
- Speaker boxes (or any small boxes)
- Mouse
- Keyboard
- Glue
- Scissors
- Markers
- Color paper (optional)
Step by Step Video Instructions:
- Prepare the Base:
- Use a large piece of cardboard as the base for your computer model.
- You can cut the cardboard into a rectangular shape to fit the components.
- CPU Box:
- Use the CPU box as the central component of your computer model.
- If the CPU box is empty, you can use it as is. If not, cover it with color paper to give it a new look.
- Place the CPU box in the center of the cardboard base.
- Monitor (Optional):
- If you want to include a monitor, draw a rectangle on the cardboard to represent the screen.
- You can use color paper to cover the rectangle and make it look like a screen.
- Place the “monitor” above the CPU box.
- Keyboard and Mouse:
- Place the keyboard and mouse in front of the CPU box.
- You can use real keyboard and mouse or make them from cardboard.
- To make a cardboard keyboard, draw a rectangle for the base and smaller rectangles for the keys. Write letters and symbols on the keys.
- For the mouse, draw an oval shape and add buttons.
- Speaker Boxes:
- Place the speaker boxes on either side of the CPU box.
- If you don’t have speaker boxes, you can make them from small cardboard boxes.
- Draw speaker grills on the front of the boxes and decorate them.
- Connect Components:
- Use small pieces of cardboard to create connections between components.
- For example, draw and cut out small rectangles to represent wires connecting the CPU to the keyboard and mouse.
- Add Details:
- Use markers to add details to your computer model.
- Draw ports, buttons, and other features on the CPU box, keyboard, and mouse.
- You can also add labels to identify different parts of the computer.
- Decorate:
- Use color paper, markers, or stickers to decorate your computer model.
- Add details like logos or designs to make it more realistic and visually appealing.
- Display:
- Once your computer model is complete, display it in the exhibition or classroom.
- You can also add information cards or posters explaining the different parts of the computer and how they work.
This DIY computer model is a great way to learn about the components of a computer and how they are connected. It’s a fun and educational project for any science exhibition or classroom activity!