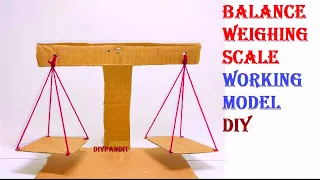
In this post we write about making the weighing balance working mode for science project | DIY using cardboard | DIY pandit
Creating a weighing balance working model using cardboard, woolen thread, and a nut and bolt can be a great hands-on project to understand the principles of balance and weight measurement.

Let’s build a simple model that demonstrates how a weighing balance works.
Materials needed:
- Cardboard (for the base and structures)
- Woolen thread or string (for suspending objects)
- Nut and bolt (as the fulcrum)
- Small objects with known weights (e.g., small bags of sand, coins, etc.)
- Scissors
- Glue or double-sided tape
- Ruler or protractor (for measurements)
- Marker pens or sketch pens
Step-by-step instructions:
- Base:
- Cut a large rectangular piece of cardboard to serve as the base of the weighing balance.
- Fulcrum:
- Take a nut and bolt and insert the bolt through the cardboard base to create the fulcrum or pivot point.
- Support Stand:
- Cut two smaller rectangles of cardboard to serve as the support stands for the weighing pans.
- Attach the support stands vertically to the base, on either side of the fulcrum, leaving space in between to hang the weighing pans.
- Weighing Pans:
- Cut two small squares or circles of cardboard to create the weighing pans.
- Attach one end of a woolen thread to the center of each weighing pan.
- Pass the other end of each woolen thread through the nut on the bolt (fulcrum) so that the weighing pans can hang freely on either side of the fulcrum.
- Balance Indicator:
- Cut a small rectangular piece of cardboard to create the balance indicator.
- Attach the balance indicator to the top of the bolt at the center, above the hanging weighing pans.
- Markings and Measurements:
- Use a ruler or protractor to create markings on the base and the support stands, indicating measurement units (e.g., grams, ounces).
- Add numbers or labels to the markings to represent different weight measurements.
- Testing with Objects:
- Now that your weighing balance is assembled, you can test it using small objects with known weights.
- Place one object in one weighing pan and adjust the position of the other weighing pan until the balance is level. This indicates that the two objects have the same weight.
- Labeling and Details:
- Use marker pens or sketch pens to label the weighing pans and the balance indicator, indicating which side represents which weight.
- Decorating the Model:
- Use markers or color paper to decorate the model and add more details to make it visually appealing.
Now, you have a simple weighing balance working model using cardboard, woolen thread, and a nut and bolt. This model demonstrates the principles of balance and weight measurement by suspending objects on the weighing pans and adjusting them until they are in equilibrium.
#weighingbalance #workingmodel #diypandit #scienceproject #scienceexhibition #sciencefair #modelmaking #diy