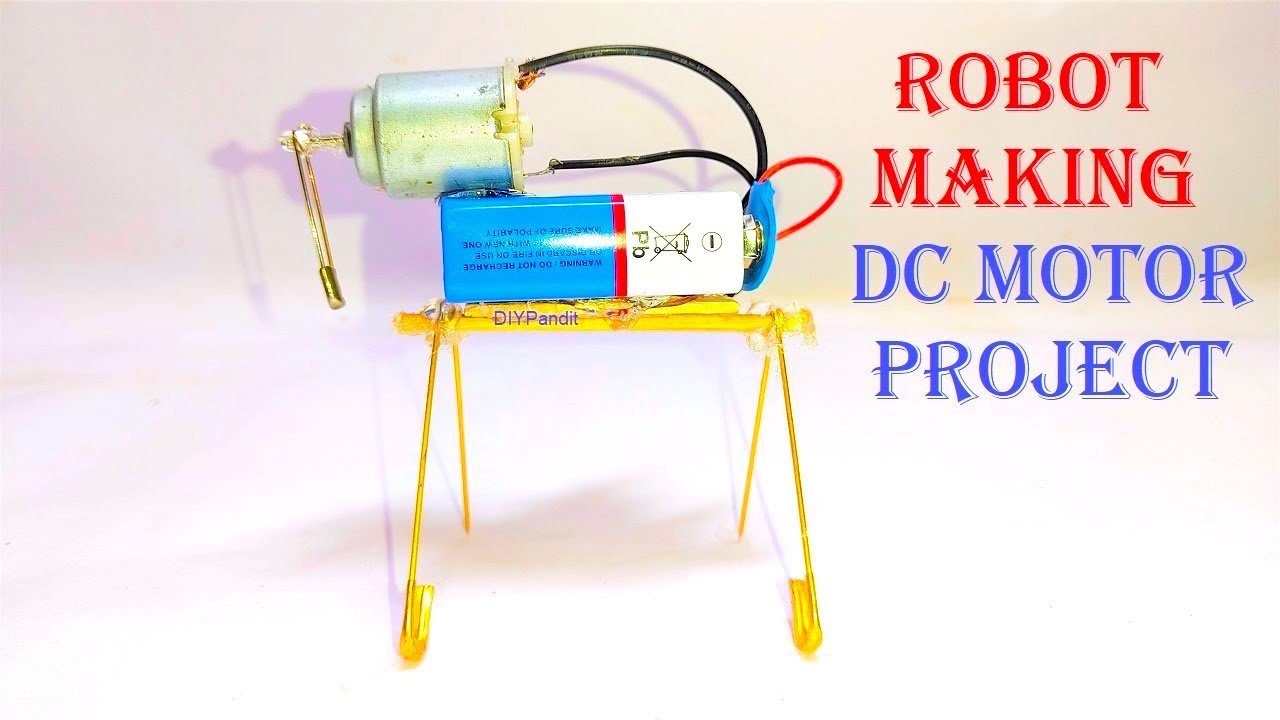
Making a simple robot using safety pins, ice cream sticks, a 9V battery, and a switch is an interesting project.
This project illustrates basic principles of electricity and mechanics, showing how simple materials can be used to create a functional robot.

Here’s how you can build a basic robot with rotating legs using these materials:
Materials Needed:
- Safety pins (large size)
- Ice cream sticks (popsicle sticks)
- 9V battery
- Battery clip (to connect the battery)
- Small DC motor (compatible with 9V battery)
- Switch (single-pole single-throw)
- Wires
- Hot glue gun and glue sticks
- Small plastic gears (optional, for improved motion)
- Rubber bands (for traction on legs)
- Small plastic or metal piece for motor shaft (if gears are not available)
- Scissors or wire cutters
Step by Step Video Instructions:
1. Build the Robot’s Body:
- Take two ice cream sticks and glue them parallel to each other, leaving space in the middle to place the battery and motor.
- Attach another ice cream stick perpendicular to these two at one end to form a base. This will be the top part of the robot’s body.
2. Create the Legs:
- Take two large safety pins and slightly bend them to form legs.
3. Attach the Motor:
- Attach the small DC motor to the center of the ice cream stick body using hot glue. Position it so that the motor shaft is accessible.
- If you don’t have gears, attach a small plastic or metal piece to the motor shaft to serve as an eccentric cam that will move the safety pin legs.
4. Connect the Legs to the Motor:
- Glue or attach the open end of each safety pin to the eccentric cam or gears on the motor shaft. Make sure they are securely attached.
- Ensure that the safety pins can rotate around the motor shaft, creating a walking motion when the motor turns.
5. Connect the Battery and Switch:
- Connect the battery clip to the 9V battery.
- Attach one wire from the motor to one terminal of the switch.
- Connect the other terminal of the switch to one wire from the battery clip.
- Connect the remaining wire from the battery clip to the other wire of the motor, completing the circuit.
6. Final Assembly and Testing:
- Secure all wires and components with hot glue to ensure they don’t move around.
- Turn on the switch to test the walking motion. Adjust the position of the legs and motor if necessary to achieve a smooth walking motion.
Simple Robot Science Project Explanation:
This robot shows how basic mechanical and electrical principles can be used to create motion.
Here’s how it works:
- Body: The robot’s body is made from ice cream sticks, providing a sturdy frame to hold the motor and battery.
- Legs: The legs are made from safety pins, which are attached to the motor shaft. When the motor rotates, the safety pins move in a circular motion, mimicking a walking motion.
- Motor: The small DC motor, powered by a 9V battery, drives the movement. The motor shaft is connected to the safety pins, which act as legs.
- Switch: The switch controls the flow of electricity from the battery to the motor. When the switch is turned on, the circuit is complete, and the motor runs, making the robot walk.
By following these steps, you can create a simple and educational walking robot using safety pins, ice cream sticks, a 9V battery, and a switch. This project demonstrates the basic concepts of robotics and mechanics, providing a hands-on learning experience.

