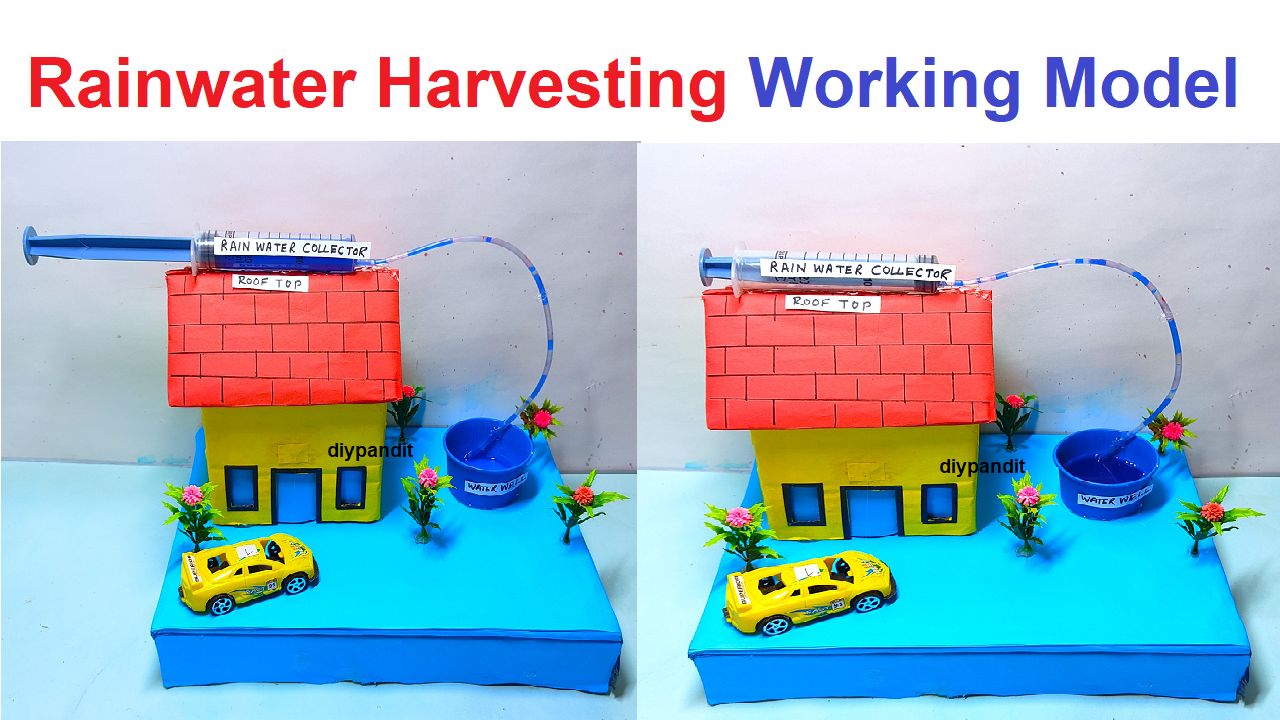
Creating a rainwater harvesting working model using a cardboard house, syringes as roof-top water storage, a sump tank on the ground floor, a water filter, and pipes is a fantastic way to understand the principles of rainwater collection and conservation.

Here’s a step-by-step guide on how to build this model:
Materials You’ll Need:
- Cardboard sheets (for the house, sump tank, and base)
- Syringes (without needles) or plastic containers (for water storage)
- Plastic tubing or straws (for pipes)
- Small plastic container (for the sump tank)
- Small piece of cloth (for the water filter)
- Craft knife or scissors
- Hot glue gun and glue sticks
- Water-based paint (for decoration)
- Craft supplies for decoration (markers, stickers, etc.)
Step by Step Building Rainwater harvesting working model
- Prepare the Base:
- Cut a piece of cardboard to serve as the base for your model.
- You can paint or cover the base to represent the ground.
- Build the House:
- Cut and assemble cardboard pieces to create a simple house structure.
- Decorate the house with paint or colored paper to make it visually appealing.
- Create the Roof:
- Cut and attach a piece of cardboard to the top of the house to represent the roof.
- Ensure that the roof is slanted to facilitate water flow.
- Roof Water Collection:
- Attach syringes (or plastic containers) to the roof to simulate rainwater collection points.
- Use hot glue to secure the syringes in place.
- Sump Tank:
- Attach a small plastic container to the base of the house to represent the sump tank.
- Connect the sump tank to the roof syringes using plastic tubing.
- Water Filter:
- Attach a small piece of cloth to the opening of the sump tank to represent a simple water filter.
- This cloth will filter debris from the collected rainwater.
- Pipes:
- Use plastic tubing or straws to simulate pipes that connect the roof collection points to the sump tank.
- Attach one end of the tubing to the roof syringes and the other end to the sump tank.
- Water Flow Demonstration:
- Pour water onto the roof to simulate rainfall.
- Observe how the water flows through the pipes and collects in the sump tank.
- Final Touches:
- Decorate the model with additional details like doors, windows, and garden elements using craft supplies.
This model will help you understand the concept of rainwater harvesting, water collection, and its storage for future use. It’s an informative and creative way to learn about sustainable practices and apply them to a miniature scenario.