This model demonstrates the principles of light reflection and how periscopes are used to see over or around obstacles. Enjoy your hands-on science project!

Creating a working model of a periscope using cardboard and mirrors is a fun and educational project. Here’s a step-by-step guide:
Materials Needed:
- Cardboard (sturdy enough to hold its shape)
- Two small mirrors (about 2″ x 2″)
- Craft knife or scissors
- Ruler
- Pencil
- Hot glue gun or strong adhesive
- Tape
Step by Step Video Instructions:
- Prepare the Cardboard:
- Cut the cardboard into four rectangles. The size will depend on how large you want your periscope to be, but a good starting size for each piece is 12″ x 4″.
- These rectangles will form the sides of the periscope.
- Mark the Mirror Positions:
- On two of the cardboard rectangles, draw a diagonal line from one corner to the opposite corner. This line will be used to position the mirrors.
- On the first rectangle, mark a spot along the diagonal line about 1 inch from the top. This is where the first mirror will be placed.
- On the second rectangle, mark a spot along the diagonal line about 1 inch from the bottom. This is where the second mirror will be placed.
- Cut the Mirror Slots:
- Using the craft knife, carefully cut slits along the marked spots on the diagonal lines. These slits should be just wide enough to fit the edge of the mirrors snugly.
- Insert the Mirrors:
- Insert the mirrors into the slits at a 45-degree angle. The reflective side of each mirror should be facing inward, so they reflect light down the length of the periscope.
- Secure the mirrors in place using hot glue or strong adhesive. Ensure they are stable and at the correct angle.
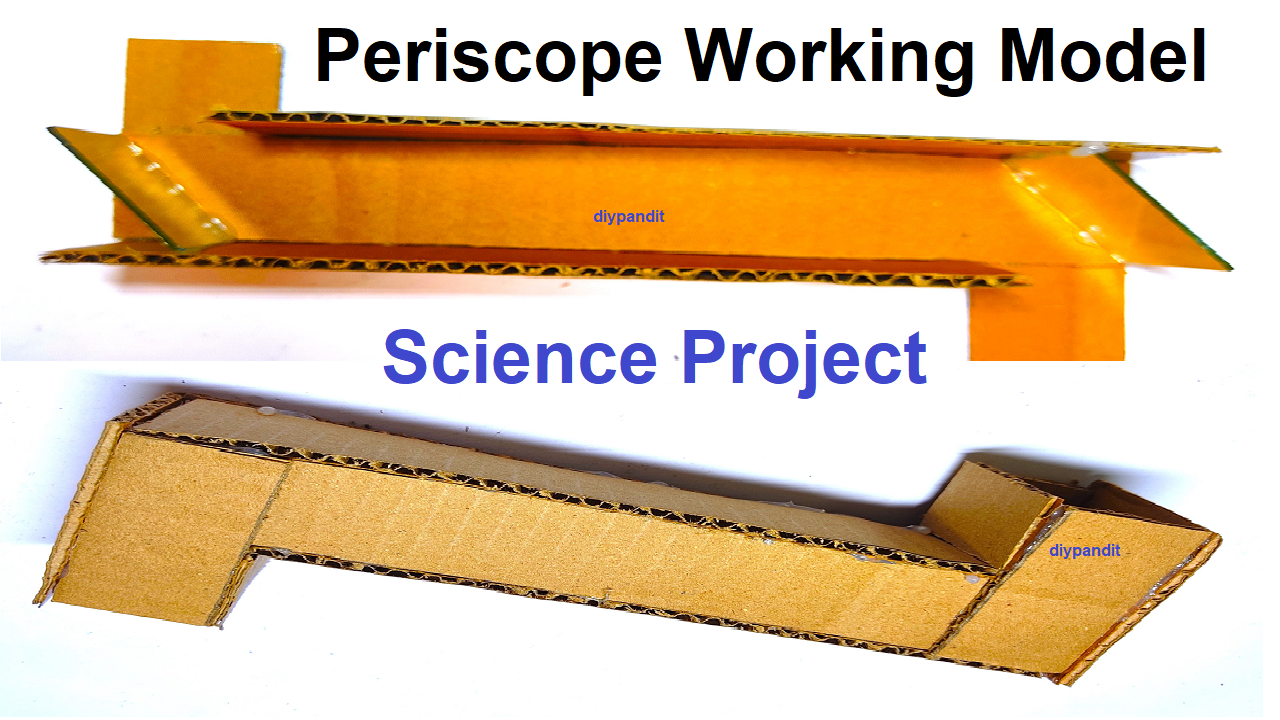
- Assemble the Periscope Body:
- Arrange the four cardboard rectangles into a rectangular tube shape, with the mirrors positioned at opposite ends, facing each other.
- Use hot glue or strong adhesive to attach the edges of the cardboard together. You can also reinforce the edges with tape for extra stability.
- Ensure the mirrors are aligned so that light entering one end of the periscope will be reflected from one mirror to the other, and then out the other end.
- Test the Periscope:
- Look through one end of the periscope. You should be able to see out the other end, with the mirrors reflecting the view.
- Adjust the mirrors if necessary to ensure the view is clear and properly aligned.