
This parallel circuit model provides a hands-on and visual representation of how parallel circuits work, making it an engaging and educational exhibit for a science project exhibition.
Creating a parallel circuit working model using cardboard, LED lights, a 9V battery, wires, and a switch is an excellent science project for an exhibition. Here’s a step-by-step guide to help you build your parallel circuit model:
Materials needed:
- Cardboard
- LED lights (2 or more)
- 9V battery
- Wires
- Switch
- Resistor (optional, depending on LED specifications)
- Small strips of aluminum foil
- Glue
- Scissors
- Marker or pen
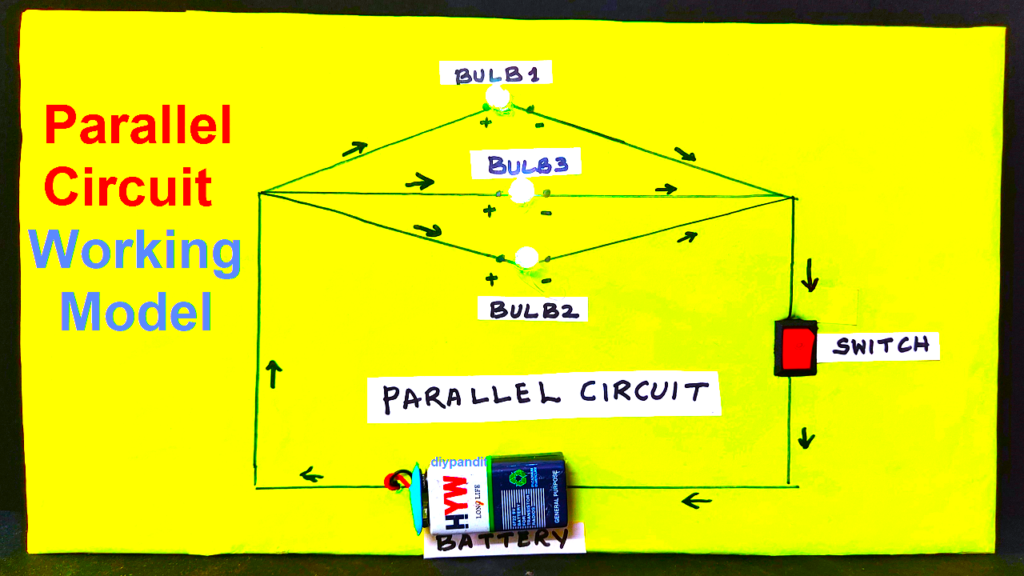
Working Model Making Steps:
- Prepare the Base:
- Cut a piece of cardboard to serve as the base for your model. This will be the foundation on which you’ll build your parallel circuit.
- Attach LED Lights:
- Place the LED lights on the cardboard base in the desired arrangement. Make sure the longer leg (anode) of each LED is positioned to one side and the shorter leg (cathode) is on the other side.
- Connect LEDs in Parallel:
- Use wires to connect the anodes of all the LEDs together. Similarly, connect the cathodes of all the LEDs together. This forms the parallel arrangement. You can use small strips of aluminum foil to help secure the connections.
- Add Resistor (if needed):
- If the LEDs require a resistor, connect it in series with the positive side (anode) of one LED. Check the specifications of your LEDs to determine if a resistor is necessary.
- Connect Wires to Battery:
- Connect one wire from the anode side and one from the cathode side to the positive and negative terminals of the 9V battery, respectively.
- Attach Switch:
- Connect a wire from one side of the switch to the positive terminal of the battery. Connect another wire from the other side of the switch to the junction where the anodes of the LEDs are connected.
- Secure Components:
- Use glue to secure the LEDs, wires, battery, and switch in place on the cardboard base.
- Test the Circuit:
- Turn on the switch, and your LEDs should light up. Since it’s a parallel circuit, each LED should light independently of the others.
- Create Labels:
- Label the components on the cardboard to explain the different parts of the parallel circuit and how it works.
- Present and Explain:
- During the exhibition, demonstrate how the parallel circuit functions. Explain the concept of parallel circuits and how each LED can operate independently.