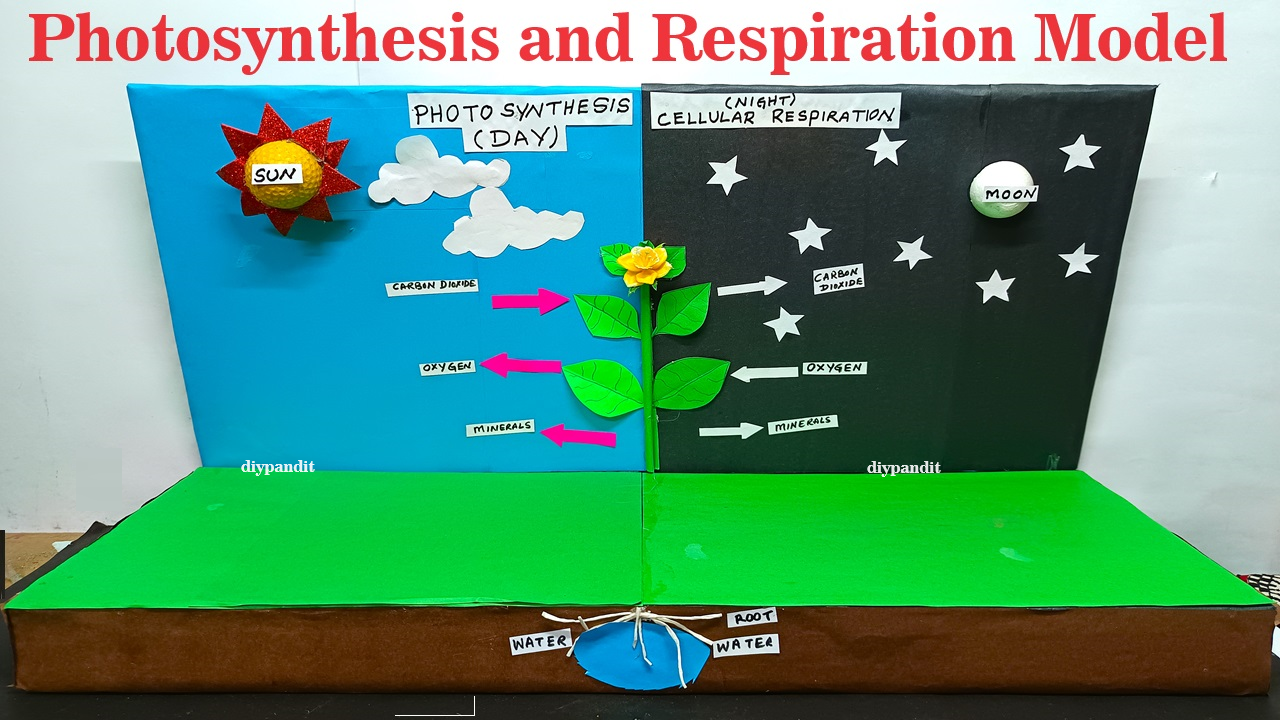
Photosynthesis and cellular respiration are two fundamental biological processes that are interconnected and essential for life on Earth.
Photosynthesis is the process by which green plants, algae, and some bacteria convert light energy into chemical energy, producing glucose and oxygen from carbon dioxide and water.
On the other hand, cellular respiration is the process by which cells break down glucose and other organic molecules to release energy, carbon dioxide, and water, which are used for various cellular functions.
These processes play critical roles in energy conversion, nutrient cycling, and the balance of atmospheric gases, shaping the biosphere and sustaining life as we know it.
Creating a model of photosynthesis and cellular respiration for a science exhibition using cardboard and colored paper is a great idea to demonstrate these biological processes.
Here’s how you can make it:

Materials Needed:
- Cardboard
- Colored paper (green, blue, yellow, etc.)
- Scissors
- Glue or tape
- Markers
- Ping pong ball (for the sun)
- Plastic ball or foam ball (for the moon)
- String or fishing line
- Transparent plastic sheet or cellophane (for atmosphere effect, optional)
Steps by step video instructions on photosynthesis and respiration model:
1. Prepare the Base:
- Cut out a large piece of cardboard to serve as the base of your model.
- This will be the background on which you’ll create your scene.
2. Create the Sun and Moon:
- Use a ping pong ball to represent the sun. You can paint it yellow or orange.
- Use a plastic or foam ball to represent the moon. Paint it white or gray.
- Attach a string or fishing line to each ball to hang them from above the scene.
3. Design the Earth:
- Cut out a large circle from cardboard to represent the Earth.
- Cover the circle with blue colored paper to represent the oceans.
- Cut out pieces of green colored paper to represent the continents. Glue them onto the blue circle.
4. Represent Photosynthesis:
- Cut out shapes of leaves from green colored paper.
- Glue the leaves onto the surface of the Earth to represent plants.
- Use markers to draw details on the leaves, such as veins.
5. Show the Process:
- Draw arrows or labels to indicate the flow of sunlight from the sun to the Earth.
- Show how plants absorb sunlight and carbon dioxide (CO2) and release oxygen (O2) and glucose (C6H12O6) during photosynthesis.
- You can create small arrows or labels using colored paper and glue them onto the scene.
6. Depict Cellular Respiration:
- Use colored paper to represent animal cells or human cells.
- Show how cells take in oxygen (O2) and glucose (C6H12O6) and release carbon dioxide (CO2) and energy (ATP) during cellular respiration.
- Draw or glue labels to indicate the process.
7. Add Details:
- Use markers to add details to the sun and moon, such as craters or sunspots.
- Draw stars in the background to create a space effect.
- Optionally, cover the background with a transparent plastic sheet or cellophane to represent the atmosphere.
8. Assemble the Model:
- Hang the sun and moon from the top of the scene using the strings or fishing line.
- Arrange the Earth, plants, and cells on the base of the scene.
- Glue or tape all components securely in place.
Explanation:
- The model illustrates how sunlight is used by plants during photosynthesis to produce oxygen and glucose.
- It also shows how cells in animals and humans use oxygen and glucose during cellular respiration to produce energy and carbon dioxide.
This model effectively demonstrates the interconnected processes of photosynthesis and cellular respiration. It’s both educational and visually appealing for a science exhibition

