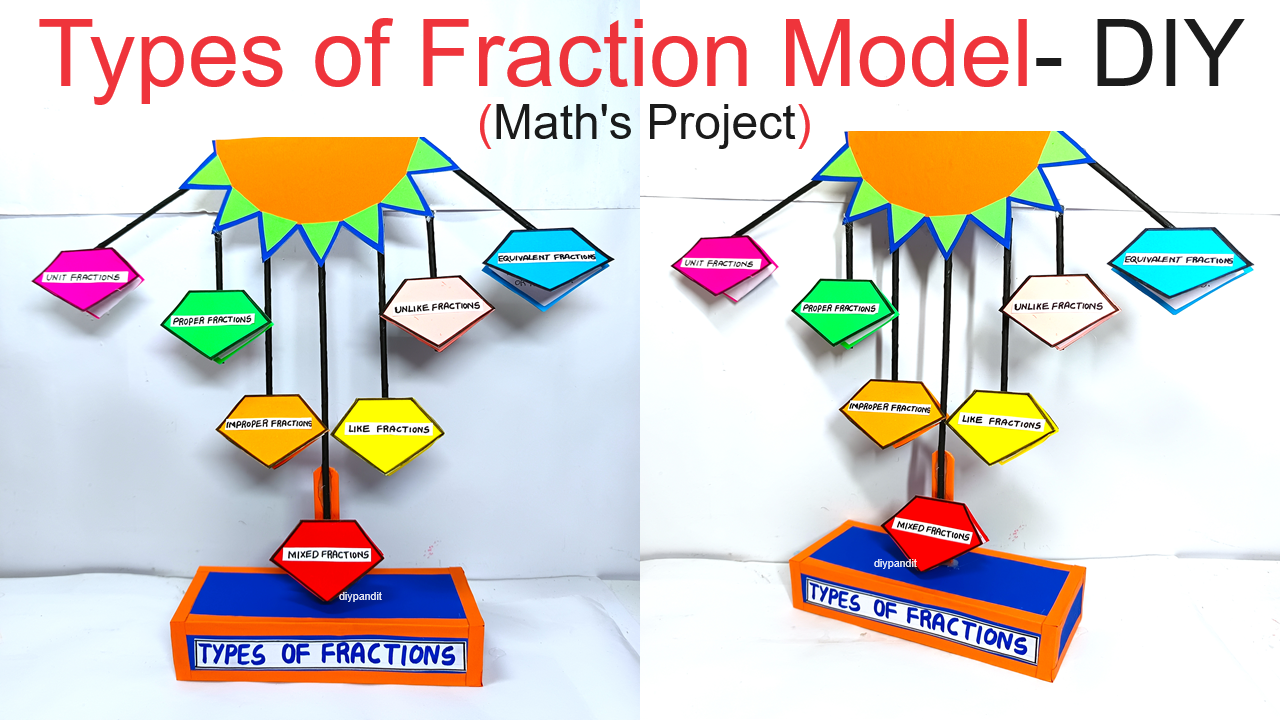
Types of Fractions Working Model in Reverse Tree Structure
Creating a working model to illustrate the different types of fractions using a reverse tree structure is a creative way to understand and visualize how fractions are categorized.

This model will be made using cardboard and color paper, and it will clearly show the relationship between different types of fractions. Here’s how to make it:
Materials Needed:
- Cardboard (for the base and tree structure)
- Color Paper (for the fraction types and decorations)
- Markers, Pens, or Colored Pencils (for writing and labeling)
- Glue or Tape (for assembly)
- Scissors or Cutter (for cutting the cardboard and color paper)
- Ruler (for precise measurements)
Step-by-Step Video Instructions:
1. Create the Base:
- Cut a large, sturdy piece of cardboard to serve as the base of the model. This will support the reverse tree structure.
- Optionally, cover the base with color paper for a more polished look.
2. Construct the Reverse Tree Structure:
- Cut several strips of cardboard to form the branches of the reverse tree. The reverse tree will start with the broad category of “Fractions” at the top and branch out into more specific types as it moves downward.
- The main branches will split into smaller branches, each representing different types of fractions.
3. Design the Top Section:
- At the top of the tree, create a large label that says “Fractions.” This is the starting point of the tree.
- Cut out a rectangle or a shape from color paper, write “Fractions” on it, and glue it to the top center of the tree.
4. Create the Branches for Types of Fractions:
- From the main “Fractions” label, create two or three large branches that lead to the first major categories, such as “Proper Fractions,” “Improper Fractions,” and “Mixed Numbers.”
- Cut out shapes (rectangles, circles, etc.) from color paper, write the names of these categories, and glue them onto the branches.
5. Add Sub-Categories:
- From each of these branches, create smaller branches that lead to more specific types of fractions.
- For example:
- Proper Fractions: Can lead to “Unit Fractions” (where the numerator is 1) and “Non-Unit Fractions.”
- Improper Fractions: Can be further explained with examples or divided into equivalent fractions.
- Mixed Numbers: Show how they combine whole numbers with proper fractions.
- Again, use color paper shapes to label these sub-categories and glue them onto the appropriate branches.
6. Include Examples:
- On each branch or near each label, add a small example to illustrate what that type of fraction looks like.
- For instance, under “Proper Fractions,” include an example like 12\frac{1}{2}21. For “Improper Fractions,” include something like 53\frac{5}{3}35. For “Mixed Numbers,” show 1231 \frac{2}{3}132.
7. Decorate the Tree:
- Use different colors for each type of fraction to make the branches distinct and easy to follow.
- Add small decorative elements, such as leaves or shapes, to enhance the visual appeal.
8. Assemble the Reverse Tree:
- Attach the branches to the main structure in a reverse tree format, where the broad category is at the top, and it branches out into more specific types as it goes down.
- Make sure the branches are securely attached to the base so that the model stands firm.
Conclusion:
This reverse tree structure effectively showcases the different types of fractions in a clear and visually appealing way. By categorizing and labeling each type of fraction, this model helps students understand how fractions are related and how they differ from one another.
The use of cardboard and color paper makes the model both durable and vibrant, making it an excellent tool for learning and teaching about fractions.

