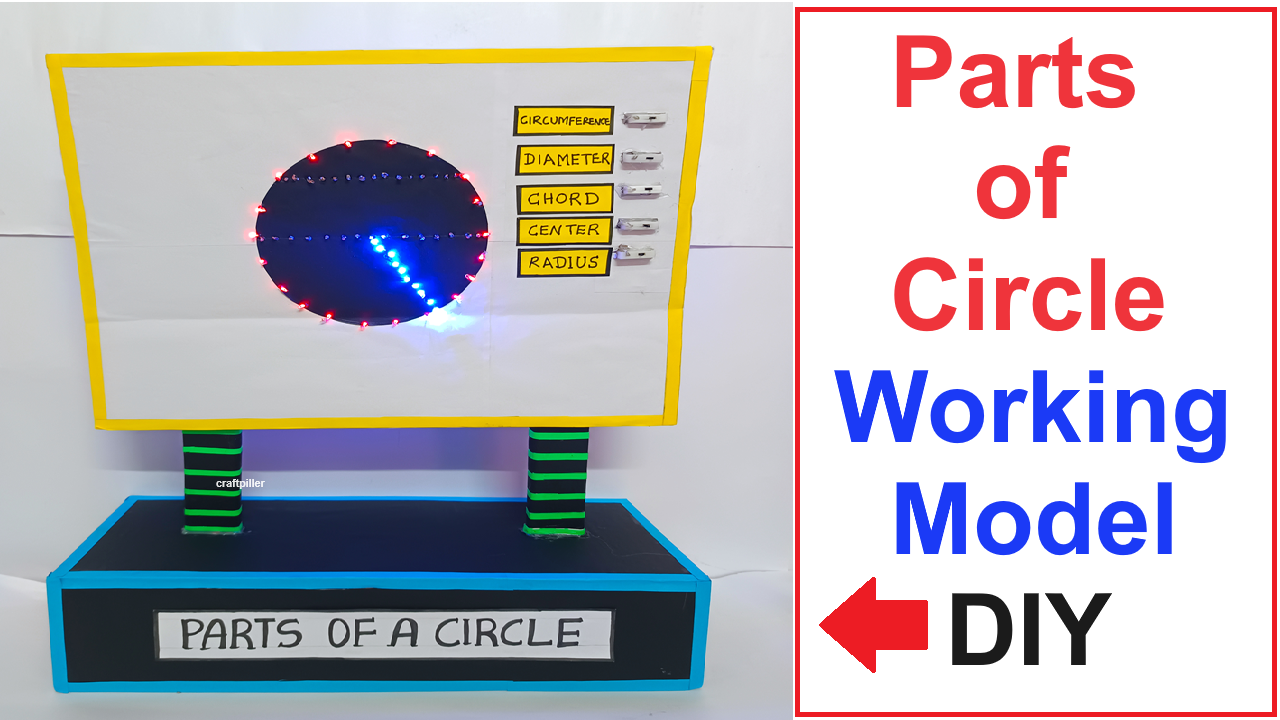
Creating a working model of the parts of a circle using LED lights, serial lights, and switches will be a fun and educational project.
This model will help in visually demonstrating different parts of a circle, such as the radius, diameter, circumference, and sectors, using lights controlled by individual switches.

Here’s a step-by-step guide to build this model:
Materials Needed:
- Cardboard (for the base and circle parts)
- Color Paper (for decoration and labeling)
- LED Lights (for highlighting parts of the circle)
- Serial Lights (to outline the circle)
- 9V Battery (with a battery clip)
- Wires (assorted colors)
- Switches (one for each part of the circle)
- Resistors (if needed, to limit current for LEDs)
- Glue or Tape (to fix components)
Video Steps to Build the Parts of Circle Working Model :
- Prepare the Base:
- Use a large piece of cardboard as the base.
- Draw and cut out a large circle from another piece of cardboard to represent the circle.
- Label the Parts of the Circle:
- Divide the circle into various parts, such as radius, diameter, circumference, and sectors.
- Use color paper to label each part clearly.
- Outline the Circle:
- Attach serial lights along the circumference of the cardboard circle. Secure them with glue or tape.
- Highlighting Circle Parts:
- Radius: Attach an LED light at the center of the circle and another at the edge, connecting them with a wire.
- Diameter: Attach two LED lights at opposite ends of the circle, connecting them with a wire passing through the center.
- Circumference: The serial lights already outline this part.
- Sectors: Use additional LED lights to highlight different sectors of the circle.
- Wiring the Lights:
- Connect the positive terminal of the 9V battery to a common positive rail.
- Connect the negative terminal to a common negative rail.
- Wire each set of LED lights and serial lights in parallel, ensuring to add resistors in series with LEDs if necessary to prevent them from burning out.
- Attach switches to control each part of the circle (radius, diameter, circumference, and sectors) separately.
- Attach the Circle to the Base:
- Securely attach the labeled cardboard circle to the base.
- Wiring the Switches:
- Connect each switch in series with the respective part of the circle it controls.
- Ensure each switch can independently control the LED or serial lights for its part.
Usage:
- Radius: Turn on the switch to light up the LEDs representing the radius.
- Diameter: Turn on the switch to light up the LEDs representing the diameter.
- Circumference: Turn on the switch to light up the serial lights outlining the circumference.
- Sectors: Turn on the switch to light up the LEDs representing different sectors.
This model will effectively demonstrate the various parts of a circle, making it an engaging educational tool.