Introduction to Rain Detector Cum Automatic Cloth Collect Working Model
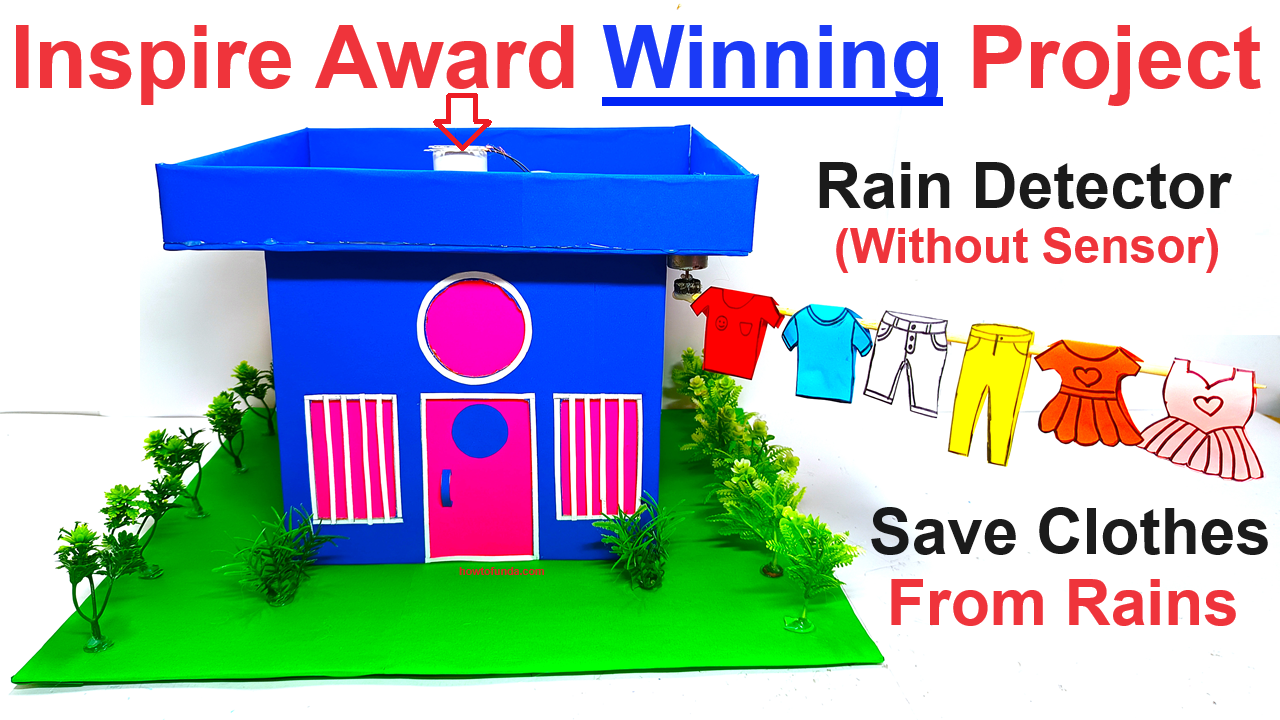
This Rain Detector cum Automatic Cloth Collect working model is an innovative and practical solution for protecting clothes drying outside a house from unexpected rain. The model operates without sensors and relies on a simple mechanical setup that includes two blades, a 9V battery, and a DC motor.
This system automatically detects rain and moves the drying clothes to a sheltered area, ensuring they stay dry.

Components of the Model:
- Base Structure: The model is built on a sturdy base, typically made of cardboard or wood, which supports the entire mechanism.
- Cloth Drying Rack: A small-scale cloth drying rack or line is set up outside a model house, where the clothes are hung to dry.
- Two Blades (Rain Detection Mechanism): The two blades are positioned in a way that they respond to the presence of rain. When rainwater touches the blades, they trigger the mechanism to start the cloth collection process.
- DC Motor: A DC motor is connected to the system, which drives the movement of the drying rack or clothesline. The motor is powered by a 9V battery.
- 9V Battery: The battery provides the necessary power to run the DC motor and move the clothes inside when rain is detected.
- Pulley or Lever System: A simple pulley or lever system is used to translate the motor’s rotation into linear motion, moving the clothes from the outdoor drying area to a sheltered position under the house’s roof.
How It Works:
- Rain Detection: The two blades act as a mechanical rain detector. When it starts to rain, the water on the blades causes them to come into contact, completing an electrical circuit that activates the motor.
- Motor Activation: The DC motor, powered by the 9V battery, starts rotating as soon as the circuit is completed. This rotation drives the pulley or lever system attached to the clothes drying rack.
- Automatic Cloth Collection: The pulley or lever system pulls the clothesline or rack towards the house, moving the clothes from the exposed outdoor area to a sheltered position under the roof, preventing them from getting wet.
- Stopping the Mechanism: Once the clothes are under shelter, the motor automatically stops as the blades are no longer in contact or through a simple mechanical limit switch that disengages the motor when the rack reaches the end of its path.
Making of Rain Detector cum Automatic Cloth Collect working model
Creating a Rain Detector cum Automatic Cloth Collect working model is an engaging project that demonstrates how a simple mechanical system can automatically protect clothes drying outside from unexpected rain.
Here’s a step-by-step guide to making this model:
Materials Needed:
- Cardboard or Wood (for base structure)
- Two Metal Blades (e.g., from an old pair of scissors or thin metal strips)
- 9V Battery
- DC Motor (suitable for a 9V battery)
- Wires (for connections)
- Pulley or Lever System (can be made from small wheels, spools, or other rotating objects)
- String or Thin Rope (to act as the clothesline)
- Small Cloth Drying Rack or Bar
- Adhesive Tape, Glue, or Screws (for assembly)
- Paper Clips or Small Weights (optional, for testing)
- Small Roof or Shelter (can be made from cardboard)
Step-by-Step Video Instructions:
1. Prepare the Base Structure:
- Cut a piece of cardboard or wood to serve as the base. This base will hold all the components in place.
- Attach a small structure (like a cardboard model of a house) to one side of the base. This will represent the house under which the clothes will be moved.
2. Set Up the Cloth Drying Rack:
- Install a small drying rack or bar outside the house model on the base. This is where the clothes will be hung.
- Attach a string or thin rope to act as the clothesline. Make sure it is long enough to move from the drying area to the shelter area under the house model.
3. Install the Two Blades (Rain Detection Mechanism):
- Position the two metal blades close together on the base, outside the house, where rain would normally fall.
- Mount them so they slightly touch each other when rainwater falls on them. This touch will close the circuit and activate the motor.
- Connect these blades to the wires leading to the motor, creating a simple switch that completes the circuit when the blades are wet.
4. Connect the DC Motor:
- Attach the DC motor to the base, close to the drying rack.
- Connect the motor to the 9V battery through the blades’ circuit. When the blades touch due to rain, the circuit will close, and the motor will turn on.
5. Create the Pulley or Lever System:
- Install a pulley or lever system that the motor can drive. This system should be connected to the clothesline.
- When the motor is activated, it should pull the string, moving the drying rack or the clothesline towards the shelter under the house.
6. Test the Mechanism:
- Hang a small piece of cloth or paper on the drying rack.
- Manually close the circuit by pressing the blades together or simulate rain by lightly spraying water on them.
- Observe as the motor activates and the pulley system moves the drying rack towards the shelter.
7. Fine-Tuning:
- Adjust the position of the blades and motor if necessary to ensure smooth operation.
- Make sure the motor stops once the clothes are under the shelter, which can be done with a mechanical stop or by designing the pulley system to limit its range of motion.
Final Touches:
- Decorate the model with labels and signs to make it visually appealing and to clearly indicate how each part functions.
- If desired, paint the house model and drying rack to give it a realistic appearance.
Conclusion:
This Rain Detector cum Automatic Cloth Collect working model is a simple yet effective way to demonstrate the principles of mechanical automation and basic circuits.
It’s a practical project that not only shows the importance of protecting clothes from rain but also introduces the concepts of switching mechanisms, motors, and mechanical movement in a fun and interactive way.