
This is a Mini Lift Working Model. It uses a DC robo motor to pull a lift box up using woolen thread.
The lift works like real elevators, where motors and pulleys lift the platform. The motor is powered by a 9V battery and controlled using a switch.
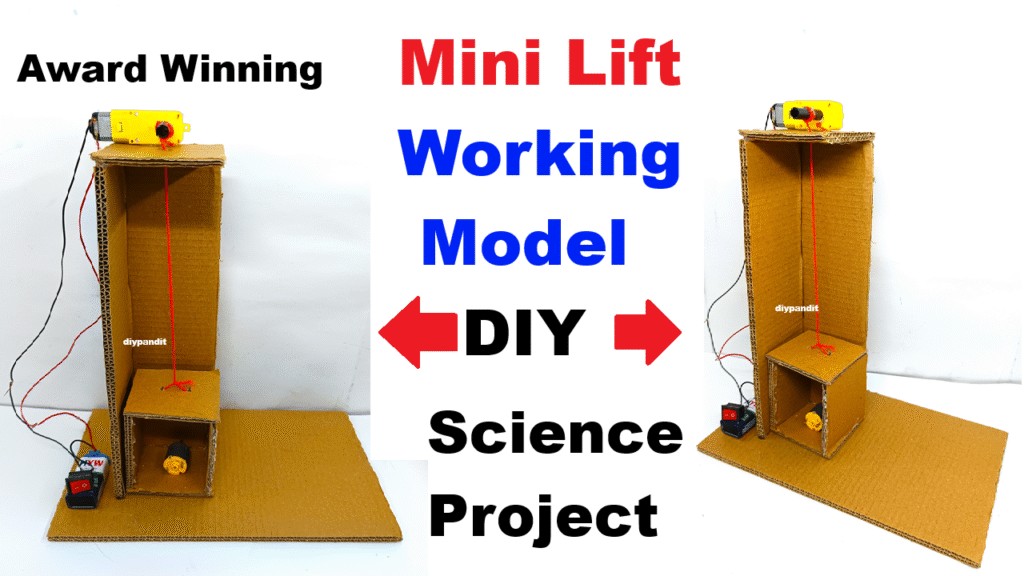
It demonstrates basic principles of mechanical work, electric circuits, and simple machines.
Materials Needed
- Cardboard (for lift structure and lift box)
- Robo motor (DC gear motor)
- Woolen thread or strong string
- 9V battery + battery clip
- On/Off switch
- Straw or small stick (for pulley axle)
- Glue, scissors, tape
- Small paper cup or cardboard box (to act as the lift)
- Color paper (for decoration)
How to Make Mini Lift Working Model
Step 1: Build the Lift Shaft
- Make a rectangular vertical shaft using cardboard (approx. 25–30 cm tall).
- Leave an open slot in front so the lift movement is visible.
- Fix a horizontal cardboard piece at the top to hold the motor and pulley setup.
Step 2: Motor & Pulley Setup
- Attach the robo motor on the top horizontal panel using glue or tape.
- Fix a small straw or stick (or use the motor’s shaft) and wind woolen thread around it — this will act like the pulley drum.
- Tie one end of the woolen thread to the lift box (small cardboard box or cup).
Step 3: Electrical Connections
- Connect motor terminals to:
- One terminal to the 9V battery (+) via a switch
- Other motor terminal to the battery (–)
- Insert the On/Off switch between battery and motor to control lift movement.
Step 4: Assemble the Lift
- Place the lift box inside the cardboard shaft.
- When you turn on the switch, the motor pulls the thread and raises the lift.
- Reverse the connection manually to lower the lift (or add a DPDT switch for reverse motion, optional).