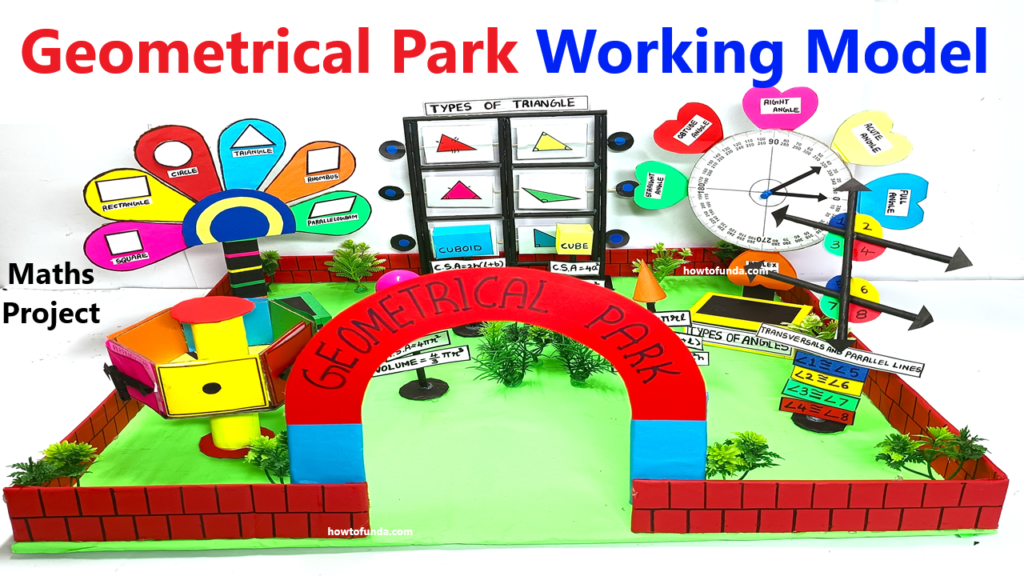
Here’s how to design a Geometrical Park Working Model that incorporates key geometric concepts like points, lines, shapes, triangles, angles, and parallel lines.
This park will creatively combine these ideas into an interactive and visually engaging model.

Concept:
The park represents different geometric concepts through its layout and attractions. For example:
- Points: Locations on the map, like benches or trees.
- Lines: Pathways, slides, and beams.
- 2D and 3D Shapes: Decorative structures like a fountain or buildings.
- Triangles and Angles: Roofs, pathways, and corners.
- Parallel Lines: Roads or railway tracks running parallel to each other.
Materials Needed:
- Cardboard: For the base, shapes, and structures.
- Colored Paper: For decorating and labeling.
- Push Pins and String: For creating lines and points.
- Chopsticks or Straws: For 3D shapes and structures.
- Glue/Tape: To assemble the parts.
- Markers/Pens: For writing labels and formulas.
- Scissors, Ruler, Compass, Protractor: For drawing and cutting geometric shapes.
Step-by-Step Instructions:
1. Prepare the Base:
- Cut a large rectangular piece of cardboard (e.g., 18 x 18 inches) as the park’s base.
- Cover it with green-colored paper to mimic grass.
- Divide the base into sections, each representing a different geometric concept.
2. Add Geometric Elements:
A. Points and Lines (Benches and Pathways):
- Mark several points on the park base using push pins or small colored dots (e.g., A,B,C,DA, B, C, DA,B,C,D).
- Connect these points with lines using string or strips of paper. Label them (e.g., AB,CDAB, CDAB,CD).
- Use intersecting lines to represent geometric concepts like perpendicular and intersecting lines.
B. 2D Shapes (Play Area):
- Cut out colorful 2D shapes like squares, rectangles, circles, and hexagons from paper or cardboard.
- Arrange them in a play area. For example:
- A circular sandbox.
- A rectangular swimming pool.
- A hexagonal gazebo.
C. 3D Shapes (Fountain or Buildings):
- Use cardboard or paper to make simple 3D shapes:
- Cube: Small cardboard box covered with colored paper.
- Cylinder: Rolled colored paper for a water fountain.
- Cone: A conical slide.
- Pyramid: A small pyramid-shaped structure.
- Place these shapes around the park and label them.
D. Types of Triangles (Roof of a Gazebo):
- Create different triangles using cardboard and colored paper:
- Equilateral: All sides equal.
- Isosceles: Two sides equal.
- Scalene: No sides equal.
- Right Triangle: One angle is 90∘90^\circ90∘.
- Use these triangles as roofs or decorative features and label them.
E. Types of Angles (Signs or Structures):
- Use small cardboard strips to create:
- Acute Angles: Narrow angles, used in corner decorations.
- Right Angles: A square corner of a bench or pathway intersection.
- Obtuse Angles: Wider corners in the layout.
- Add labels for each type of angle.
F. Parallel Lines and Transversals (Roads or Railway Tracks):
- Use strips of black paper or cardboard to create parallel lines for roads or railway tracks.
- Add a transversal crossing these lines and label the angles formed (e.g., corresponding, alternate interior).
3. Assembly and Decoration:
- Arrange all the elements (points, lines, shapes, and angles) on the park base.
- Add small trees, benches, or miniature people to make the park visually appealing.
- Use markers to write labels and formulas directly on the cardboard or on small tags attached to each structure.

