
INTRODUCTION
In this topic, we are going to show you how to build a windmill at home for your science project or exhibitions.
The objective of the windmill project to demonstrate wind energy can be converted into electrical energy for science primary and secondary school students or kids.
This homemade windmill model for a school science experiment is made using materials like cardboard, papers, colors and hot glue gun which is easily available at home at low cost for students or kids
Windmill or Wind Turbine Information (Overview)
Windmills are machines that help in transforming energy from the wind into useful work by continuously rotating.
This rotation of a windmill is used to powers a motor or generator which in turn are used to produce electricity or do some mechanical work.
History of Windmills
Using windmill power for rotation of objects dates back to 1st century Greece.
They have been used to lift things up and down mainly water from the ground. To power machines that crush grain and process food
Recently to power motors to generate electricity.
They are the best example of wheel-and-axle machines.
The wheel is able to rotate freely on an axis, harnessing the wind’s energy to move its shapes that can catch the wind.
Types of Wind Turbines
- Horizontal
axis
- Vertical
axis
- Ducted
Wind Turbines
How to build a working windmill step by step video
In this video, we will show steps by step video instructions on how to build the windmill model at home easy way for science exhibition
First cut the cardboard to shapes of windmill and glue them together to build the windmill.
Then we create six blades for the fan, along with a circular cardboard.
Make a hole in the center large enough for the wooden skewers to fit through it and glue six blades to the circular cardboard.
Check to make sure that blade of windmill fan rotates on the axis of wooden skewers fitted to the windmill.
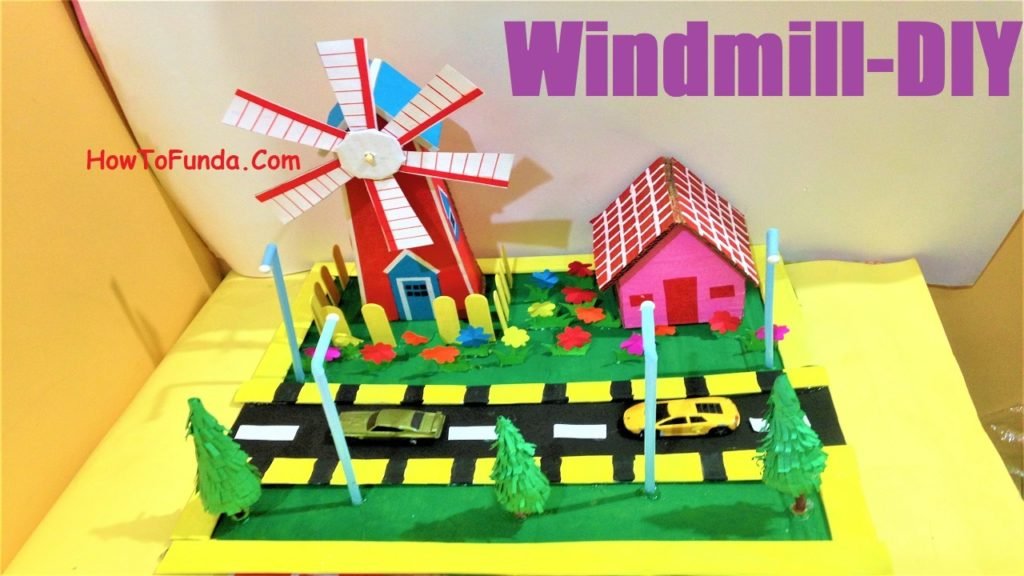
Create a big base to place the windmill. Next, we create a road and glue it to the big base along with already constructed windmill.
Now place an already constructed house next to the windmill.
Finally, place some small flower shrubs and small trees along the roadside to complete the project.
Materials Used to build working windmill
Materials used in this video are shown below to build a windmill working model at home by taking the help of your parents.
- Card
board
- Scale
- Pencil
- Waste
box for card board
- Blade
- Pin
- Wooden
skewers
- Fevicol
- Color
and white papers
- Scissor
- Hot
Glue gun
- Sketch
pen
- Colors
- Paint
brush
- Ice
cream sticks
- Straws
- Beeds
- Plastic
cars
Questions & Answers on working windmill
1. What are the main uses of windmills?
Windmills are mainly used for pumping water, sawing wood, generate electricity and grinding grain or spices.
2. How many different types of windmills are there?
Different types of wind turbines are Horizontal axis, Vertical axis and Ducted Wind Turbines.
3. How do you describe a windmill?
Windmills are mainly used to generate electricity. First wind turns the blades, blades turn the rotor, rotor turns the shaft, the shaft spins the generator; and the generator produces electricity.
4. Who made the windmill?
In 1854, Daniel Halladay invented windmill in United States in his Connecticut machine shop.
Conclusions
In this science project, you will learn how to make a windmill that generates electricity that helps students to learn about how the wind is used to generate electricity using windmill
As well as how to make a windmill for a science project with easily available materials at home.