
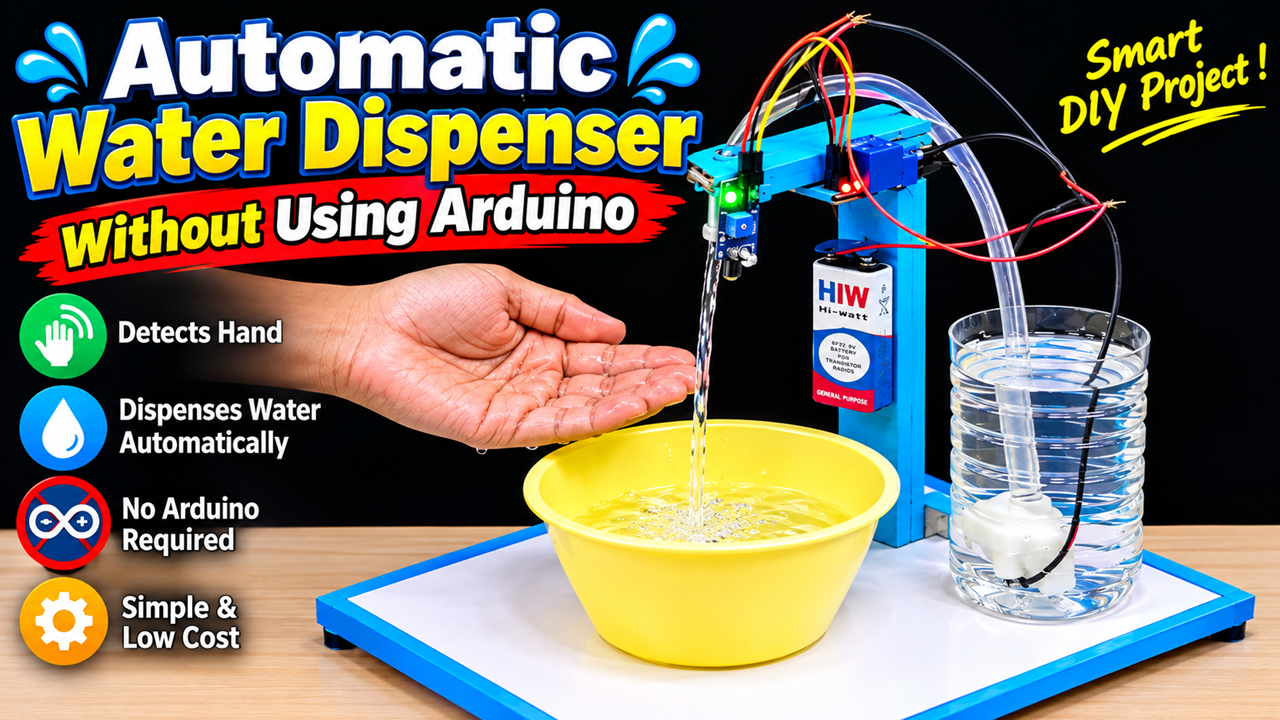
The Automatic Water Dispenser Without Using Arduino is a simple, useful, and low-cost science exhibition project. It automatically detects a person’s hand and dispenses water without requiring the user to touch a switch, tap, or button. The model shown uses an IR sensor, relay module, DC water pump, battery, water container, and transparent pipe.
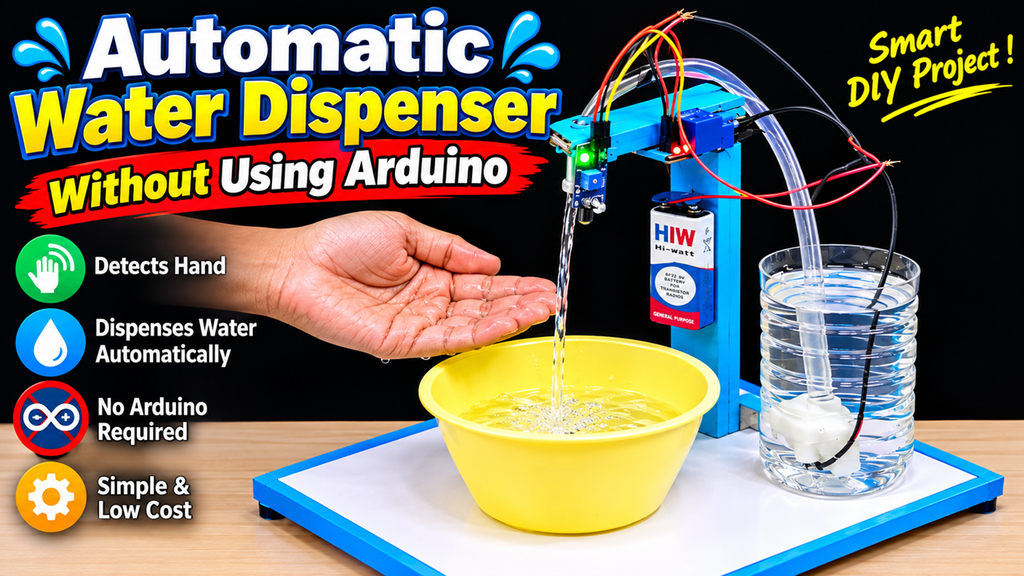
This project is especially useful for demonstrating the idea of touch-free water dispensing. It can be used as a school science project, STEM activity, practical examination model, or innovation project.
1. Aim of the Project
The main aim of this project is to design a simple automatic water dispensing system without using an Arduino or any programming.
The system should:
- Detect a hand automatically.
- Switch on the water pump.
- Dispense water through a pipe.
- Stop dispensing when the hand is removed.
- Reduce the need to touch a tap or switch.
- Demonstrate a simple real-world automation system.
The project works using basic electronic components, making it easy for beginners to understand.
2. Materials Required
The following materials can be used to make the model:
Electronic components
- IR sensor module
- 5V relay module
- Small DC water pump
- Battery suitable for the pump
- Connecting wires
- Switch, if required
- Battery holder
Mechanical materials
- Cardboard sheet
- Colour paper
- Plastic container or bottle
- Transparent water pipe
- Small water bowl
- Glue or Fevicol
- Tape
- Scissors
- Cutter
- Small plastic fittings
The voltage of the battery and pump should be selected according to the specifications of the pump being used.
3. Making the Base
Start with a strong cardboard sheet to create the base of the project.
Cover the top of the cardboard with white chart paper. Use blue coloured strips around the edges to make the model attractive.
Create a vertical frame using cardboard strips. The frame supports the electronic components and the water outlet.
The water container can be placed on one side of the base. A small bowl can be placed underneath the outlet to collect the water.
This arrangement makes the project look neat and also prevents water from spreading across the table.
4. Making the Water Storage System
Take a transparent plastic bottle or container and fill it with water.
Make a small hole near the lower portion of the container and connect the water pump using a suitable pipe or fitting.
The pump should be positioned inside or near the bottom of the water container, depending on the type of pump being used.
Connect a transparent pipe to the outlet of the pump.
The other end of the pipe should be positioned above the bowl.
When the pump operates, it pushes water through the transparent pipe and produces the water flow.
5. Installing the IR Sensor
The IR sensor is responsible for detecting the user’s hand.
Mount the IR sensor near the water outlet.
The sensor emits infrared radiation and detects an object when it comes within its sensing range.
When a hand is placed in front of the sensor, the sensor detects the hand and changes its output signal.
This signal is then used to control the relay.
The sensing distance can usually be adjusted using the small potentiometer present on many IR sensor modules.
6. Role of the Relay Module
The relay module acts as an electronic switch.
The IR sensor cannot necessarily drive the water pump directly because the pump may require more current than the sensor output can safely provide.
The relay solves this problem.
The basic sequence is:
Hand detected → IR sensor activates → Relay switches ON → Pump runs → Water flows
When the hand is removed:
Hand removed → IR sensor changes state → Relay switches OFF → Pump stops → Water flow stops
Thus, the relay provides a simple interface between the low-power sensor circuit and the pump circuit.
7. How the Water Pump Works
The DC water pump is responsible for moving water from the storage container to the outlet.
When electrical power is supplied to the pump, its internal motor rotates an impeller.
The rotating impeller pushes water through the pipe.
The water therefore travels from:
Water container → Pump → Transparent pipe → Outlet → Bowl
When the relay disconnects power from the pump, the motor stops and the water flow stops.
This makes the system automatic.
8. Working Principle
The complete working principle is very simple.
First, the system is powered using a suitable battery or DC power source.
The IR sensor continuously monitors the area in front of the dispenser.
When a person places their hand below the outlet, the IR sensor detects the hand.
The sensor sends a control signal to the relay module.
The relay switches ON.
The water pump receives power and starts rotating.
Water is then pumped from the storage container through the transparent pipe.
The water falls into the bowl placed below the outlet.
When the user removes their hand, the IR sensor no longer detects the hand.
The relay switches OFF.
The pump stops.
The water flow stops automatically.
Therefore, no Arduino, programming, or complicated control system is required.
9. Why No Arduino Is Required
One of the main advantages of this project is that it works without an Arduino.
An Arduino normally requires:
- A microcontroller board
- Programming
- USB connection during programming
- Additional wiring
- Software
In this project, the IR sensor directly provides the detection signal and the relay performs the switching function.
Therefore, the basic system can be constructed using:
IR Sensor + Relay + Pump + Power Supply
This makes the project inexpensive and easy to understand.
10. Touch-Free Operation
The biggest practical benefit of the project is touch-free operation.
In a conventional water tap, the user has to touch the tap or handle.
In this automatic dispenser, the user simply places their hand below the outlet.
The sensor detects the hand and the pump starts automatically.
This can be useful in places where reducing contact with frequently touched surfaces is desirable, such as:
- Schools
- Offices
- Laboratories
- Workshops
- Public facilities
- Small clinics
- Homes
The model demonstrates how simple automation can make everyday activities more convenient.
11. Important Electrical Connections
The exact wiring depends on the voltage and type of pump and relay module being used.
For a typical setup, the IR sensor is connected to its appropriate VCC and GND supply, while its output is connected to the relay module’s input.
The relay module then controls the pump’s power circuit.
A simplified representation is:
IR Sensor OUT → Relay IN
Power Supply → Relay Contact → Water Pump
The pump should receive the voltage specified by its manufacturer.
It is important not to assume that every pump can be connected directly to a 5V or 9V battery. Always check the pump’s rated voltage before connecting it.
12. Making the Model Attractive
For a science exhibition, appearance is also important.
The cardboard frame can be covered with blue coloured paper to represent water.
The water storage container should preferably be transparent so that visitors can see the water and understand how the pump operates.
Use a clean transparent pipe so that the water flow is clearly visible.
Place a colourful bowl below the outlet.
The IR sensor can be mounted neatly near the dispensing point.
The battery, relay and wiring should be arranged neatly rather than leaving loose wires everywhere.
Labels can be added:
- IR SENSOR
- RELAY MODULE
- WATER PUMP
- WATER TANK
- WATER OUTLET
- AUTOMATIC WATER DISPENSER
13. Demonstration at a Science Exhibition
To demonstrate the project, first fill the storage container with water.
Switch ON the main power supply.
Keep your hand away from the sensor. The pump should remain OFF.
Now place your hand below the water outlet.
The IR sensor detects the hand.
The relay activates the pump.
Water starts flowing through the transparent pipe into the bowl.
Remove your hand.
The sensor changes its output.
The relay switches the pump OFF.
The water flow stops.
This simple demonstration clearly shows the complete automation process.
14. Advantages of the Project
This project has several advantages.
Low cost
It can be constructed using inexpensive components.
No programming
An Arduino and software are not required.
Easy to understand
The working principle is simple and suitable for beginners.
Touch-free
The user does not need to touch a switch or tap.
Water control
The pump operates only when the sensor detects the user’s hand.
Reusable
The same concept can be adapted for liquid soap, sanitizer, or other dispensing applications, provided the pump and materials are suitable for the liquid.
15. Limitations
The system also has some limitations.
The IR sensor can sometimes respond to other objects within its detection range. Its performance can also be affected by the surrounding environment and the sensor’s adjustment.
The water pump must be operated within its specified voltage and current rating.
The electrical components should be protected from water. Water and electrical connections must be kept physically separated to avoid short circuits and safety hazards.
For a real product, additional features such as a timer, water-level sensor, rechargeable battery, or more sophisticated control circuit could be added.
16. Future Improvements
The project can be upgraded in several ways.
A water-level sensor could be added to indicate when the tank is empty.
An LED indicator could show whether the system is powered or dispensing water.
A rechargeable battery could be used instead of disposable batteries.
A flow-control system could be added to reduce unnecessary water consumption.
A waterproof enclosure could be designed to protect the electronics.
For more advanced versions, a microcontroller could be added to control dispensing time and monitor water usage.
17. Simple Explanation for Practical Examination
You can explain the model in these words:
“This is an Automatic Water Dispenser made without using Arduino. The main components are an IR sensor, relay module, DC water pump, battery, water container and transparent pipe. The IR sensor detects the user’s hand when it is placed near the outlet. The sensor sends a signal to the relay module. The relay acts as an electronic switch and turns ON the water pump. The pump draws water from the container and sends it through the transparent pipe. When the hand is removed, the sensor changes its output, the relay turns OFF, and the pump stops. Therefore, water is dispensed automatically without touching a tap or using Arduino programming. This project demonstrates how simple electronic components can be used to create a useful touch-free automation system.”
18. Conclusion
The Automatic Water Dispenser Without Using Arduino is a practical example of how sensors and electronic switching can be combined to solve an everyday problem.
The IR sensor detects the hand, the relay controls the electrical load, and the DC pump moves the water. Together, these components create an automatic dispensing system without requiring a microcontroller or programming.
The project is inexpensive, easy to build, easy to demonstrate, and suitable for students who are learning basic electronics and automation. More importantly, it shows that useful technological solutions do not always require complicated circuits—sometimes a simple combination of a sensor, relay, pump, and power supply is enough to create a functional real-world device.