
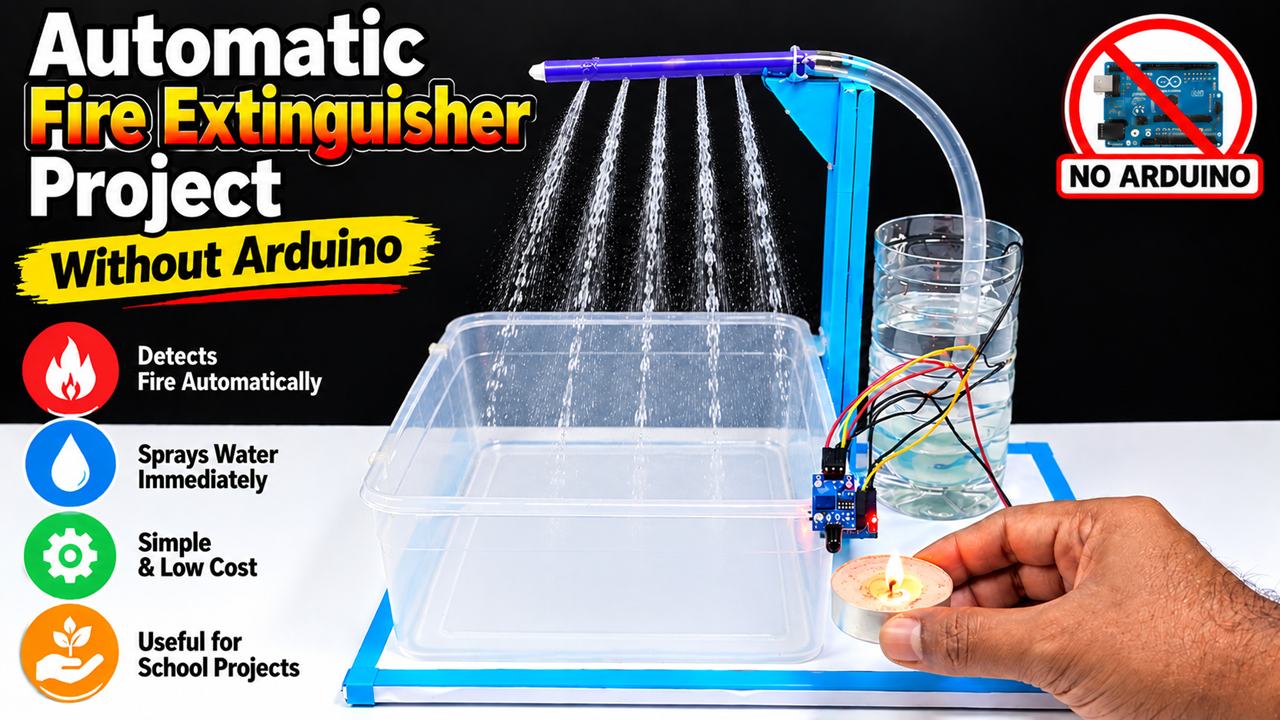
The Automatic Fire Extinguisher Project Without Arduino is a simple and practical science exhibition model that demonstrates how a fire can be detected automatically and how water can be sprayed immediately to control it. The project uses basic electronic components such as a flame sensor, relay module, DC water pump, water container, transparent pipe, and spray nozzle. Unlike many automatic fire-fighting projects, this model does not require an Arduino or any programming.
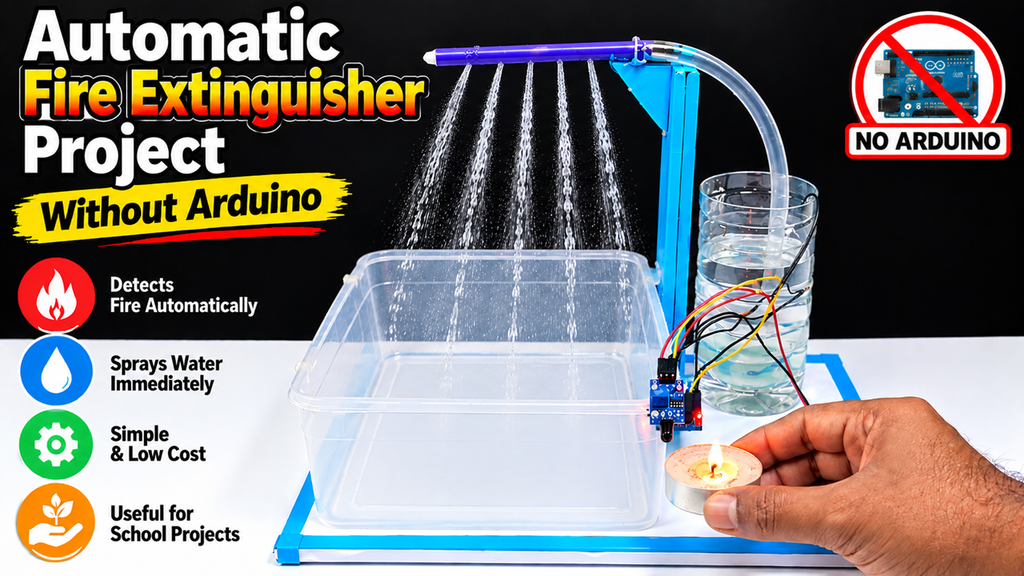
The main idea behind the project is simple:
Fire detected → Sensor activates → Relay switches ON → Pump starts → Water is sprayed
This model is useful for explaining the basic concept of automatic fire detection and suppression to students in a simple and visual way.
1. Aim of the Project
The main objective of this project is to demonstrate an automatic system that can detect a flame and activate a water pump without human intervention.
The project demonstrates four important functions:
- Detecting a flame using a flame sensor.
- Processing the sensor signal through a relay module.
- Switching ON a water pump automatically.
- Spraying water toward the area where the fire is detected.
The model can be presented as a school science exhibition, STEM project, electronics demonstration, or practical examination project.
2. Materials Required
The following materials can be used to build the model.
Electronic components
- Flame sensor module
- Relay module
- Small DC water pump
- Suitable battery or DC power supply
- Connecting wires
- Switch
- LED indicator, if required
Mechanical materials
- Large cardboard sheet
- Transparent plastic container
- Transparent water pipe
- Spray pipe or nozzle
- Cardboard strips
- Blue coloured paper
- Glue or Fevicol
- Tape
- Scissors
- Cutter
- Small water container
- Decorative materials
The pump and power supply should always be selected according to the pump’s rated voltage and current.
3. Preparing the Base
First, take a strong rectangular cardboard sheet to create the base of the project.
Cover the top of the cardboard with white chart paper. Blue coloured strips can be fixed around the edges to give the model a clean and attractive appearance.
Place a transparent plastic container in the center or front portion of the model. This container represents the fire zone or the area that needs to be protected.
A water storage container can be positioned on one side of the model.
A vertical cardboard structure can be constructed behind the water container. This structure supports the water pipe and spray system.
4. Making the Water Tank
Take a transparent plastic bottle or container and fill it with water.
Place the small DC water pump inside the water container if the pump is designed for submerged operation.
Connect a transparent pipe to the pump outlet.
Route the pipe upward toward the top of the cardboard structure.
At the end of the pipe, attach a suitable spray nozzle or perforated pipe.
The image shows a horizontal pipe with multiple openings. This creates several streams of water, producing a wider spray pattern.
This arrangement makes the demonstration more attractive because viewers can clearly see the water being sprayed over the fire area.
5. Installing the Flame Sensor
The flame sensor is the main detection component.
A flame sensor is designed to detect infrared radiation associated with a flame. The sensor module normally contains a sensing element and electronic circuitry that produces an output signal when a flame is detected within its sensing range.
Mount the sensor facing the demonstration area.
The sensor should be positioned so that it can detect the flame without being directly exposed to water.
Many flame sensor modules have an adjustable sensitivity control. This can be adjusted carefully during testing so that the sensor responds appropriately to the demonstration flame.
6. Role of the Relay Module
The relay module works as an electrically controlled switch.
The flame sensor provides a control signal when it detects the flame.
The relay receives this signal and changes the state of its contacts.
When the relay is activated, it completes the pump’s power circuit.
The pump then starts operating.
The sequence is:
Flame → Flame Sensor → Relay → Water Pump → Spray
When the flame is removed and the sensor returns to its normal state, the relay can switch the pump OFF, depending on the relay module’s configuration and sensor output.
This eliminates the need for an Arduino or software program.
7. How the Water Pump Works
The DC water pump converts electrical energy into mechanical energy.
When power is supplied to the pump, its internal motor rotates an impeller. The impeller pushes water through the outlet pipe.
The water travels from:
Water Tank → Pump → Transparent Pipe → Spray Pipe → Fire Area
The spray pipe can contain several small holes.
When water reaches the pipe, it comes out through these holes and produces multiple water streams.
The multiple streams help demonstrate how a larger area could theoretically be covered by a suppression system.
8. Complete Working Principle
The complete operation of the model can be explained in simple steps.
First, water is filled into the storage container.
The electronic circuit is switched ON.
The flame sensor continuously monitors the demonstration area.
When there is no flame, the pump remains OFF.
Now a small demonstration flame is introduced in front of the sensor.
The flame sensor detects the flame.
Its output changes and activates the relay module.
The relay switches ON the water pump.
The pump draws water from the storage container and pushes it through the pipe.
Water comes out through the spray holes and falls over the demonstration area.
When the flame is removed, the sensor output changes again.
The relay switches the pump OFF, depending on the circuit configuration.
Thus, the system demonstrates automatic detection and response.
9. Why Arduino Is Not Required
A major feature of this project is that it works without Arduino.
An Arduino-based system would normally involve:
- Arduino board
- Programming
- Sensor input
- Program logic
- Relay output
In this project, the flame sensor and relay module perform the basic control function directly.
Therefore, the system can be constructed using:
Flame Sensor + Relay + Pump + Power Supply
This makes the project easier for beginners who are learning basic electronics.
It also demonstrates that automation can sometimes be achieved using simple electronic control circuits without a programmable microcontroller.
10. Multiple Water Spray Points
The spray pipe shown in the model contains several water outlets.
This is an interesting feature because it demonstrates wide-area water coverage.
Instead of having only one water stream, several small streams can spray water over the demonstration area.
The holes should be made carefully so that the water flows in the desired direction.
The spray system should be tested with water before the final exhibition.
If the water pressure is too high, the holes can produce an uneven spray. Adjusting the pump, pipe diameter, or nozzle arrangement can help achieve a better demonstration.
11. Applications
The concept demonstrated by this model can be related to automatic fire protection systems used in different environments.
Possible applications include:
- Laboratories
- Workshops
- Storage areas
- Electrical equipment rooms
- Industrial facilities
- Warehouses
- Kitchens
- Agricultural storage areas
However, a school prototype should not be considered a replacement for certified fire protection equipment. Real fire suppression systems require proper engineering, suitable extinguishing agents, reliable detection systems, pressure calculations, and safety standards.
12. Advantages of the Project
1. Simple design
The circuit uses basic components and is easy to understand.
2. No programming
No Arduino or software is required.
3. Automatic operation
The pump starts when the sensor detects the demonstration flame.
4. Low-cost model
Many components can be obtained inexpensively.
5. Attractive demonstration
The automatic water spray makes the project visually interesting for a science exhibition.
6. Educational value
The model teaches students about sensors, relays, motors, pumps, electrical circuits, and automation.
13. Safety Precautions
Safety is extremely important with this project because it combines fire, water, and electricity.
The flame should be very small and used only for a controlled demonstration under adult supervision.
Keep the Arduino-free electronic circuit, battery connections, relay, and exposed electrical wiring away from water.
Do not allow sprayed water to reach the battery, relay, sensor wiring, or other electrical connections.
Use a suitable low-voltage DC pump and appropriate power supply.
Never demonstrate the model near flammable materials.
For a classroom demonstration, a safer alternative is to use a simulated flame or LED-based flame indicator rather than a real flame.
Also, this project should not be presented as a device capable of safely extinguishing a real uncontrolled fire.
14. How to Present the Project
During the exhibition, first explain the problem.
“Fire can spread quickly if it is not detected at an early stage.”
Then introduce the solution.
“Our project demonstrates a simple automatic fire detection and water spraying system without using Arduino.”
Next, explain the components:
- Flame sensor detects the fire.
- Relay acts as an electronic switch.
- Water pump moves water.
- Pipe carries the water.
- Spray holes distribute the water.
Finally, demonstrate the operation using a carefully controlled test.
15. Simple Explanation for Practical Examination
You can say:
“This is an Automatic Fire Extinguisher Project made without Arduino. The main components used are a flame sensor, relay module, DC water pump, water container, pipe and spray nozzle. The flame sensor detects the presence of a flame. When the flame is detected, the sensor activates the relay module. The relay acts as an automatic switch and turns ON the water pump. The pump draws water from the container and sends it through the transparent pipe. The water comes out through several holes in the spray pipe and covers the fire area. When the flame is removed, the sensor returns to its normal condition and the pump can switch OFF depending on the circuit configuration. The main advantage of this project is that it demonstrates automatic fire detection and response without using Arduino or programming.”
16. Conclusion
The Automatic Fire Extinguisher Project Without Arduino demonstrates an important concept in automation: detect a problem and respond automatically.
The flame sensor performs the detection, the relay provides electrical switching, and the water pump provides the physical response. The spray pipe then distributes water over the demonstration area.
The project is simple, inexpensive, visually attractive, and suitable for explaining basic electronics and automation concepts. It also encourages students to think about how technology can be used to improve early fire detection and emergency response.
Most importantly, the model demonstrates the principle in a safe educational setting rather than attempting to replace professional fire-protection systems. With appropriate safety precautions, it can be an effective science exhibition project for teaching students about sensors, relays, motors, pumps, automatic control, and fire-safety awareness.