Introduction
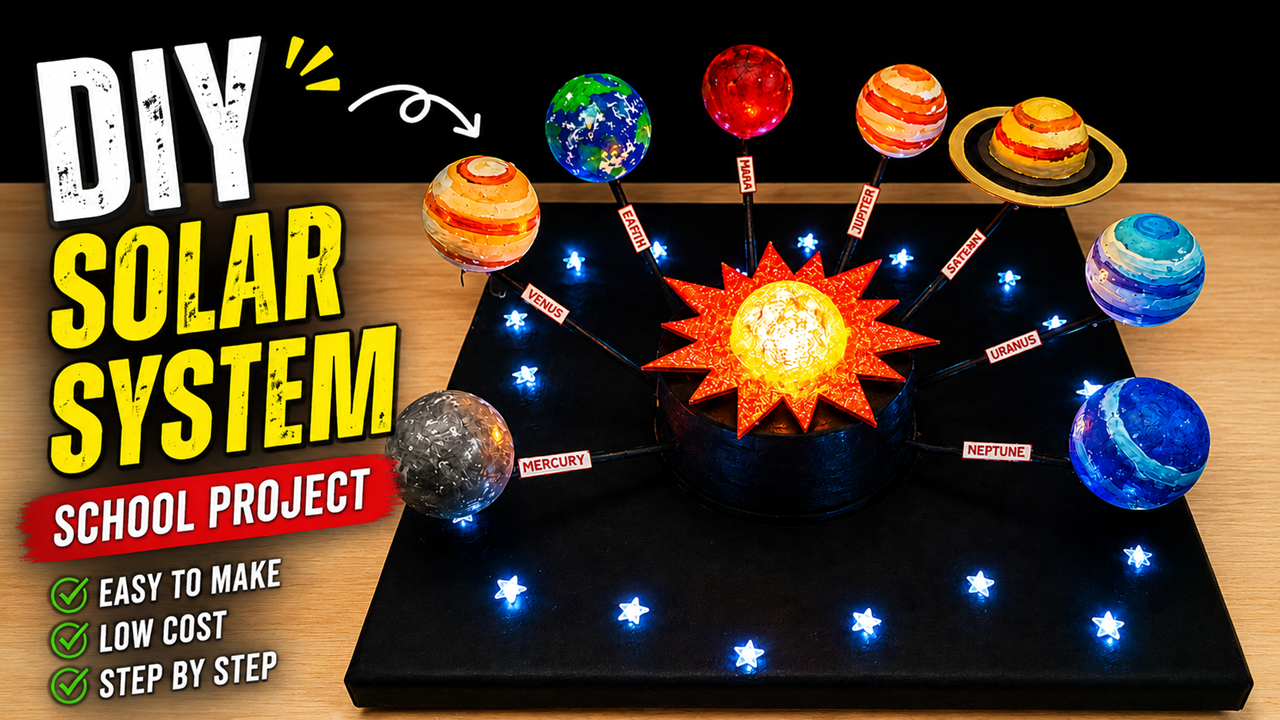
The Solar System Working Model is an attractive science project that demonstrates the arrangement of the Sun and the eight planets in our solar system. It helps students understand the relative positions of the planets, their names, and how they revolve around the Sun. The glowing Sun and LED stars make the model visually appealing, making it an excellent choice for science exhibitions, STEM fairs, and school competitions.

Aim
To create a working model that demonstrates the structure of the Solar System and explains the position and movement of the planets around the Sun.
Objective
- To identify the eight planets.
- To understand the structure of the Solar System.
- To explain planetary revolution around the Sun.
- To create an attractive working model using LEDs.
Materials Required
- Thick cardboard or foam board (Base)
- Black chart paper
- Thermocol balls (Different sizes)
- Acrylic paints
- Paint brushes
- Wooden skewers or metal rods
- Hot glue gun
- LED fairy lights (Blue/White)
- Yellow LED bulb or LED strip
- Plastic container/cardboard cylinder (Sun stand)
- Battery (9V or USB power bank)
- Switch
- Small wires
- Printed planet name labels
- Cutter
- Scale
- Compass
- Double-sided tape
Scientific Theory
The Solar System consists of the Sun at the center and eight planets revolving around it due to the Sun’s gravitational force.
The planets are arranged in the following order:
- Mercury
- Venus
- Earth
- Mars
- Jupiter
- Saturn
- Uranus
- Neptune
Each planet revolves around the Sun in its own orbit and takes a different amount of time to complete one revolution.
Working Principle
The glowing Sun represents the central star of our Solar System.
The thermocol planets are mounted on rods around the Sun according to their order.
Blue LED lights represent stars in outer space.
When the switch is turned ON:
- The Sun glows brightly.
- The stars illuminate.
- Students can easily identify every planet.
- If a rotating motor is added, the planets can revolve around the Sun to demonstrate planetary motion.
How to Make the Model
Step 1: Prepare the Base
- Cut a square cardboard or foam board.
- Cover it with black chart paper.
- This represents outer space.
Step 2: Make the Sun
- Take a large thermocol ball.
- Paint it yellow and orange.
- Cut sun rays from orange foam sheet or cardboard.
- Fix them around the Sun.
- Install a yellow LED inside or behind the Sun.
- Mount it on a small cylindrical stand at the center.
Step 3: Make the Planets
Paint thermocol balls as shown below:
| Planet | Suggested Colour |
|---|---|
| Mercury | Grey |
| Venus | Cream and Orange |
| Earth | Blue, Green and White |
| Mars | Red |
| Jupiter | Orange and White Stripes |
| Saturn | Yellow with Ring |
| Uranus | Light Blue |
| Neptune | Dark Blue |
Allow all planets to dry completely.
Step 4: Fix the Planets
- Insert wooden skewers into each planet.
- Arrange them around the Sun in the correct order.
- Keep the distances approximately proportional for a realistic appearance.
Step 5: Add Saturn’s Ring
- Cut a ring from cardboard or foam sheet.
- Paint it golden or brown.
- Glue it around Saturn.
Step 6: Install LED Stars
- Drill small holes in the base.
- Insert blue or white LED fairy lights through the holes.
- Secure the wiring underneath the base.
Step 7: Label the Planets
Print or write labels:
- Mercury
- Venus
- Earth
- Mars
- Jupiter
- Saturn
- Uranus
- Neptune
Paste each label near its respective planet.
Step 8: Electrical Connections
Connect:
Battery → Switch → Sun LED
Battery → Switch → Star LEDs
Hide all wires beneath the base using tape or hot glue.
Working
- Turn ON the switch.
- The Sun lights up brightly.
- The blue LEDs glow like stars.
- The planets remain arranged around the Sun.
- If a slow-speed motor is added, the planets revolve around the Sun, demonstrating planetary motion.
- The model clearly explains the structure of the Solar System.
Planet Order
- Mercury
- Venus
- Earth
- Mars
- Jupiter
- Saturn
- Uranus
- Neptune
Interesting Facts
- The Sun contains about 99.8% of the total mass of the Solar System.
- Mercury is the closest planet to the Sun.
- Venus is the hottest planet.
- Earth is the only known planet that supports life.
- Mars is called the Red Planet.
- Jupiter is the largest planet.
- Saturn is famous for its beautiful rings.
- Uranus rotates on its side.
- Neptune is the farthest planet from the Sun.
Advantages
- Easy to build.
- Attractive LED lighting.
- Improves understanding of astronomy.
- Low-cost science project.
- Excellent for school exhibitions.
- Can be upgraded into a motorized working model.
Applications
- Science exhibitions
- Astronomy demonstrations
- Classroom learning
- STEM education
- Space science projects
- Educational displays
Learning Outcomes
Students will learn:
- The names and order of the planets.
- The structure of the Solar System.
- The role of the Sun.
- Planetary revolution.
- Basic concepts of astronomy.
- The importance of gravity in keeping planets in orbit.
Precautions
- Handle LEDs and wires carefully.
- Use hot glue with adult supervision.
- Paint the planets before assembly.
- Ensure all rods are firmly fixed.
- Hide electrical wiring for a neat finish.
- Switch OFF the power after use.
Conclusion
The Solar System Working Model is an engaging and educational science project that brings astronomy to life. With a glowing Sun, illuminated stars, and accurately positioned planets, it provides a clear visual representation of our Solar System. This low-cost and attractive model is ideal for school science exhibitions, helping students confidently explain planetary order, the role of the Sun, and the fascinating structure of our cosmic neighborhood.