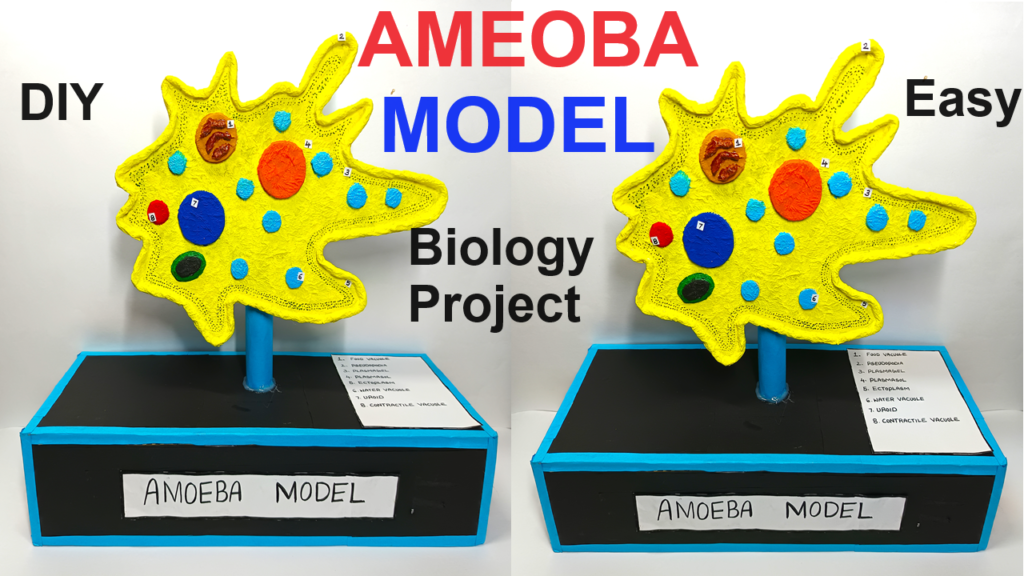
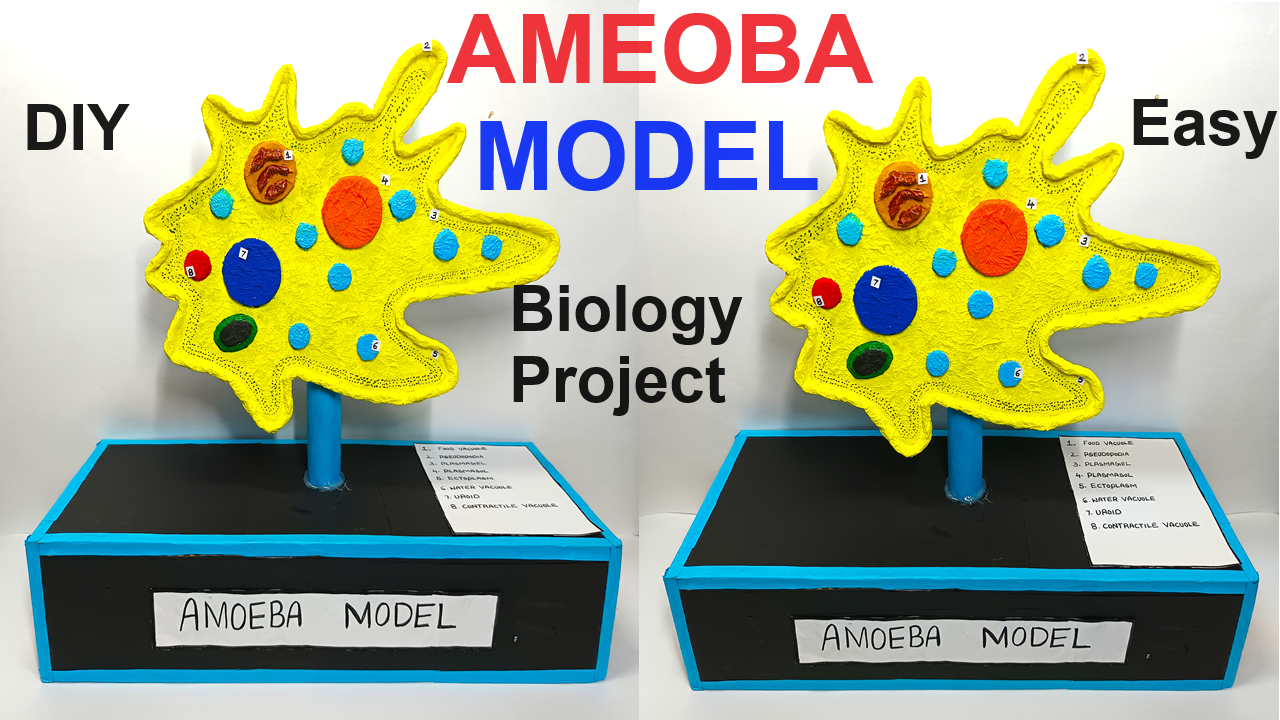
Creating a model of an amoeba for a science project using cardboard and colored paper is a creative way to help students learn about this single-celled organism.

Here’s a step-by-step guide on how to make this model:
Materials Needed:
- Cardboard: For the base and structure of the amoeba.
- Colored Paper: For representing different parts of the amoeba.
- Markers or Paint: To add details and label the parts.
- Glue: For assembling the parts.
- Scissors or Craft Knife: For cutting cardboard and paper.
- Googly Eyes or Beads (Optional): To make the model more visually engaging.
- Labels: To identify different parts of the amoeba.
Step-by-Step Video Instructions:
1. Creating the Base:
- Cut the Base Shape: Start by cutting a large, irregular shape from the cardboard to represent the general outline of the amoeba. Amoebas have a flexible, changing shape, so make sure the shape is uneven and blob-like, with protrusions that represent pseudopodia (false feet).
- Add Layers for Depth: If you want the model to have more depth, you can cut multiple layers of cardboard in slightly smaller sizes and glue them on top of each other. This will give the model a 3D effect.
2. Covering the Base with Colored Paper:
- Cut the Colored Paper: Choose a color to represent the amoeba’s cytoplasm (typically light blue, green, or pink). Cut the colored paper to the shape of the cardboard base, leaving a little extra around the edges to fold over and glue to the back.
- Glue the Paper: Glue the colored paper onto the cardboard base. If you have multiple layers, cover each layer separately.
3. Creating the Amoeba’s Parts:
- Nucleus: Cut out a circular shape from a different colored paper (e.g., dark purple or red) to represent the nucleus, which is the control center of the cell. Glue this in the center of the amoeba.
- Cytoplasm: If you want to show the cytoplasm more distinctly, cut small pieces of slightly lighter-colored paper and glue them around the nucleus.
- Contractile Vacuole: Cut out a small circle from white or light-colored paper to represent the contractile vacuole, which helps regulate water within the cell. Place this near the edge of the amoeba.
- Food Vacuoles: Cut out a few small circles from different colored paper (e.g., brown or yellow) to represent food vacuoles, which are responsible for digestion. Place these in various parts of the amoeba.
- Pseudopodia: To emphasize the amoeba’s ability to move, you can add more colored paper strips or shapes extending from the edges to represent pseudopodia.
4. Adding Details and Labels:
- Draw Details: Use markers or paint to add more details, like small dots to represent the cytoplasm’s granular texture, or lines around the nucleus.
- Label the Parts: Cut small rectangles of paper and write the names of the parts of the amoeba (nucleus, cytoplasm, contractile vacuole, food vacuole, pseudopodia). Glue these labels next to the corresponding parts on the model.
5. Optional Finishing Touches:
- Googly Eyes or Beads: If you want to make the model more engaging, you can add googly eyes or small beads on the surface of the amoeba to represent various cellular components or just for fun.
- Background Display: Consider mounting the amoeba on a larger piece of cardboard to serve as a background. You can add information about amoebas or their functions on this background.
Display and Demonstration:
- Explain the Parts: Use the labeled model to explain the different parts of the amoeba and their functions.
- Interactive Element: If possible, make the pseudopodia flexible so that you can move them around to demonstrate how the amoeba changes shape and moves.
This model is not only visually appealing but also an effective way to teach the structure and function of an amoeba. It’s simple to make with basic materials, making it a great choice for a science project exhibition.

