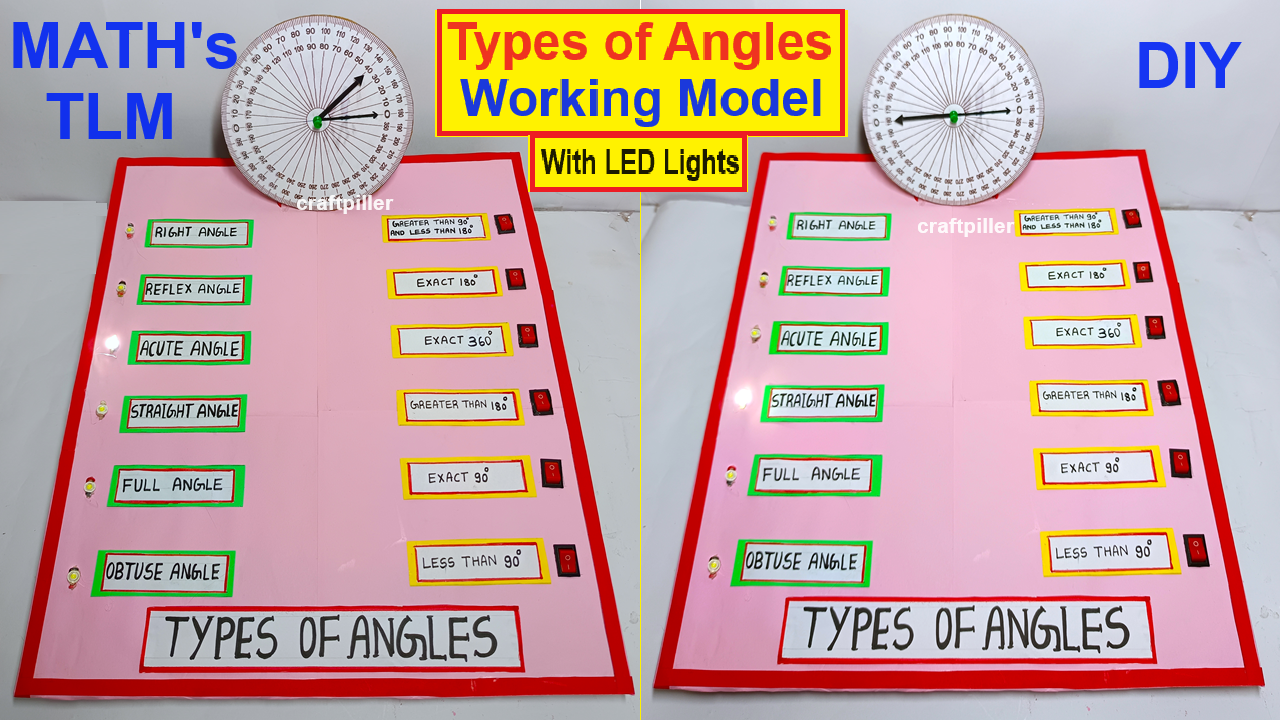
Creating a working model to teach the types of angles using LED lights, a 9V battery, and a matching board with definitions is an excellent educational project.
This model will help students understand the different types of angles (acute, right, obtuse, straight, reflex) by lighting up the correct angle when matched with its definition.

Here’s how you can build it:
Materials Needed:
- Cardboard or Foam Board: For the base and the matching board.
- Colored LED Lights: Different colors for each type of angle.
- 9V Battery: To power the LEDs.
- Battery Holder: For easy connection to the battery.
- Switches or Matching Pins: To connect the angles with their definitions.
- Wires: To connect the LEDs to the battery and switches.
- Resistors: To prevent the LEDs from burning out (if needed, depending on the LEDs used).
- Glue, Tape, and Scissors: For assembling the parts.
- Markers or Paint: For labeling the angles and definitions.
- Brass Fasteners or Paper Clips: To create a simple matching mechanism if using a matching board.
Step-by-Step Video Instructions:
1. Creating the Base and Angles:
- Cut the Base: Cut out a large piece of cardboard or foam board to serve as the base of your model.
- Draw the Angles: On the base, draw different angles: acute, right, obtuse, straight, and reflex. You can place them in a row or in a circular pattern, depending on your design preference.
- Label the Angles: Clearly label each angle with its name below or beside it.
2. Setting Up the LEDs:
- Position the LEDs: Place an LED near each angle. Use different colors for each type of angle to make it visually distinctive.
- Drill or Punch Holes: Carefully drill or punch small holes in the cardboard where the LEDs will be inserted. The LEDs should be placed so that they can illuminate the angle clearly.
- Insert the LEDs: Insert the LEDs through the holes, with the wires extending to the back of the cardboard. Secure them in place with glue or tape.
3. Creating the Matching Board:
- Cut the Matching Board: Cut another piece of cardboard or foam board to create the matching board. This will hold the definitions of the angles.
- Write the Definitions: Write the definitions of each type of angle (e.g., “An angle less than 90 degrees” for an acute angle) on the matching board.
- Add Matching Mechanism: Below each definition, place a brass fastener or create a simple pin system that, when connected to the correct angle on the base, will complete the circuit and light up the corresponding LED.
4. Wiring the LEDs:
- Prepare the Circuit: Connect each LED to a wire, ensuring that each LED has its own wire leading to the matching mechanism.
- Attach Resistors: If needed, solder or twist a resistor onto the positive leg (longer leg) of each LED to prevent excess current from damaging the LEDs.
- Common Ground: Connect all the negative wires from the LEDs to a common ground, which will then connect to the negative terminal of the battery.
- Connect to the Matching Board: Connect the positive wires from each LED to the corresponding brass fastener or pin on the matching board. The other side of the fastener or pin will connect to the battery’s positive terminal through a switch or directly.
5. Setting Up the Power Supply:
- Battery Placement: Secure the 9V battery in a holder on the back of the base, ensuring it is accessible for replacement if needed.
- Wiring to Battery: Complete the circuit by connecting the wires from the matching board to the battery. Ensure that when the correct angle is matched with its definition, the circuit closes, and the corresponding LED lights up.
6. Testing and Final Touches:
- Test the LEDs: Match each definition to its angle and check if the correct LED lights up.
- Label the Definitions: Clearly label the definitions on the matching board.
- Decorate the Model: Use markers or paint to make the model more visually appealing.
Display and Demonstration:
- Interactive Element: Allow users to match the angle definitions with the correct angles on the model. When they connect the correct match, the corresponding LED will light up.
- Educational Explanation: Prepare a brief explanation or chart to help users understand each type of angle and how the matching mechanism works.
This interactive model is a fun and effective way to help students learn about angles by providing both a visual and hands-on learning experience.

