Creating a working model of photosynthesis for a science exhibition using cardboard, an LED bulb cover as the Sun, a plastic tray to hold a live plant, and paper clouds is a fantastic idea.

Here’s a step-by-step guide to help you build this model:
Materials Needed:
- Cardboard – For creating the base, backdrop, and other components.
- LED bulb cover – To simulate the Sun.
- LED bulb and holder – To provide light.
- Battery pack or power source – To power the LED bulb.
- Plastic tray – To hold the live plant with soil.
- Live plant – Preferably a small potted plant like a houseplant or small sapling.
- Paper – To create clouds and arrows.
- Markers and paints – For labeling and decorating.
- Hot glue gun or strong adhesive – For assembly.
- Scissors or craft knife – For cutting cardboard and paper.
- Wire and switch – To connect the LED bulb to the battery pack.
- Tape – For securing components.
Step-by-Step Instructions:
Step 1: Prepare the Base and Backdrop
- Create the Base:
- Cut a large rectangular piece of cardboard to serve as the base. This will hold the entire model.
- Create the Backdrop:
- Cut a piece of cardboard to serve as the backdrop. Attach this to the back edge of the base to form a vertical support.
- Paint or decorate the backdrop to resemble a natural environment (e.g., sky, trees, grass).
Step 2: Prepare the Sun
- Create the Sun:
- Use the LED bulb cover as the Sun. Paint it yellow to resemble the Sun.
- Attach the LED bulb inside the cover.
- Mount the Sun:
- Attach the LED bulb cover to the top of the backdrop using hot glue or strong adhesive. Ensure it’s positioned to shine light onto the plant in the tray.
- Connect the LED bulb to the battery pack using wires and a switch to control the light.
Step 3: Prepare the Plant Tray
- Plant Setup:
- Place a live plant with soil in the plastic tray. Ensure the plant is healthy and positioned to receive light from the LED Sun.
- Place the tray on the base in front of the backdrop.
Step 4: Create the Clouds and Arrows
- Paper Clouds:
- Cut out cloud shapes from white paper. These will represent CO₂ coming from the atmosphere.
- Label the clouds with “CO₂”.
- Oxygen Arrows:
- Cut out arrow shapes from paper. Paint or color them green and label them with “O₂” to represent oxygen being released by the plant.
Step 5: Assemble the Model
- Attach the Clouds:
- Attach the paper clouds to the backdrop or hang them from the top edge using string. Position them above the plant to indicate CO₂ coming down to the plant.
- Attach the Arrows:
- Place the oxygen arrows around the plant pointing away from it, indicating that the plant is releasing oxygen.
Step 6: Wiring the LED Bulb
- Connect the LED Bulb:
- Connect the wires from the LED bulb to the battery pack. Use a switch to easily turn the LED light on and off.
- Secure all connections and insulate any exposed wires to ensure safety.
Step 7: Final Adjustments and Testing
- Test the Model:
- Turn on the LED light to ensure it illuminates the plant properly, simulating sunlight.
- Check the positioning of the clouds and arrows to ensure they clearly represent the flow of CO₂ to the plant and O₂ from the plant.
- Make Adjustments:
- Make any necessary adjustments to the placement of the components or decorations to improve the visual appeal and clarity of the model.
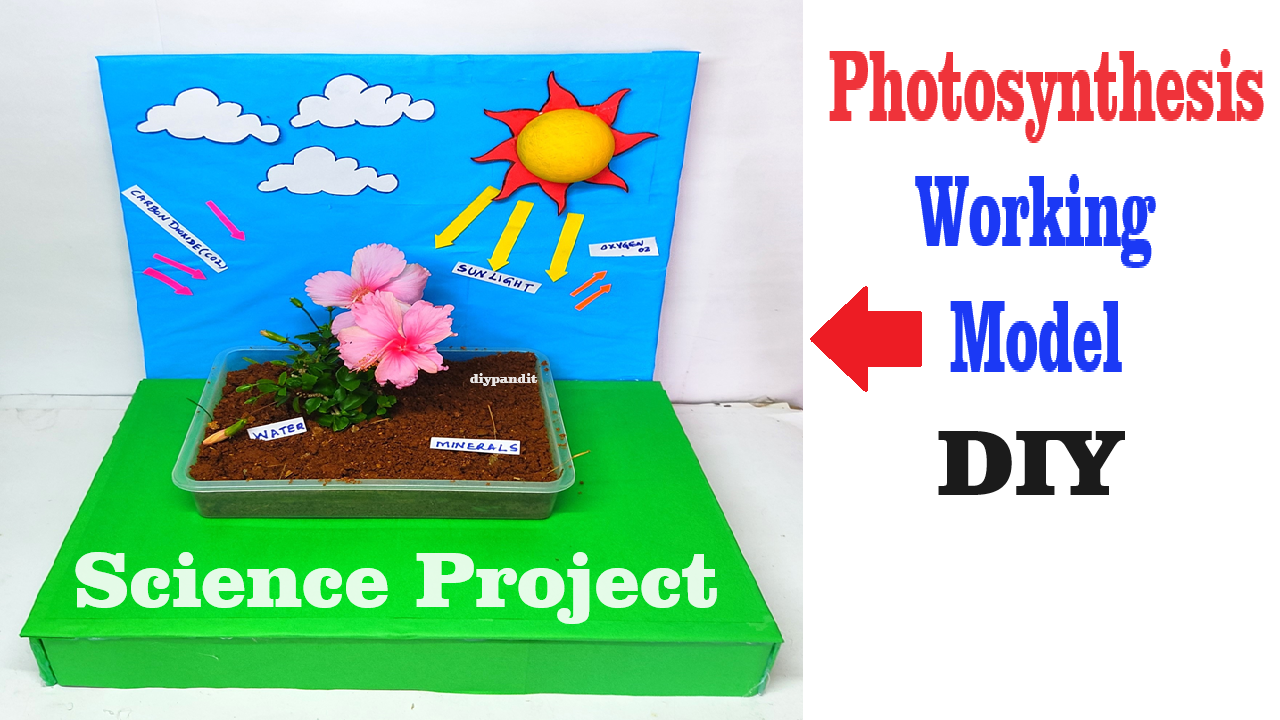
Diagram of the Setup:
- Create a simple diagram to visualize the assembly. Include the base, backdrop, Sun (LED bulb cover), plant tray, paper clouds (CO₂), and oxygen arrows (O₂).
Summary:
This working model will effectively demonstrate the process of photosynthesis. The LED bulb cover as the Sun provides light, the live plant represents the photosynthesis process, and the paper clouds and arrows show the intake of CO₂ and release of O₂. This interactive model will help students understand how plants convert light energy into chemical energy, using carbon dioxide and releasing oxygen.