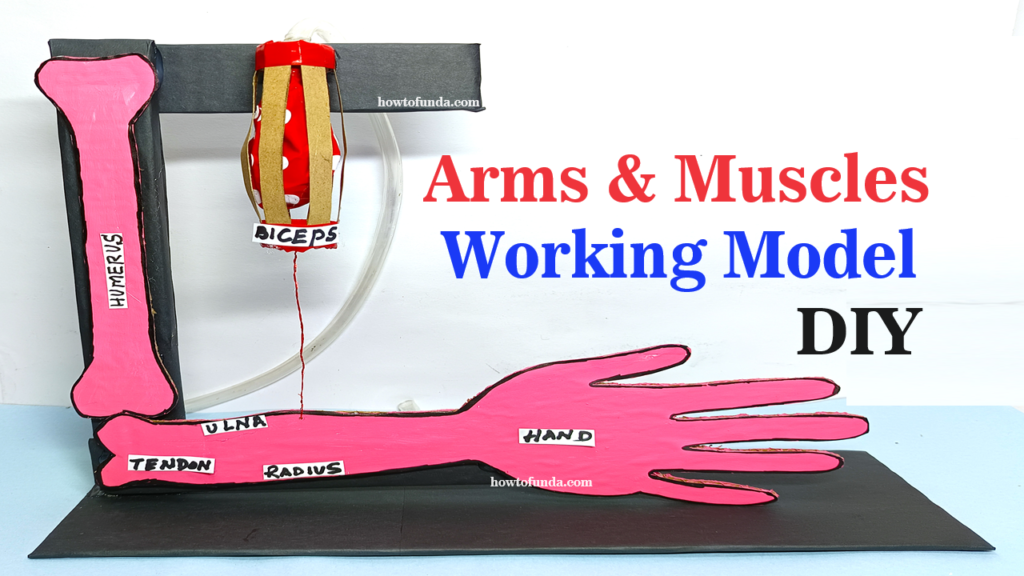
Creating a working model of arms and muscles using balloons, pipes, cardboard, nuts and bolts, and thread can be a fascinating and educational project for a science exhibition.

Below are the steps to create such a model:
Materials Needed:
- Balloons (several)
- Pipes (thin and flexible, such as straws or bendable drinking straws)
- Cardboard
- Nuts and bolts
- Thread
- Scissors
- Markers or paint
- Glue or tape
step by step video instructions:
- Research and Planning:
- Begin by researching the anatomy of the human arm and the muscles involved in its movement. Understand how muscles contract and relax to produce different movements.
- Sketch out a rough plan for your model, including the main components and their relative sizes.
- Create the Skeleton:
- Use pipes (straws or bendable drinking straws) to represent the bones of the arm. Cut the pipes into appropriate lengths to represent the upper arm, lower arm, and fingers.
- Attach the pipes together using nuts and bolts to create a flexible skeleton that can be manipulated to demonstrate different movements.
- Add Muscles (Balloons):
- Inflate balloons to represent muscles. Use different sizes and shapes of balloons to represent different muscle groups.
- Attach the balloons to the skeleton using thread or string. Position them around the pipes to represent the muscles of the arm.
- Create Joints (Cardboard):
- Cut out small pieces of cardboard to represent joints, such as the elbow and wrist.
- Attach the cardboard joints to the skeleton using glue or tape. Ensure they are flexible enough to allow movement.
- Demonstrate Muscle Contraction and Relaxation:
- Use thread or string to simulate tendons connecting the muscles to the bones. Attach one end of the thread to the balloons representing the muscles and the other end to the pipes representing the bones.
- Manipulate the threads to demonstrate how muscles contract and relax to produce movement. Pulling the thread will cause the balloons to inflate (contraction), while releasing the tension will cause them to deflate (relaxation).
- Detailing and Labeling:
- Use markers or paint to add details and color to your model. Add labels to identify the different muscles and bones of the arm.
- Include information about the functions of each muscle group and how they work together to produce movement.

