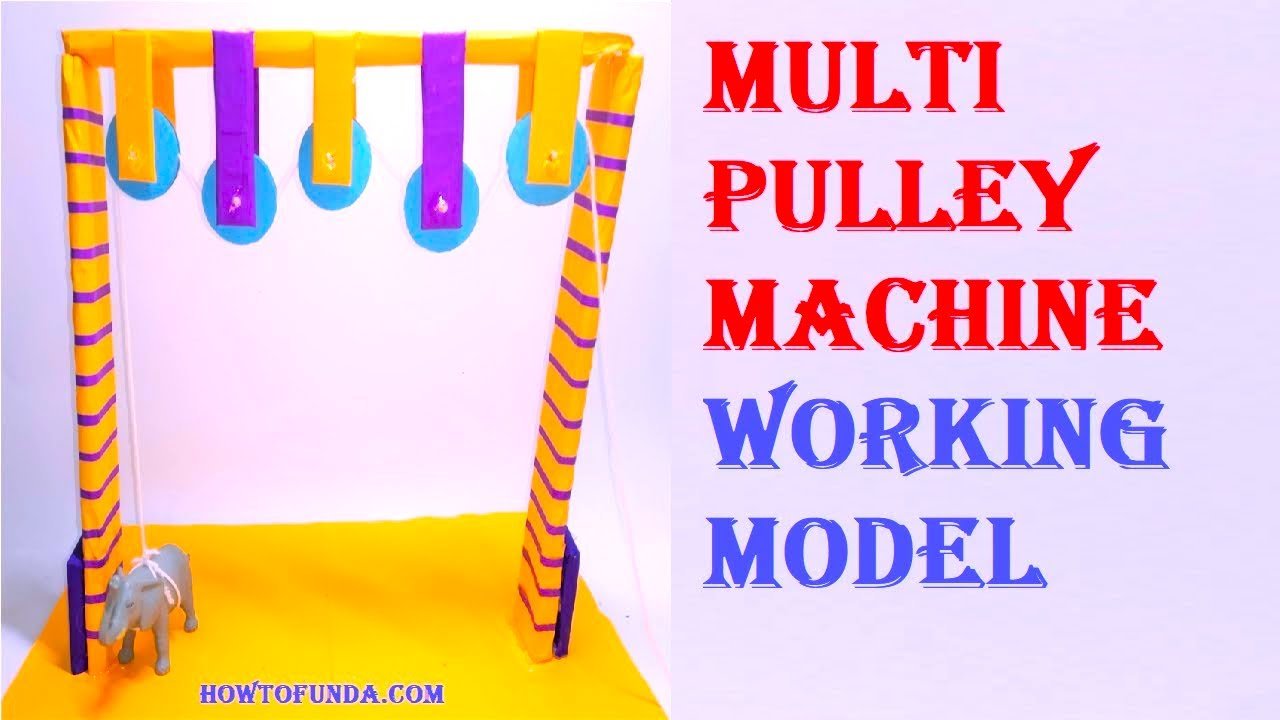
Creating a working model of a multiple pulley system using cardboard is a great way to demonstrate how pulleys can reduce the effort needed to lift a load.

Here’s a detailed step-by-step guide to making a 5-pulley system science project:
Materials Needed:
- Cardboard sheets
- Colored paper (optional for decoration)
- Scissors
- Glue or adhesive
- Ruler
- Markers or pens (for detailing)
- Brass fasteners (split pins) or small nails (for rotating parts)
- String
- Small dowels or sticks (for axles and supports)
- Paper clips or small weights (to demonstrate the machine)
- Small box or weight (to serve as the load)
Step by Step Video Instructions:
1. Prepare the Base:
- Cut a large rectangular piece of cardboard to serve as the base for your model. This will provide a stable platform for your pulley system.
2. Create the Pulley Wheels:
- Pulley Wheels: Cut five circular pieces of cardboard to serve as the pulley wheels. Each wheel should be about 2-3 inches in diameter.
- Grooves: Cut a smaller circle from the center of each pulley wheel to create a groove for the string. You can use a compass to ensure the circles are even.
3. Create the Supports:
- Vertical Supports: Cut four strips of cardboard, each about 10-12 inches long and 1 inch wide, to serve as vertical supports. These will hold the pulleys in place.
- Crossbars: Cut two shorter strips of cardboard, each about 6 inches long and 1 inch wide, to connect the vertical supports at the top and bottom.
4. Assemble the Pulley System:
- Base Support Assembly: Glue two vertical supports to the base about 4 inches apart. Attach one of the crossbars at the top to connect these two supports, forming a frame. Repeat this process with the other two vertical supports and the remaining crossbar.
- Attach Pulleys: Attach the first two pulleys to the top crossbar of one frame using small dowels or sticks as axles, ensuring they can rotate freely. Attach the next two pulleys to the bottom crossbar of the same frame. The fifth pulley will be attached to the top crossbar of the second frame.
5. String the Pulley System:
- String Preparation: Cut a long piece of string. Thread the string through the pulleys, starting from the top pulley on the second frame, down to the first bottom pulley on the first frame, back up to the second top pulley on the first frame, and continue this pattern.
- Load Attachment: Attach one end of the string to the small box (load). The other end will be used to pull and demonstrate the working of the pulley system.
6. Final Assembly and Adjustment:
- Check Alignment: Ensure all pulleys are aligned correctly and the string moves smoothly through each pulley wheel without slipping.
- Test the Mechanism: Test the pulley system by pulling the free end of the string to lift the load. Adjust the pulleys and string tension as necessary to ensure smooth operation.
Demonstration and Explanation:
- Multiple Pulley System: Explain that the multiple pulley system reduces the amount of force needed to lift a load by distributing the load across multiple wheels.
- Force Distribution: Demonstrate how the system works by pulling the free end of the string and lifting the load. Explain how the effort required is reduced due to the mechanical advantage provided by the multiple pulleys.
- Real-World Applications: Discuss real-world applications of pulley systems, such as in construction cranes, elevators, and theater stage rigging, where pulleys are used to lift heavy objects with less effort.
Final Touches:
- Stability: Ensure all parts are securely glued and stable.
- Testing: Conduct several tests to ensure the model works reliably and can effectively demonstrate the principles of the pulley system.
By following these steps, you can create a functional and visually appealing multiple pulley system model using cardboard. This project will effectively illustrate the mechanics of pulleys and their practical applications, making it an excellent choice for a science exhibition.

