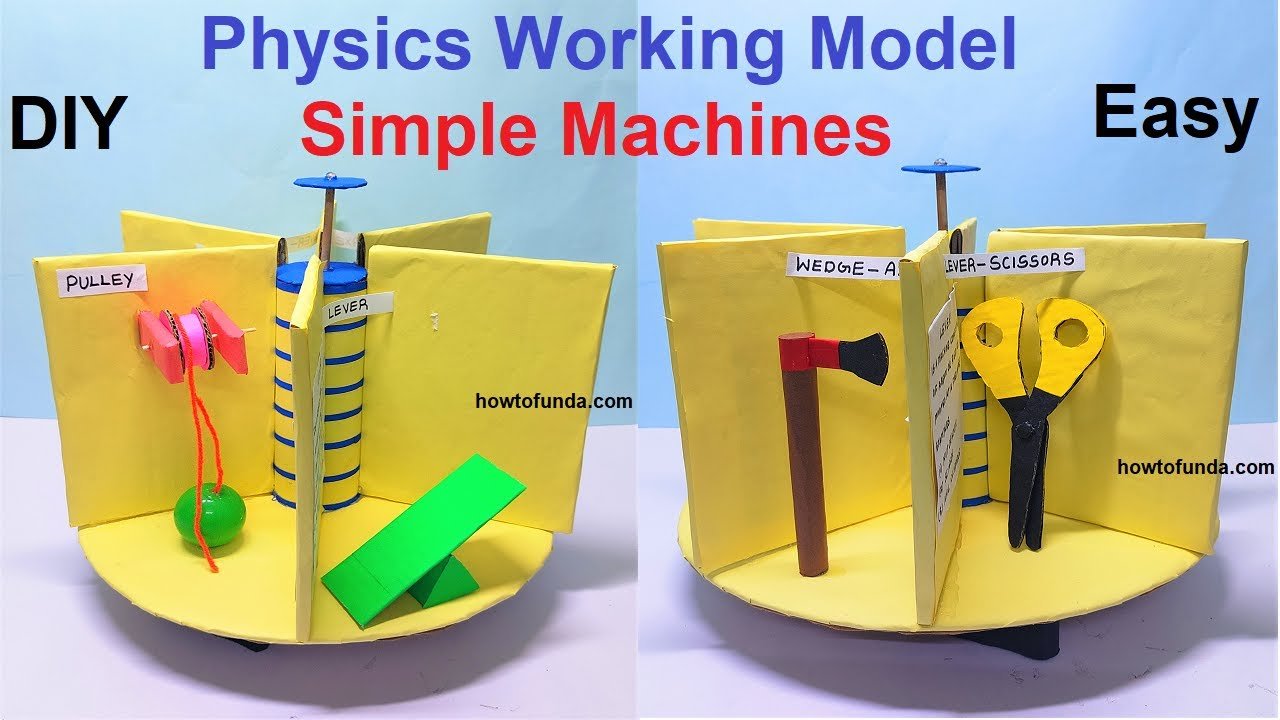
Creating a physics working model to demonstrate simple machines using cardboard and colored paper can be an engaging and educational project.
Here’s a step-by-step guide to making a rotatable model that showcases a lever, pulley, inclined plane, wheel and axle, and scissors.

Materials Needed:
- Cardboard sheets
- Colored paper
- Scissors
- Glue or adhesive
- Ruler
- Markers or pens (for detailing)
- Brass fasteners (split pins) or small nails (for rotating parts)
- String (for the pulley)
- Small dowels or sticks (for axles and supports)
- Paper clips or small weights (to demonstrate the machines)
Step by Step Video Instructions:
1. Prepare the Base:
- Cut a large piece of cardboard to serve as the base for your model. This will support all the simple machines.
2. Create a Lever:
- Fulcrum: Cut a small triangular piece of cardboard to serve as the fulcrum.
- Lever Arm: Cut a long rectangular piece of cardboard to serve as the lever arm. Make sure it can pivot on the fulcrum.
- Assembly: Place the lever arm on the fulcrum and attach them to the base using a brass fastener, allowing the lever to pivot.
3. Create a Pulley:
- Pulley Wheel: Cut a circular piece of cardboard to serve as the pulley wheel.
- Pulley Groove: Cut a smaller circle from the center of the pulley wheel to create a groove for the string.
- Support: Cut two strips of cardboard and attach them vertically to the base to hold the pulley wheel.
- Assembly: Attach the pulley wheel between the supports using a small dowel or stick as an axle. Wrap a piece of string around the pulley.
4. Create an Inclined Plane:
- Plane: Cut a rectangular piece of cardboard to serve as the inclined plane.
- Supports: Cut two triangular pieces of cardboard to support the inclined plane at an angle.
- Assembly: Attach the inclined plane to the supports and then to the base.
5. Create a Wheel and Axle:
- Wheels: Cut two identical circular pieces of cardboard to serve as wheels.
- Axle: Use a small dowel or stick as the axle.
- Assembly: Attach the wheels to either end of the axle. Ensure the axle can rotate freely when attached to the base.
6. Create Scissors (a type of lever):
- Blades: Cut two long, narrow pieces of cardboard to serve as the scissor blades.
- Pivot: Attach the blades together at the middle using a brass fastener, allowing them to pivot like real scissors.
- Handles: Cut and attach small loops at the ends of the blades for handles.
- Assembly: Place the scissors on the base and label them.
Demonstration and Explanation:
- Lever: Place a small weight (e.g., a paper clip) on one end of the lever and show how pressing on the other end lifts the weight.
- Pulley: Attach a small weight to the string and show how pulling the string raises the weight.
- Inclined Plane: Place a small object at the top of the inclined plane and let it roll or slide down to demonstrate how it reduces the effort needed to lift the object.
- Wheel and Axle: Roll the wheel and axle to show how it reduces friction and makes it easier to move objects.
- Scissors: Use the cardboard scissors to cut a piece of paper, demonstrating how they work as a lever.