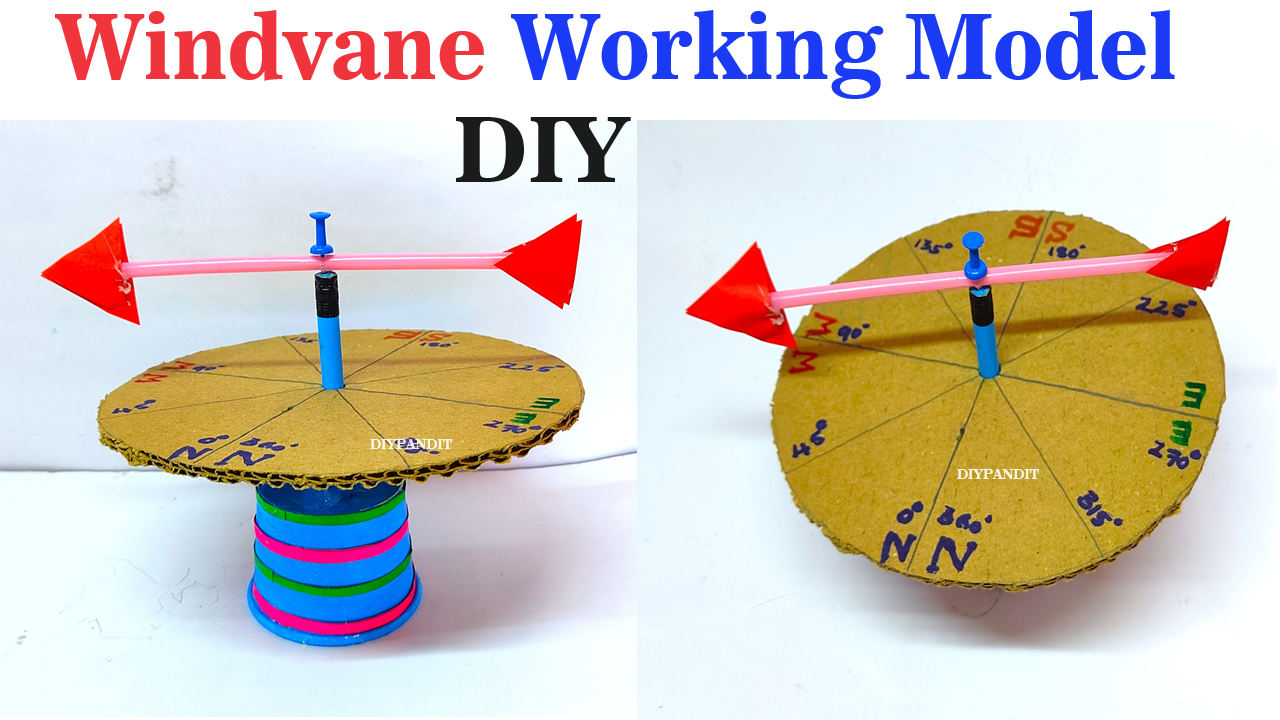
Creating a wind vane model for a science exhibition project using simple materials like cardboard, a pencil, a pushpin, a straw, and a paper cup can be both fun and educational. Here’s a step-by-step guide:

Materials Needed:
- Cardboard (for the wind vane and base)
- Pencil
- Pushpin
- Straw
- Paper cup
- Glue or tape
- Markers or paint (optional for decorating)
Step by Steps Video Instructions on Wind vane :
- Prepare the Wind Vane:
- Cut a square or rectangular piece of cardboard for the wind vane.
- Draw an arrow shape on the cardboard using a pencil.
- Cut out the arrow shape carefully.
- Attach the Straw:
- Cut a small piece of straw, around 1 inch (2.5 cm) long.
- Attach the piece of straw vertically to the back of the cardboard arrow using glue or tape.
- Ensure it’s centered and straight.
- Make the Base:
- Cut a small square or rectangle from cardboard to act as the base of the wind vane.
- Cut a small slit in the center of the base, large enough to fit the straw through.
- Attach the Wind Vane to the Base:
- Insert the straw attached to the wind vane through the slit in the base.
- Make sure the wind vane can rotate freely.
- Create the Stand:
- Take a paper cup and cut off the bottom to make a short cylinder.
- Stand the cylinder on its wider opening.
- Secure the Wind Vane on the Stand:
- Use glue or tape to attach the base of the wind vane to the top of the paper cup stand.
- Ensure it’s securely attached but can still rotate freely.
- Mark Directions on the Wind Vane:
- Use a marker or paint to mark the cardinal directions (North, South, East, West) on the wind vane.
- Alternatively, you can use colored paper or stickers to represent the directions.
- Add the Pointer:
- Push a pushpin through the straw at the top of the wind vane.
- Make sure it’s balanced so that it can easily turn with the wind.
Wind Vane – How It Works:
- When the wind blows, it will push against the arrow on the wind vane, causing it to rotate.
- The wind vane will point in the direction from which the wind is coming.
- By observing the direction the wind vane points, you can determine the direction of the wind.
- The pointer (pushpin) will help in accurately indicating the wind direction.
This simple wind vane model demonstrates the basic principles of wind direction measurement and can be a great addition to a science exhibition project!