Introduction to Volcano Eruption:
A volcano eruption is a spectacular and often dramatic geological event where molten rock, ash, and gases are expelled from the Earth’s crust.
Volcanoes are openings in the Earth’s surface that allow magma, ash, and gas to escape. Eruptions can range from relatively gentle lava flows to explosive events with significant ash clouds, pyroclastic flows, and even the ejection of volcanic rocks.
Volcanoes working Model using natural sand or soil
Creating a volcano eruption working model made up of natural sand or soil can be a fun and educational project.
Here’s a step-by-step guide to help you build a simple yet impressive volcano model:

Materials Needed:
- Large bottle or plastic container (to form the volcano structure)
- Natural sand or soil
- Baking soda
- Vinegar
- Dish soap
- Red food coloring
- Cardboard
- Paints and brushes
- Craft knife or scissors
- Newspaper or plastic sheet (to protect the work area)
- Water
Video Step by Step Procedure:
1. Set Up the Work Area:
- Lay down newspaper or a plastic sheet to protect the work area from spills and splatters.
2. Create the Volcano Structure:
- Place the bottle or plastic container in the center of your work area. This will be the structure of your volcano. You can use additional materials like cardboard to shape the volcano’s structure around the bottle.
3. Add Natural Sand or Soil:
- Cover the entire structure with a layer of natural sand or soil. This will give your volcano a realistic, natural appearance.
4. Paint the Volcano (Optional):
- If you want to add more detail, you can paint the exterior of the volcano. Use browns and greens to mimic the colors of a real volcano. Allow the paint to dry completely.
5. Create the Volcanic Cone:
- Cut a piece of cardboard to create a cone shape. Attach this cone to the top of the bottle, forming the summit of your volcano. You can secure it with tape or glue.
6. Decorate the Cone (Optional):
- Paint the cardboard cone to match the colors of the volcano. This adds a realistic touch to the model.
7. Prepare the Eruption Solution:
- In a separate container, mix a solution of vinegar, a few drops of dish soap, and red food coloring. This will be the eruption solution.
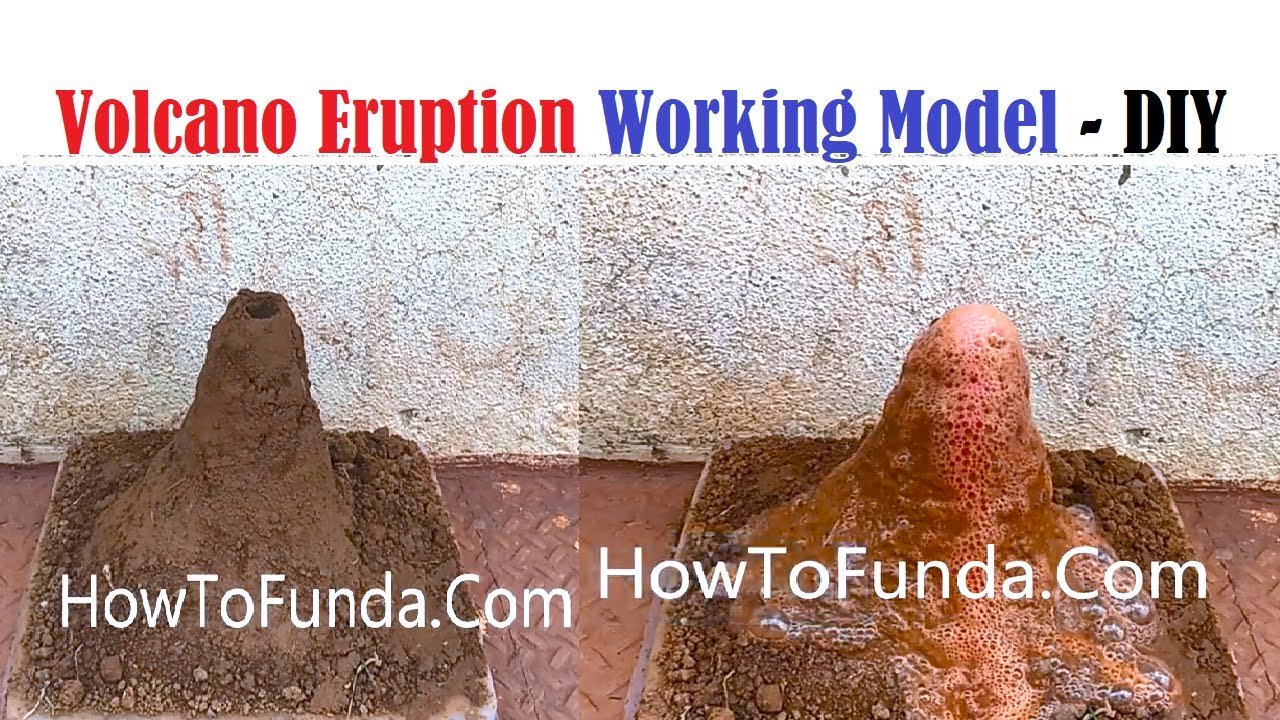
8. Start the Eruption:
- Place a tablespoon of baking soda into the bottle (inside the cone). When you’re ready for the eruption, pour the vinegar solution into the bottle, and watch the eruption occur.
9. Observe and Document:
- Observe the eruption and document what you see. Note the flow of “lava” (the foaming mixture) down the sides of the volcano.
10. Discuss the Science: – Explain the science behind the eruption. The reaction between baking soda (a base) and vinegar (an acid) produces carbon dioxide gas, creating the foaming eruption.
11. Repeat as Desired: – You can repeat the eruption by adding more baking soda and vinegar. Experiment with different amounts to observe variations in eruption intensity.