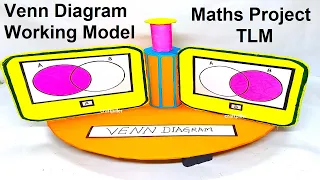
In this post we write about making of the Venn Diagram Working Model using cardboard and color paper
Creating a Venn Diagram working model using cardboard and color paper can be a great way to visually represent the relationships and differences between different sets of data.

Let’s build a 3D Venn Diagram model with partition for each type using these materials.
Materials needed:
- Cardboard (for the base and circles)
- Color paper (for representing the elements and sets)
- Scissors
- Glue or double-sided tape
- Marker pens or sketch pens
Step-by-step video instructions:
- Base:
- Cut a large rectangular or square piece of cardboard to serve as the base for the model.
- Venn Diagram Circles:
- Draw three overlapping circles on the color paper. Use three different colors to distinguish the circles.
- Cut out the circles carefully.
- Labeling the Sets:
- Use marker pens or sketch pens to label each circle with the name of a set (e.g., Set A, Set B, Set C).
- Overlapping Areas:
- Identify the overlapping regions between the circles.
- Cut out small rectangular pieces from color paper to represent the overlapping areas of the sets.
- Elements:
- Write down the elements that belong to each set on color paper.
- Cut out each element and categorize them into the corresponding sets.
- For example, if you have elements “1,” “2,” and “3” for Set A, cut out three small pieces of color paper with “1,” “2,” and “3” written on them.
- Arranging the Elements:
- Place the circles on the base, overlapping as per the Venn Diagram.
- Arrange the elements in their respective sets within the circles.
- Place the elements that belong to the overlapping areas in the appropriate overlapping regions.
- Gluing the Circles:
- Once the circles and elements are arranged as desired, glue them onto the base.
- Labeling and Details:
- Use marker pens or sketch pens to label each element and the overlapping regions.
- You can also add titles or descriptions to the model to explain the Venn Diagram’s purpose or the relationships between the sets.
- Decorating the Model:
- Use markers or color paper to decorate the model and add more details to make it visually appealing.
Now, you have a 3D working Venn Diagram model made from cardboard and color paper with partitions for each type. This model can be a helpful visual aid to understand the relationships and differences between different sets of data. It’s an interactive and creative way to explore the concept of Venn Diagrams and their applications in data representation and analysis.
#venndiagram #mathstlm #workingmodel #mathsproject #tlm #diy #craftpiller