
In the dynamic landscape of modern urban planning, the pursuit of sustainability has become a driving force for innovation.
Harnessing renewable energy sources and implementing energy-efficient technologies are pivotal steps towards creating more eco-conscious and resilient cities.
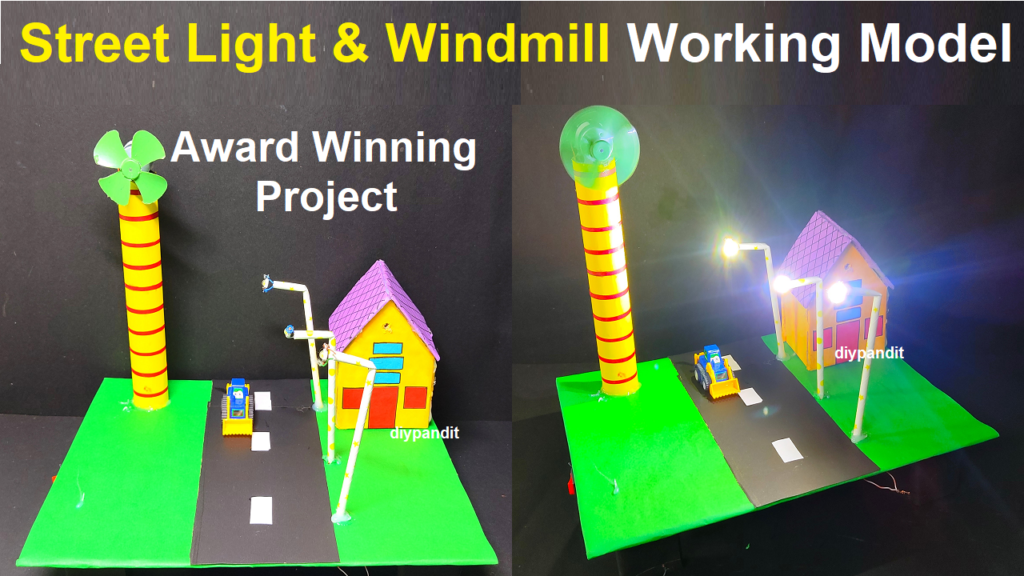
The “Street Light and Windmill Working Model” project exemplifies this ethos by ingeniously combining two potent elements of sustainable urban design.
Creating a street light and windmill working model for a science project is a great way to explore renewable energy sources and sustainable urban lighting solutions. Here’s how you can build this combined model:
Materials Needed:
- Cardboard sheets (for structure)
- LED lights
- DC motor (small)
- Small blades (for windmill)
- Wires and soldering equipment (or breadboard and jumper wires)
- Resistors (if required)
- Battery or power source (e.g., 9V battery and holder)
- Switch
- Infrared (IR) sensor (optional)
- Glue, tape, scissors, and a cutter
Steps:
Building the Windmill:
- Design the Windmill Structure:
- Draw and cut out the windmill blades and the support structure from the cardboard.
- Mount the Windmill Blades:
- Attach the blades to the DC motor. Ensure they are balanced and can spin freely.
- Install the DC Motor:
- Attach the DC motor to the windmill support structure using glue or tape. Position it so that the spinning shaft is facing the windmill blades.
- Wire the Windmill:
- Connect the DC motor to the power source. Ensure it’s connected in a way that allows the motor to spin when power is applied.
Building the Street Light:
- Design the Street Light Structure:
- Draw and cut out the shape of a street light post and the top part where the LED lights will be attached from the cardboard.
- Mount the LED Lights:
- Attach the LED lights to the top part of the street light structure. Space them out evenly to provide adequate light coverage.
- Wire the Street Light:
- Connect the positive terminals of the LED lights to the positive terminal of the power source.
- Connect the negative terminals of the LED lights to the negative terminal of the power source.
Integrating the Model:
- Position the Windmill and Street Light:
- Place the windmill and street light structures side by side on the base.
- Connect the Circuits:
- Combine the circuits by connecting the positive and negative terminals of the power source to both the windmill motor and the LED lights.
- Add a Switch (Optional):
- Include a switch in the circuit to allow manual control over the model.
- Optional: Integrate an IR Sensor (for automatic control):
- Include an IR sensor to detect motion and activate the street light when someone approaches.
- Power On and Test:
- Power on the circuit and observe how the windmill starts to spin, generating electricity. Simultaneously, the LED lights should illuminate, demonstrating the concept of renewable energy-powered street lighting.
- Record Observations:
- Document how the windmill’s rotation affects the brightness of the LED lights.
- Optional: Experiment with Wind Speeds:
- By using a fan or changing the wind speed, you can simulate different wind conditions to observe the model’s behavior.
This working model exemplifies the potential of harnessing renewable energy sources for practical applications like street lighting, contributing to a more sustainable and eco-friendly urban environment.