A space station is a large spacecraft in orbit around the Earth where astronauts live and work for extended periods.
Unlike spacecraft that are used for space exploration missions and then return to Earth, a space station remains in space and serves as a long-term habitat for scientific research, technological experiments, and international cooperation in space exploration.
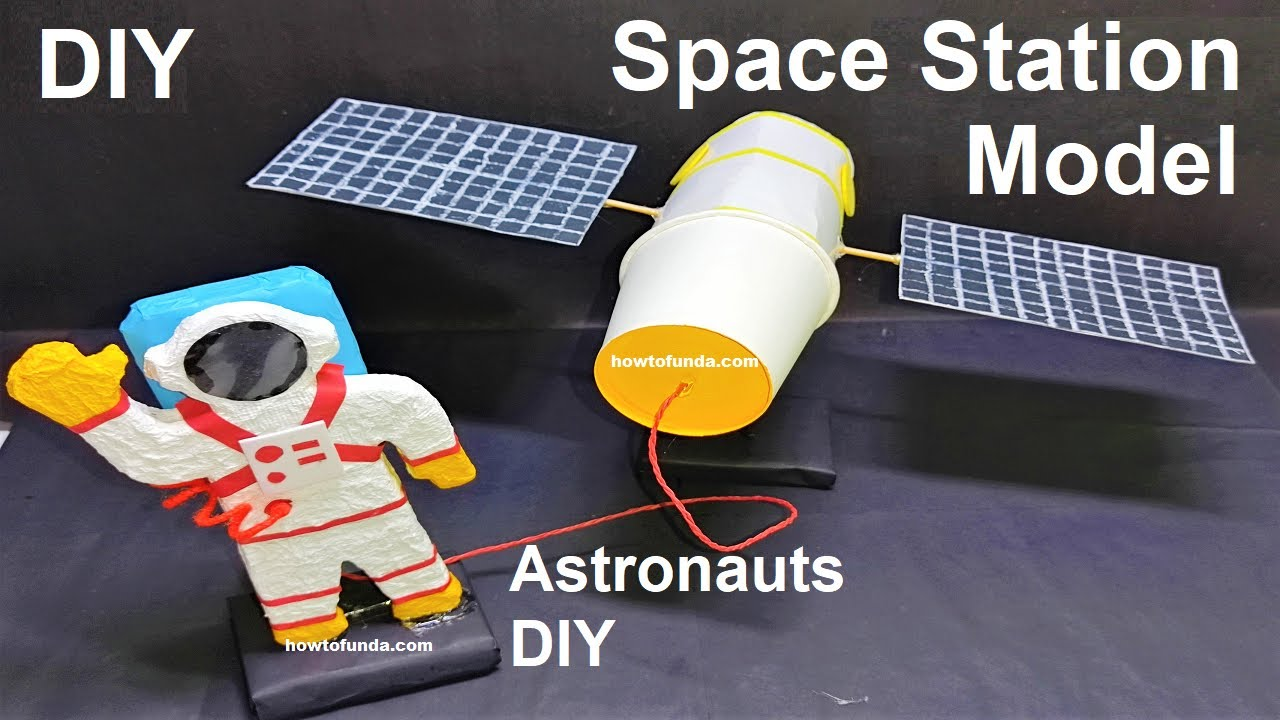
Creating a space station science project model with an astronaut using waste materials like cardboard, paper, glue adhesive, and paper cups is a creative and eco-friendly way to explore space-themed projects.

Here’s a step-by-step guide:
Materials Needed:
- Cardboard
- Paper
- Glue adhesive
- Paper cups
- Scissors
- Markers or paint
- Pencil
- Ruler
- String or thread
- Colored tape (optional)
- Craft knife (adult supervision required)
Instructions of Making Space Station:
1. Design the Space Station:
- Sketch the design of your space station on paper. Decide on the number of modules, shape, and the location for the astronaut.
2. Create the Base:
- Cut a large piece of cardboard for the base of the space station. This will provide stability to your model.
3. Build the Space Station Modules:
- Cut smaller pieces of cardboard to represent individual modules of the space station. These could be cylindrical or rectangular in shape.
- Attach the modules to the base using glue adhesive, creating the structure of the space station.
4. Design the Astronaut:
- Create an astronaut by using a paper cup as the helmet and a small piece of cardboard or a rolled-up piece of paper for the body.
- Draw or paint the astronaut’s face and space suit.
5. Attach the Astronaut to the Space Station:
- Glue the astronaut onto the space station, either inside a module or floating next to it as if on a spacewalk.
6. Add Details:
- Use smaller pieces of cardboard or paper to add details like solar panels, antennas, or control panels to the space station.
7. Create Solar Panels:
- Cut small rectangular pieces of cardboard to represent solar panels.
- Attach these panels to the sides of the space station using glue adhesive.
8. Add 3D Elements:
- Use rolled-up pieces of paper or cardboard to add 3D elements like antennas or communication dishes to the space station.
9. Paint or Color:
- Paint or color the space station and astronaut using markers or paint. Add details to make it visually appealing.
10. Create Space Station Name:
- Cut out letters from paper or cardboard to create the name of your space station.
- Attach the name to the base or a visible part of the model.
11. Make Solar Arrays (Optional):
- Cut out triangular shapes from cardboard and cover them with aluminum foil to create solar arrays.
- Attach these solar arrays to the sides of the space station.
12. Add LED Lights (Optional):
- If you want to add a dynamic element, consider incorporating small LED lights powered by a battery to simulate the glow of the space station.
13. Hang the Space Station (Optional):
- Tie a string or thread to the top of the space station to hang it from a display or create the illusion of it floating in space.
14. Display Your Project:
- Once your space station model is complete, display it on a table, hang it, or place it in a diorama to showcase your creative work.