
Introduction to Soil Erosion:
Imagine you have a garden, and when it rains, the water washes away some of the soil from the ground.
That process, where the soil gets carried away by water or blown away by the wind, is called soil erosion.
What Happens in Soil Erosion:
- Rainfall Impact:
- When it rains, the raindrops hit the soil. If the rain is too strong, it can break apart the soil into tiny pieces.
- Running Water:
- The rainwater, now carrying those tiny pieces of soil, flows over the ground. It’s like a mini river on the surface.
- Loss of Soil:
- As this water moves, it takes some of the soil with it. The more it rains or the steeper the land, the more soil can be carried away.
- Wind Action:
- Wind can also blow away the top layer of soil. It’s like nature’s way of rearranging things.
Why It Matters:
- Fertile Soil Loss:
- Soil is like the skin of the Earth. It’s where plants grow, and it’s full of nutrients. When soil erodes, we lose the fertile part, making it harder for plants to grow.
- Impact on Farms:
- Farmers depend on good soil to grow crops. If too much soil erodes, it can affect their ability to produce healthy and abundant crops.
- Environmental Changes:
- Erosion can change the landscape over time. Hills might lose their shape, and valleys might fill up with eroded soil.
- Protecting Our Land:
- Understanding soil erosion helps us find ways to protect our land. Farmers use techniques to keep the soil in place, like planting cover crops or building terraces.
Soil Erosion Working Model Making
Creating a soil erosion science project using cardboard, newspaper, and soil to make a model of a house and plants can be an informative and visually engaging activity.
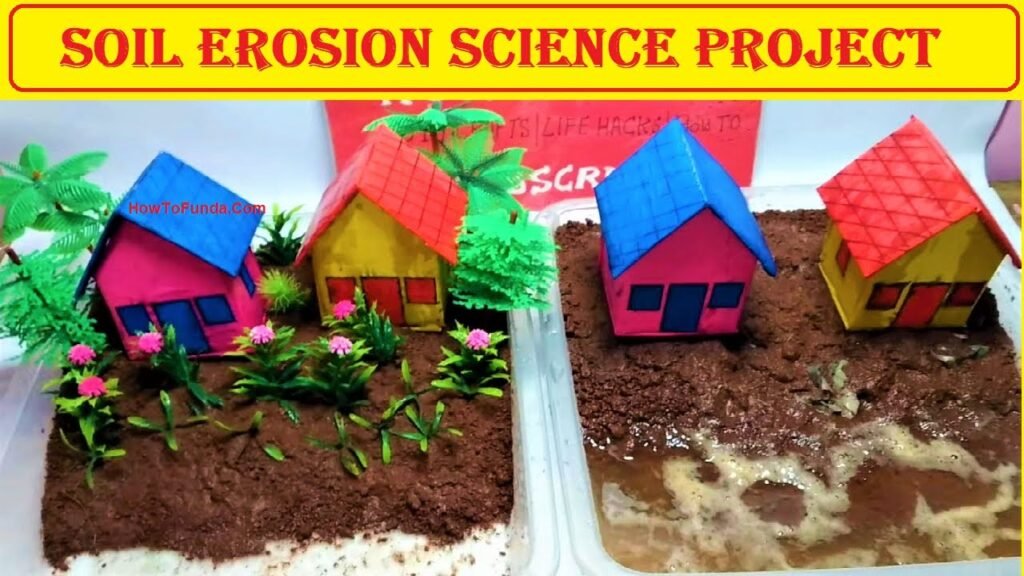
Here’s a step-by-step guide to help you build a simple yet effective soil erosion model:
Materials Needed:
- Cardboard sheets or boxes
- Newspaper or brown paper
- Soil
- Craft knife or scissors
- Ruler
- Pencil
- Glue or tape
- Small plants or model trees
- Markers or labels
- Paints (optional)
- Paintbrushes (optional)
Video Step by Step Procedure:
1. Design the Model:
- Plan the layout of your model. Decide where the house, plants, and the simulated landscape will be.
2. Create the Landscape:
- Cut a large piece of cardboard to represent the landscape. Add elevation changes to mimic hills and slopes using additional layers of cardboard if necessary.
3. Build the House:
- Cut out a simple house shape from cardboard. You can create walls, a roof, and other details. Glue or tape it onto the landscape.
4. Add Plants:
- Glue small plants or model trees onto the landscape, especially on the slopes. Plants will represent vegetation that helps prevent soil erosion.
5. Simulate Soil with Newspaper:
- Crumple newspaper or brown paper to simulate soil. Spread it over the landscape, covering the cardboard. Leave some areas exposed to represent areas with less vegetation.
6. Create Channels:
- Cut channels or grooves into the newspaper-covered landscape to represent paths for water runoff. These channels will simulate the flow of water and potential soil erosion.
7. Paint or Label Features (Optional):
- If you wish, paint the cardboard landscape with water-based paints to represent different soil types. Alternatively, you can use markers to label features like the house, plants, and soil layers.
8. Discuss Soil Erosion:
- Present your model and discuss the concept of soil erosion. Explain how vegetation helps stabilize soil and prevent erosion, while uncovered areas are more susceptible to erosion.
9. Conduct Simulations:
- Simulate rainfall or watering by gently pouring water onto your model. Observe how water flows through the landscape, and discuss how it can lead to soil erosion.
10. Experiment with Solutions: – Introduce various solutions to prevent soil erosion, such as adding more plants, building terraces, or using erosion control methods. Observe how these interventions affect water flow.
11. Label Key Features: – Label key features in your model, such as erosion-prone areas, areas protected by vegetation, and implemented erosion control measures.