
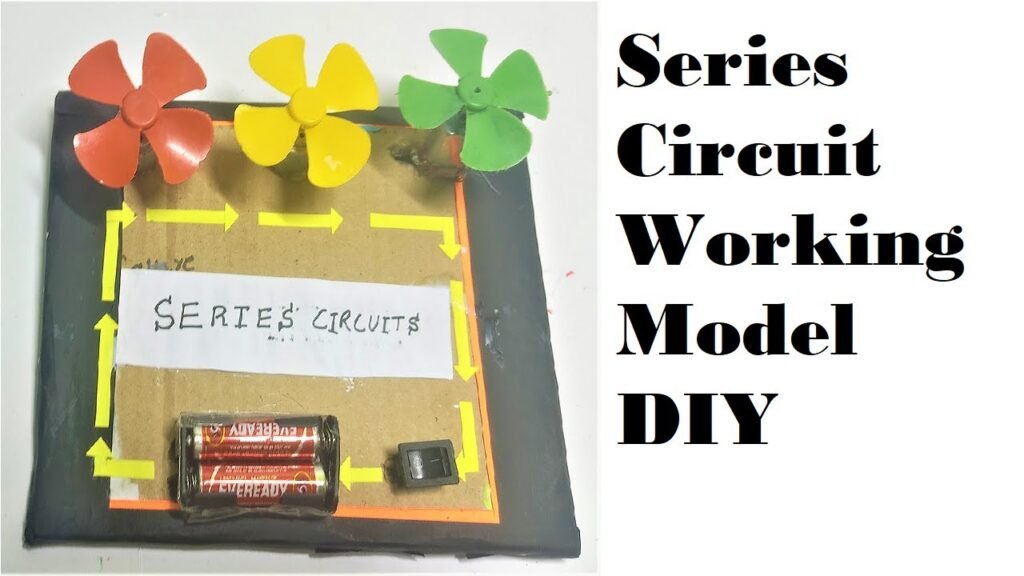
Creating a series circuit working model with a 9V battery, three DC motors with blades, a switch, and cardboard is a great way to demonstrate basic electrical principles.
Here’s a step-by-step guide to help you build this project:
Materials Needed:
- 9V battery
- Battery clip (to connect the battery)
- Three small DC motors with blades
- Switch (single-pole single-throw)
- Wires
- Cardboard
- Hot glue gun and glue sticks
- Scissors or craft knife
- Electrical tape
Step by Step Video Instructions:
1. Prepare the Base:
- Cut a piece of cardboard to act as the base for your model. Ensure it’s large enough to hold all three DC motors and the switch.
2. Mount the Motors:
- Position the three DC motors on the cardboard base in a row. Secure each motor to the cardboard using hot glue. Ensure that the motor shafts are free to rotate without obstruction.
3. Connect the Battery and Switch:
- Connect the battery clip to the 9V battery.
- Attach one wire from the battery clip to one terminal of the switch using electrical tape or soldering if available.
- Mount the switch on the cardboard base near the battery.
4. Wiring the Series Circuit:
- Cut pieces of wire long enough to connect the components.
- Connect the other terminal of the switch to the positive terminal of the first DC motor.
- Connect the negative terminal of the first DC motor to the positive terminal of the second DC motor.
- Connect the negative terminal of the second DC motor to the positive terminal of the third DC motor.
- Finally, connect the negative terminal of the third DC motor to the negative wire from the battery clip.
This creates a series circuit where the current flows from the battery, through the switch, and sequentially through each of the three motors.
5. Secure Connections:
- Use electrical tape to secure and insulate all wire connections to prevent short circuits.
6. Testing:
- Turn on the switch to complete the circuit. All three motors should start spinning their blades. If any motor does not spin, check the connections to ensure they are secure and that the wiring is correct.
Series Circuit Working Model Explanation:
This model uses a 9V battery, three DC motors with blades, a switch, and cardboard to show how a series circuit works.
Here’s how it works:
- Series Circuit: In a series circuit, electrical components are connected one after another, forming a single path for the current to flow. If any component is disconnected, the circuit is broken, and the current stops flowing.
- Battery: The 9V battery provides the electrical energy needed to power the motors. It is connected to the circuit using a battery clip.
- Switch: The switch allows us to control the flow of electricity in the circuit. When the switch is turned on, it completes the circuit, allowing current to flow from the battery through the motors.
- DC Motors: The three DC motors are connected in series. When current flows through the motors, they spin their blades, converting electrical energy into mechanical energy.
- Cardboard Base: The cardboard base holds all the components in place, making the model easy to handle and demonstrate.
By connecting the components in series, we ensure that the same current flows through each motor. This simple model illustrates how electrical energy can be distributed and used to perform work in a series circuit.