
A renewable energy park is a specially designed area that combines various forms of renewable energy generation in one location. It serves as a demonstration of sustainable energy technologies and promotes environmental awareness. Below, I’ll describe the key components you might consider including in a renewable energy park model:
1. Solar Energy:
- Create arrays of solar panels using yellow or black color paper. Arrange them on elevated platforms to simulate solar farms.
2. Wind Energy:
- Craft wind turbines using cardboard for the tower and color paper for the blades. Place them strategically to catch the “wind” in your model.
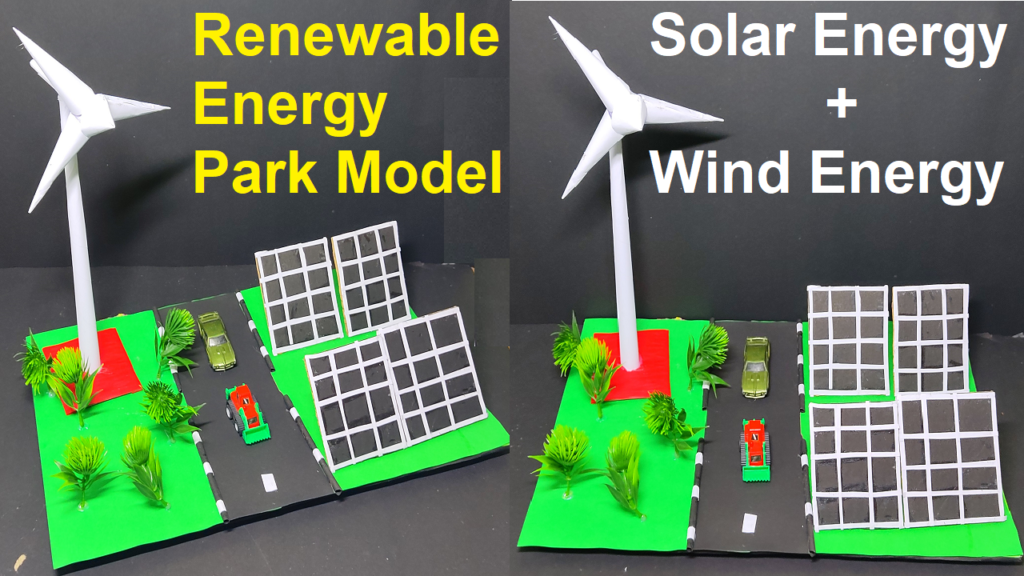
renewable energy park model making
Creating a model of a renewable energy park using color paper and cardboard is a fantastic way to visually represent sustainable energy sources. Here’s a step-by-step guide to help you get started:
Materials Needed:
- Color paper (green for grass, blue for water, and various colors for different energy sources)
- Cardboard sheets or boxes
- Scissors
- Glue or adhesive tape
- Markers or colored pencils (optional, for details)
- Ruler (optional, for precise measurements)
Step 1: Planning and Design
- Begin by sketching a rough layout of your renewable energy park on a piece of paper. Decide where you want to place each energy source (solar panels, wind turbines, hydroelectric dam, etc.) and any additional features like walking paths, benches, or information boards.
Step 2: Base and Landscape
- Cut out a large piece of cardboard to serve as the base of your model. This will represent the ground of the park. Glue or tape green color paper to represent grass, and blue for water bodies (like ponds or rivers).
Step 3: Solar Panels
- To make solar panels, cut rectangular shapes out of yellow or black color paper. These will represent the panels. You can add smaller rectangles on top to represent solar cells.
Step 4: Wind Turbines
- For wind turbines, cut out circular shapes from color paper (gray or white for the turbine, and brown for the tower). Attach a thin strip of paper to represent the blades.
Step 5: Hydroelectric Dam
- Create a dam by cutting out a rectangular shape from brown color paper and gluing it across a water body. Add details like spillways and turbines.
Step 6: Additional Energy Sources
- Depending on your design, you can create models for other renewable energy sources like geothermal plants, biomass facilities, or wave energy converters using appropriate colors and shapes.
Step 7: Paths and Walkways
- Use gray or brown color paper to create paths or walkways. You can also add small signs or labels along the paths to provide information about each energy source.
Step 8: Details and Finishing Touches
- Add any additional details like benches, trees, flowers, or even miniature figurines to bring your park to life. You can use markers or colored pencils for finer details.
Step 9: Assemble and Arrange
- Glue or tape the various components onto the base according to your design plan. Arrange them strategically to create an aesthetically pleasing layout.
Step 10: Display
- Once you’re satisfied with the arrangement, let the model dry completely. You can display it in your room, classroom, or any other place where it can be appreciated.
Remember to be creative and have fun with this project! It’s a great way to learn about renewable energy while also showcasing your artistic skills.