In this blog post we write about making of parts of circle working model – maths tlm -diy |

#partsofcircle #workingmodel #mathsmodel #tlm #diy #craftpiller #maths #scienceproject #scienceexhibition #sciencemodel
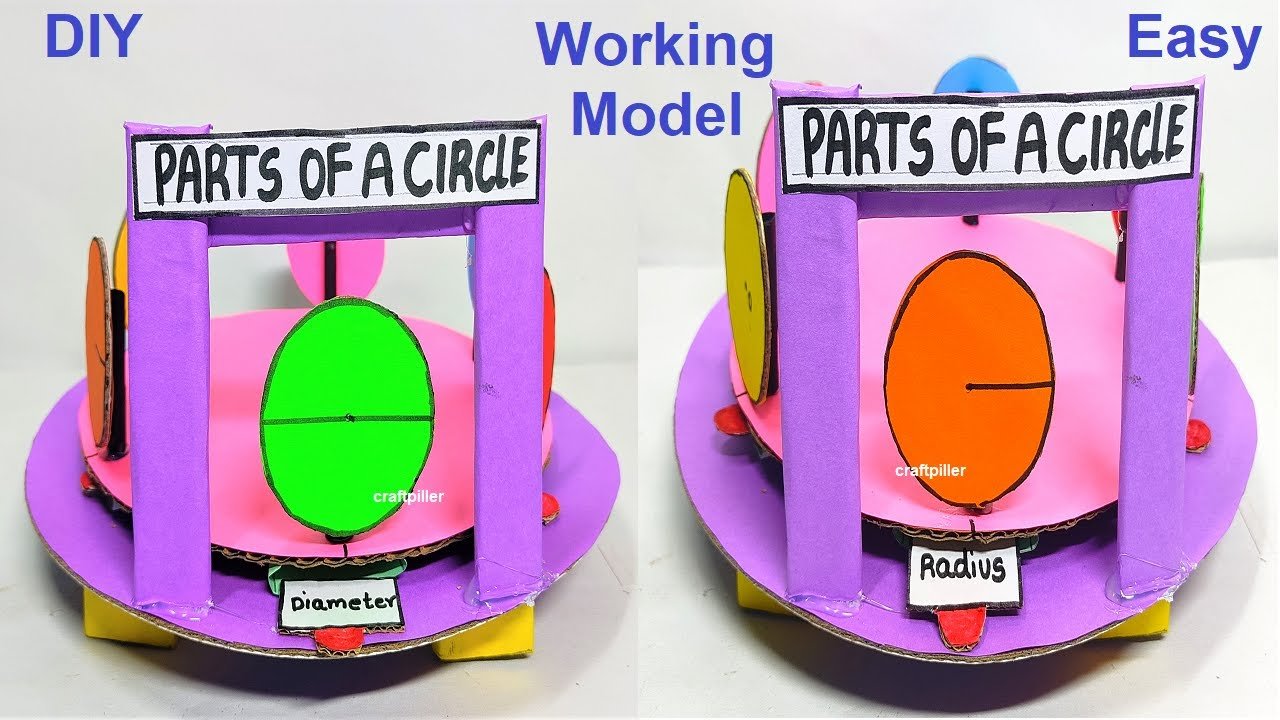
Creating a working model of the parts of a circle using cardboard and colored paper in a rotatable manner can be an engaging and educational project.
This model can help students understand various components of a circle such as the radius, diameter, chord, sector, segment, and arc.
Here is a step-by-step guide on how to make this model:
Materials Needed
- Cardboard
- Colored paper
- Scissors
- Glue or tape
- Compass
- Ruler
- Protractor
- Marker
- Brass fastener (or split pin) for rotation
Step by Step Making of parts of circle working model – maths tlm -diy
1. Prepare the Base Circle
- Draw the Circle:
- Use a compass to draw a large circle on a piece of cardboard. This will be your base circle.
- Cut out the circle carefully.
- Divide the Circle:
- Use a ruler and marker to draw lines dividing the circle into different parts: radius, diameter, chord, sector, segment, and arc.
- Label these parts lightly in pencil.
2. Create Rotatable Parts
- Radius and Diameter:
- Cut a strip of colored paper for the radius and another for the diameter.
- Glue or tape these strips onto the circle, aligning them with the lines drawn on the base circle.
- Chord:
- Cut a strip of colored paper for the chord.
- Attach this strip to the circle at a slight angle, not passing through the center.
- Sector:
- Use colored paper to cut out a sector (a pie-shaped piece) that fits within one of the divided sections.
- Make sure it can be rotated around the center.
- Segment:
- Cut another piece of colored paper for a segment (a region bounded by a chord and the corresponding arc).
- Ensure it can be placed and rotated within the circle.
- Arc:
- Draw an arc on colored paper and cut it out.
- Make sure it aligns with the edge of the circle and can be rotated.
3. Assemble the Model
- Make a Center Hole:
- Using a compass, mark the center of the circle. Poke a small hole through the center of the circle and all the rotatable parts.
- Attach the Rotatable Parts:
- Stack the base circle and all the rotatable parts, aligning the holes at the center.
- Insert a brass fastener (split pin) through the holes. Spread the legs of the fastener on the back of the cardboard to secure it.
- Label the Parts:
- Use a marker to label each part clearly:
- Radius: A line from the center to the edge of the circle.
- Diameter: A line passing through the center, touching both edges.
- Chord: A line segment within the circle that does not pass through the center.
- Sector: A pie-shaped section defined by two radii.
- Segment: A region defined by a chord and its corresponding arc.
- Arc: A part of the circumference of the circle.
- Use a marker to label each part clearly:
Example: Creating a Sector
- Draw the Sector:
- Using the compass, draw an arc on colored paper.
- Draw two radii from the center to the edge of the arc to form a sector.
- Cut the Sector:
- Cut out the sector carefully.
- Attach the Sector:
- Place the sector on the circle, aligning the center holes.
- Secure it with the brass fastener so it can rotate around the center.
By following these steps, you’ll create an interactive and educational model that effectively demonstrates the various parts of a circle. This hands-on approach helps reinforce geometric concepts in a fun and engaging way.