
Creating a model to demonstrate balanced and unbalanced forces using cardboard, colored paper, weight balance, and a seesaw can be a fun and educational project.
Here’s a step-by-step guide to make this model:
Materials Needed:
- Cardboard
- Colored paper
- Scissors
- Glue
- Ruler
- Marker
- String
- Small weights (like coins, small stones, or washers)
- A wooden dowel or a sturdy stick for the seesaw fulcrum
- Hot glue gun or strong adhesive
Steps by Step Video Instructions:
1. Prepare the Base:
- Cut the Cardboard Base: Cut a piece of cardboard to serve as the base of your model. Make it large enough to accommodate both the weight balance and the seesaw.
- Cover with Colored Paper: Cover the cardboard base with colored paper using glue to make it visually appealing.
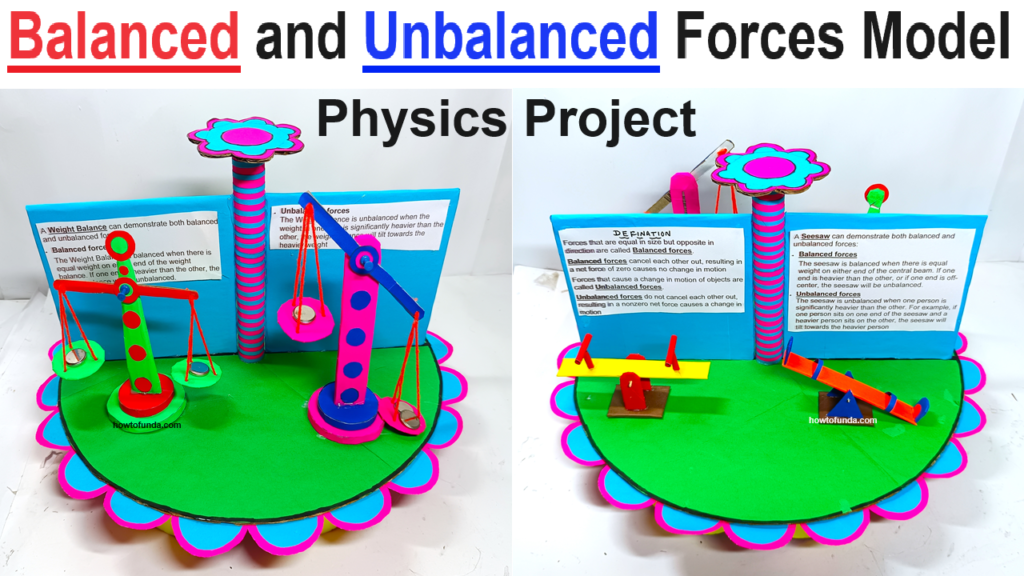
2. Create the Weight Balance:
- Cut the Balance Beam: Cut a strip of cardboard about 30 cm long and 3 cm wide for the balance beam.
- Attach String for Pans: Cut two equal lengths of string (about 15 cm each). Attach one end of each string to the ends of the balance beam using glue or tape.
- Make the Pans: Cut two small circles (about 5 cm in diameter) from the cardboard. Cover them with colored paper. Attach the other end of each string to these circles to create the weight pans.
- Create the Fulcrum: Cut a small triangular piece of cardboard (about 10 cm high) to act as the fulcrum. Glue it to the center of the base.
- Assemble the Balance: Place the balance beam on top of the triangular fulcrum so that it can pivot. Ensure the beam is balanced horizontally when no weight is added.
3. Create the Seesaw:
- Cut the Seesaw Beam: Cut another strip of cardboard, similar in size to the balance beam.
- Attach the Fulcrum: Use a wooden dowel or sturdy stick as the fulcrum. Cut two small pieces of cardboard (about 5 cm each) and glue them vertically on the base to hold the dowel in place. Insert the dowel between these pieces.
- Mount the Seesaw Beam: Place the seesaw beam on top of the dowel so it can pivot.
4. Add Details:
- Labeling: Use markers to label different parts of the model. You can label the “Balanced Force” section and “Unbalanced Force” section on the base.
- Decorations: Use colored paper to decorate the balance beam and seesaw. You can also add small figures or objects to make it more engaging.
5. Demonstrate Balanced and Unbalanced Forces:
- Balanced Force (Weight Balance): Place equal weights in both pans of the balance beam. The beam should stay level, demonstrating balanced forces.
- Unbalanced Force (Seesaw): Place different weights on each side of the seesaw. The side with more weight will go down, showing unbalanced forces.
This model is a great way to visually demonstrate the principles of balanced and unbalanced forces in a simple and understandable way.