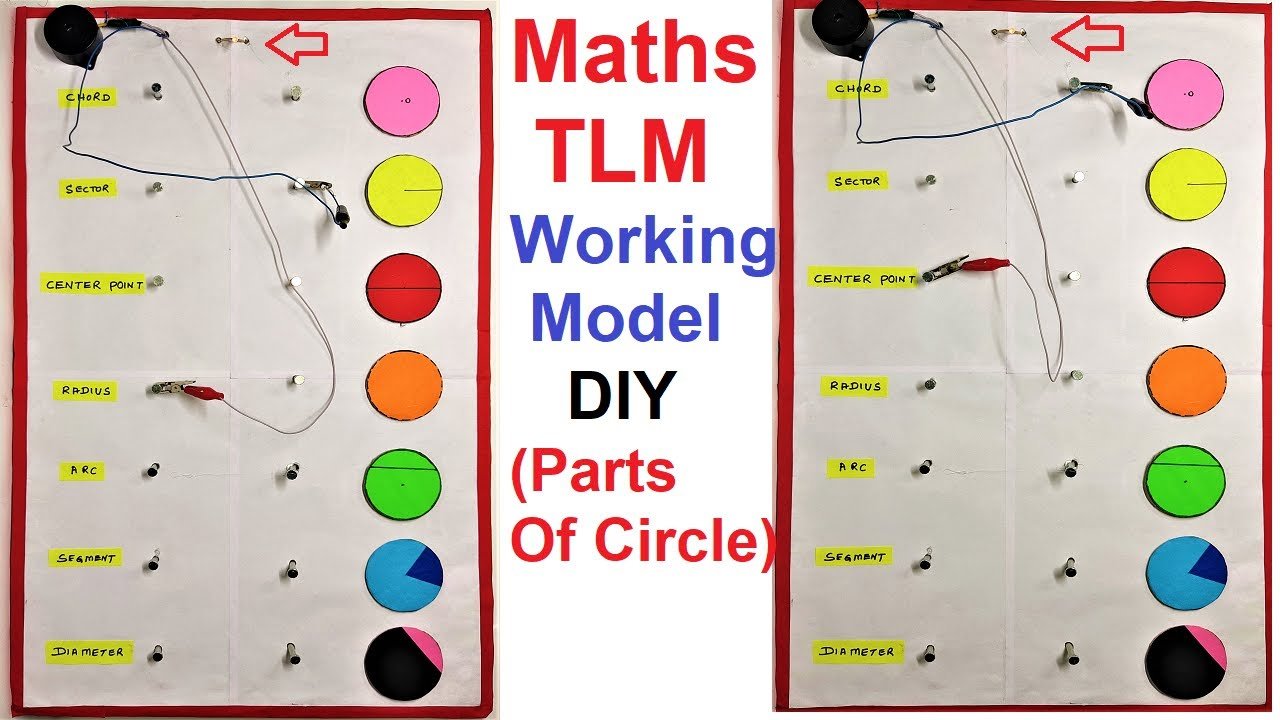
In this post we have given the instruction on how to make the maths TLM working model (parts of circles) – diy using cardboard at home
Creating a working model to demonstrate the parts of a circle using a 9V battery and LED lights can be both educational and visually appealing.
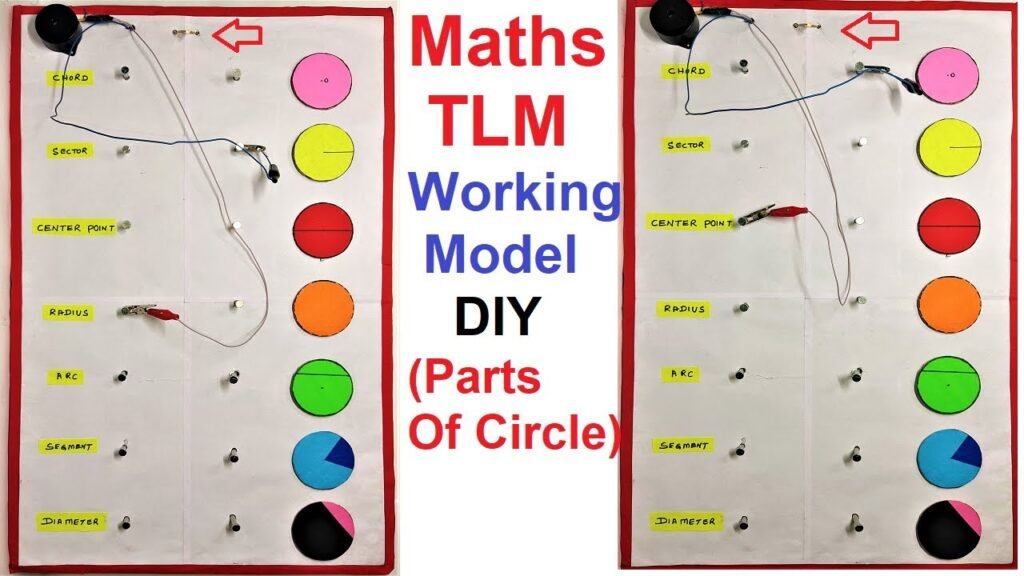
This model will help illustrate different parts of a circle such as the radius, diameter, chord, arc, sector, and tangent.
Here’s how to create a “match the following” activity using LED lights to highlight each part of the circle:
Materials Needed:
- Cardboard: For the base and the circle.
- Color Paper: For decorating and labeling.
- LED Lights: At least six LEDs of different colors to highlight different parts of the circle.
- 9V Battery: Power source for the LED lights.
- Resistors: To prevent the LEDs from burning out (usually 220Ω for each LED).
- Switch: To control the LED lights.
- Wires: For connecting the LEDs to the battery and switch.
- Glue or Tape: For assembly.
- Scissors and Craft Knife: For cutting the cardboard and paper.
- Markers, Paint, or Colored Pencils: For decorating and labeling.
- Ruler and Compass: For drawing the circle and measuring.
how to make math’s TLM working model on circles match the following
1. Prepare the Base:
- Cut a large rectangular piece from the cardboard. This will serve as the base of your model.
- Optionally, cover the base with color paper or paint it for a more polished look.
2. Create the Circle:
- Using a compass, draw a large circle on another piece of cardboard.
- Cut out the circle and draw its parts (radius, diameter, chord, arc, sector, tangent) on the circle.
3. Define the Parts:
- Radius: A line from the center to any point on the circle.
- Diameter: A line passing through the center, touching two points on the circle.
- Chord: A line segment within the circle that does not pass through the center.
- Arc: A curved line that is part of the circle’s circumference.
- Sector: A region bounded by two radii and the arc between them.
- Tangent: A line that touches the circle at exactly one point.
4. Attach the Circle to the Base:
- Glue or tape the circle onto the center of the rectangular cardboard base.
5. Attach the LEDs:
- Place LEDs at strategic points on the circle to highlight each part:
- Center: To mark the center of the circle.
- Radius: Along the line from the center to the edge.
- Diameter: Across the circle.
- Chord: A line segment within the circle.
- Arc: Along the curved edge of the circle.
- Sector: Within the region formed by two radii.
- Tangent: At a point where a line touches the circle externally.
6. Wire the LEDs:
- Connect each LED to a resistor to prevent it from burning out.
- Use wires to connect each LED to the 9V battery through the switch. This can be done in parallel to ensure each LED gets the same voltage.
- Secure the wires neatly on the back of the base using tape or glue.
7. Install the Switch:
- Attach the switch to the base in an accessible location.
- Connect the switch to the battery and complete the circuit with the LEDs.
8. Label the Parts:
- Create labels for each part of the circle on color paper.
- Attach these labels to the corresponding LEDs or near them on the circle.
- Create matching labels and place them on the other side of the base to create a “match the following” activity.
9. Test the Model:
- Turn on the switch to light up the LEDs.
- Ensure each LED lights up correctly and corresponds to the correct part of the circle.
Tips:
- Double-check all wiring connections to ensure there are no short circuits.
- Use different colored LEDs for each part to make it visually distinct.
- Ensure all labels are clear and correctly placed to facilitate easy matching.
Conclusion:
This working model is an excellent tool to help students visualize and understand the different parts of a circle. It combines hands-on activity with visual learning, making it a fun and educational project. Enjoy building and learning from your model!
#mathstlm #workingmodel #circletypes #diy #howtofunda