
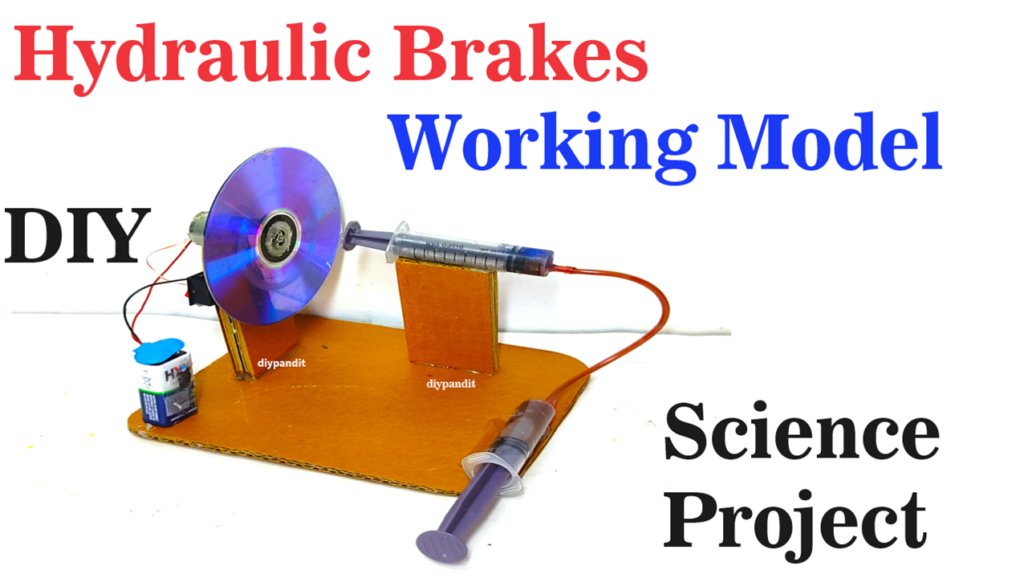
Hydraulic brakes use the power of liquid to stop vehicles smoothly and efficiently. This model demonstrates the concept of hydraulic brakes using syringes, tubes, and a DC motor.
Here’s how it works in simple terms:
- Syringe as Brake Pedal: A syringe acts like the brake pedal. When you push the syringe, it forces liquid (water or oil) through a connected tube. This liquid transfers the force to another syringe.
- Force Transfer: The liquid inside the tube doesn’t compress, so the force applied on the first syringe is sent to the second syringe. This second syringe acts as the brake cylinder.
- Brake Action: The second syringe moves when it receives the force. This movement is used to apply pressure on a brake pad or disc (in the model, this can be a rotating wheel or disc powered by a DC motor).
- Stopping the Wheel: The DC motor makes the wheel rotate. When the second syringe presses against the rotating disc, it slows down or stops due to friction. This demonstrates how real brakes work in vehicles.
Creating a hydraulic brake working model using a CD disk, DC motor, and syringes is an excellent way to understand the basic principles of hydraulic systems.
Here’s a step-by-step guide:
Materials Needed:
- CD disk (or any circular object to act as a wheel)
- DC motor
- Two syringes (with plungers)
- Flexible plastic tubing (or small diameter hoses)
- Cardboard or wooden base
- Hot glue gun or strong adhesive
- Small box or container (for mounting the DC motor)
- Wooden sticks or dowels
- Water
- Small rubber bands or zip ties
Steps by Step Video Instructions:
- Prepare the Base:
- Take the cardboard or wooden base and mount the DC motor on it using hot glue or adhesive. Make sure the motor shaft is perpendicular to the base.
- Attach the CD Disk:
- Attach the CD disk to the shaft of the DC motor. You can glue it or use a rubber band to secure it tightly.
- Prepare the Syringes:
- Fill one syringe with water and attach a piece of tubing to its nozzle.
- Leave the other syringe empty but attach tubing to its nozzle as well.
- Make sure the tubing is securely attached to the syringes.
- Create the Brake System:
- Attach the syringe with water (the one acting as the brake) to the base. You can use hot glue to hold it in place.
- Connect the tubing from the water-filled syringe to the empty syringe using a wooden stick or dowel as a bridge to keep the tubing elevated and allow movement.
- Connect the Syringes to the CD Disk:
- Position the empty syringe in a way that its plunger can press against the edge of the CD disk when activated.
- Use hot glue or adhesive to mount the empty syringe in place.
- Test the Brake System:
- Start the DC motor, causing the CD disk to rotate.
- Use the water-filled syringe as the brake. Press the plunger to push water into the empty syringe, causing its plunger to extend and press against the CD disk.
- Observe how the CD disk slows down or stops as the brake is applied.
- Adjust and Refine:
- Experiment with different amounts of water in the brake syringe to adjust the braking force.
- Check for leaks in the tubing and syringes, and seal them if necessary.
- Fine-tune the positioning of the syringes to optimize the braking action.
How It Works:
- When the water-filled syringe is pressed, water is forced through the tubing into the empty syringe.
- The pressure exerted by the water in the empty syringe extends its plunger, pressing against the CD disk and creating friction, which slows down or stops its rotation.
This model demonstrates the basic principles of hydraulic brakes used in vehicles, where brake fluid is used to transmit force and apply pressure to the brake pads, slowing down or stopping the vehicle