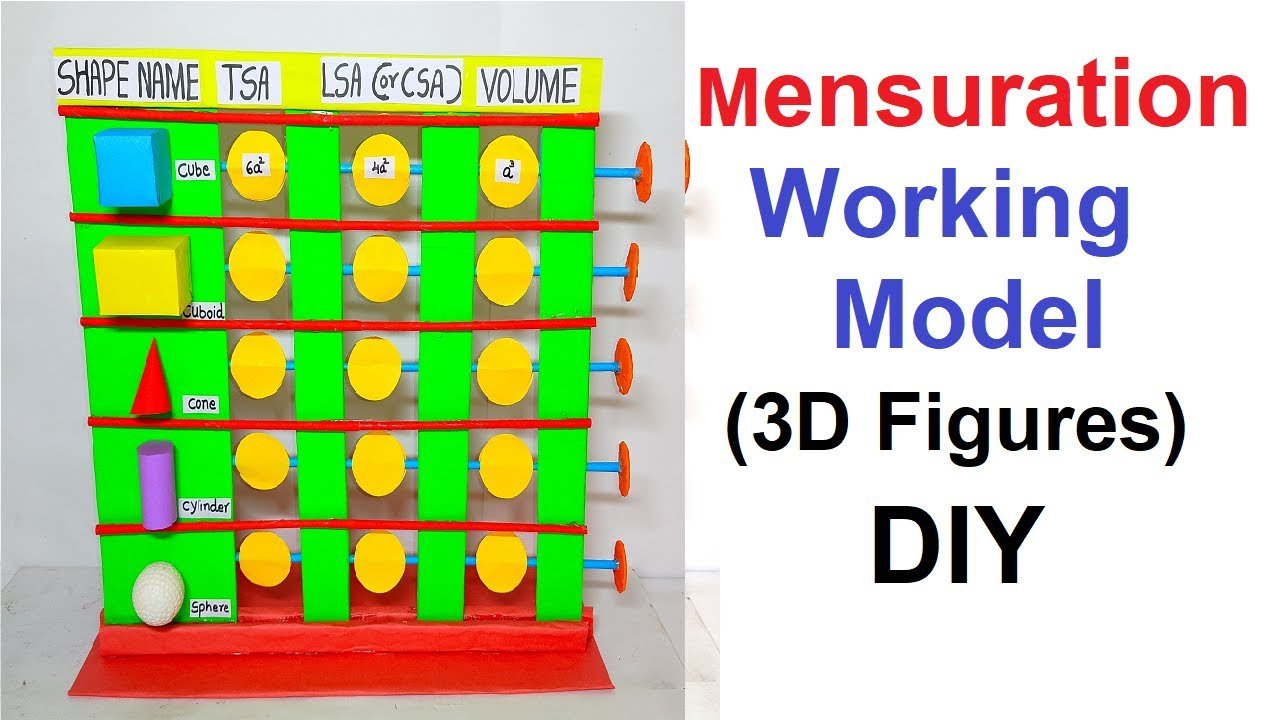
Creating a working model for teaching mensuration formulas specifically for 3D figures can be a highly effective teaching tool.

Here’s a comprehensive guide to making a DIY math TLM (Teaching Learning Material) working model that includes various 3D figures and their mensuration formulas.
Materials Needed
- Cardboard
- Scissors
- Glue or tape
- Ruler
- Compass
- Markers
- String
- Styrofoam (optional)
- Colored paper or felt
- Transparent plastic sheet (optional)
- Small whiteboard or cardboard for writing formulas
- Hot glue gun (optional for stronger bonds)
3D Figures to Include
- Cube
- Cuboid
- Cylinder
- Cone
- Sphere
- Pyramid (Square Base)
Steps to Create Each Model
1. Cube
Materials: Cardboard, markers Formulas: Surface Area (SA) = 6a², Volume (V) = a³
Instructions:
- Cut out six identical squares from cardboard.
- Glue the squares together to form a cube.
- Label each side with the edge length (a).
- Write the formulas for surface area and volume on a small piece of cardboard and attach it to the model.
2. Cuboid
Materials: Cardboard, markers Formulas: Surface Area (SA) = 2(lb + bh + hl), Volume (V) = lbh
Instructions:
- Cut out rectangles for each face of the cuboid.
- Assemble the rectangles to form the cuboid.
- Label the length (l), breadth (b), and height (h) on the model.
- Write the formulas for surface area and volume on a small piece of cardboard and attach it to the model.
3. Cylinder
Materials: Cardboard, markers, string Formulas: Surface Area (SA) = 2πr(h + r), Volume (V) = πr²h
Instructions:
- Use a compass to draw and cut out two circles for the bases.
- Cut a rectangle for the curved surface with height (h) and width equal to the circumference of the base (2πr).
- Glue the rectangle to form a cylinder and attach the circles to the top and bottom.
- Label the radius (r) and height (h).
- Write the formulas for surface area and volume on a small piece of cardboard and attach it to the model.
4. Cone
Materials: Cardboard, markers, string Formulas: Surface Area (SA) = πr(r + l), Volume (V) = ⅓πr²h
Instructions:
- Use a compass to draw and cut out a circle for the base.
- Cut a sector from another circle and roll it to form the cone.
- Attach the base to the cone.
- Label the radius (r), height (h), and slant height (l).
- Write the formulas for surface area and volume on a small piece of cardboard and attach it to the model.
5. Sphere
Materials: Styrofoam ball or cardboard, markers Formulas: Surface Area (SA) = 4πr², Volume (V) = ⅘πr³
Instructions:
- Use a Styrofoam ball or create a sphere from cardboard.
- Label the radius (r).
- Write the formulas for surface area and volume on a small piece of cardboard and attach it to the model.
6. Pyramid (Square Base)
Materials: Cardboard, markers, string Formulas: Surface Area (SA) = B + ½Pl, Volume (V) = ⅓Bh
Instructions:
- Cut out a square for the base and four triangles for the sides.
- Assemble the triangles to form the pyramid and attach them to the base.
- Label the base side (b), slant height (l), and height (h).
- Write the formulas for surface area and volume on a small piece of cardboard and attach it to the model.
Assembly and Presentation
- Base Board: Use a large cardboard sheet as the base.
- Attach each 3D shape with its corresponding formulas on the base board.
- Arrange the shapes in an organized manner for better visualization.
- Interactive Elements:
- Use Velcro or magnets to make shapes detachable so students can handle and explore them.
- Add flaps or sliders to cover and reveal formulas for an interactive quiz feature.
- Formula Display:
- Use a small whiteboard or a piece of cardboard to write and explain the formulas.
- Attach this to the base board for easy reference.
- Color Coding:
- Use different colors for different shapes to make the model visually appealing and easier to understand.
- Color-code the formulas to match the shapes.