
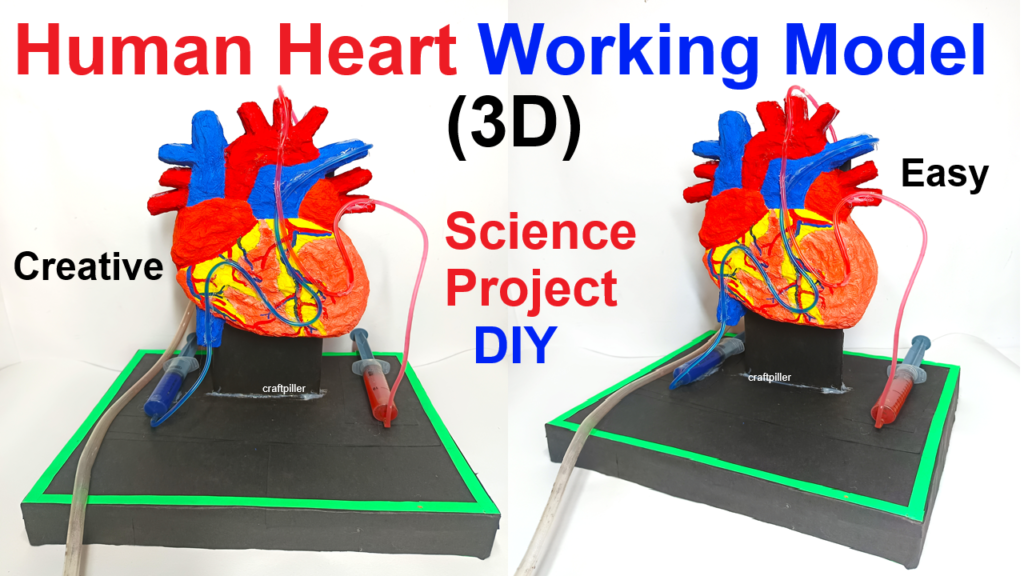
This model will demonstrate the working of the human heart, focusing on how blood flows through the heart using syringes, paint, cardboard, and aluminum foil. It will show the basic heart structure (atria, ventricles, and valves) and how the pumping action occurs.
Materials Required:
Cardboard (for heart structure and base)
Syringes (for simulating blood flow)
Aluminum foil (for arteries and veins)
Paint (red, blue, and white for heart and blood vessels)
Glue Gun
Scissors
Plastic tubing (to connect syringes)
Cotton or foam (for heart texture)
Markers or color pens (for labels)
Steps to Make the Model:
1. Create the Heart Structure
- Start with cardboard to create the outer shape of the heart.
- Cut the cardboard into a heart-like shape and glue it together to form a 3D structure. The heart should have two atria (upper chambers) and two ventricles (lower chambers).
- Use aluminum foil to create a shiny and realistic texture for the blood vessels (arteries and veins).
- Attach small pieces of aluminum foil at the top and bottom of the heart to represent the aorta (the main artery) and vena cava (main vein).
2. Set Up the Chambers
Divide the heart into four sections:
- Right Atrium
- Left Atrium
- Right Ventricle
- Left Ventricle
You can use foam or cotton inside the chambers to give a realistic texture. Paint the inner parts of the heart: - Red for the left ventricle (oxygenated blood)
- Blue for the right ventricle (deoxygenated blood)
3. Connect Syringes for Blood Flow
- Attach two syringes for the right side (deoxygenated blood) and left side (oxygenated blood).
- For the right side, connect a syringe to the right atrium, and another syringe at the right ventricle to pump blood to the lungs via the pulmonary artery.
- For the left side, connect a syringe at the left atrium and left ventricle to pump oxygenated blood through the aorta to the body.
- Use plastic tubing to connect the syringes and simulate the blood vessels.
- Test the syringes to see the pumping effect, and when the syringes are pressed, blood should flow through the tubes.
4. Attach the Blood Vessels (Arteries and Veins)
- Use aluminum foil to create the veins and arteries.
- Attach the pulmonary arteries and veins from the right side and the aorta and venous vessels from the left side.
- Paint the veins blue (deoxygenated blood) and arteries red (oxygenated blood) for clear differentiation.
5. Add the Heart Valves
- Create small flaps using cardboard to represent the heart valves (mitral valve, tricuspid valve, and semilunar valves).
- Attach these flaps inside the chambers where blood flow is regulated.
- Ensure the flaps open and close as the syringes are pumped to simulate the valves in action.
6. Label the Model
Use markers or colored pens to label the parts of the heart:
- Right Atrium
- Right Ventricle
- Left Atrium
- Left Ventricle
- Aorta
- Pulmonary Artery
- Pulmonary Vein
- Venus Cava
- Heart Valves