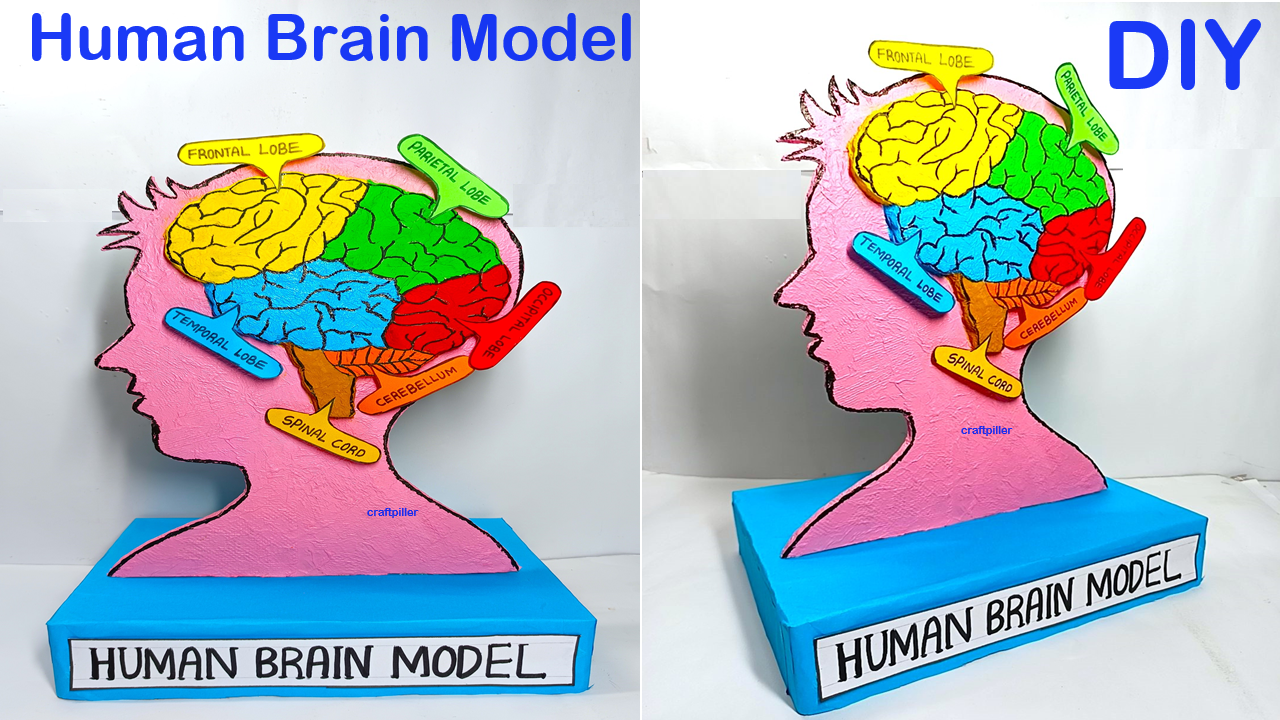
Creating a simple brain model using cardboard with a face/head and labeled brain parts can be a fun and educational project.

Here’s a step-by-step guide to help you make this model:
Materials Needed:
- Cardboard
- Colored paper or markers
- Scissors
- Glue or tape
- Pencil
- Ruler
- Labels or small pieces of paper for labeling
Step by Step Video Instructions:
1. Draw and Cut Out the Head/Face:
- Draw the Head:
- On a piece of cardboard, draw an outline of a human head in profile (side view). Ensure it’s large enough to show the brain parts inside.
- Cut Out the Head:
- Carefully cut out the head shape using scissors.
2. Draw and Cut Out the Brain Parts:
- Basic Brain Parts:
- Cerebrum: The largest part of the brain, located at the top.
- Cerebellum: Located under the cerebrum, towards the back.
- Brainstem: Located at the bottom, connecting the brain to the spinal cord.
- Draw the Brain Parts:
- On another piece of cardboard, draw the basic shapes of the cerebrum, cerebellum, and brainstem.
- Cut Out the Brain Parts:
- Carefully cut out each brain part.
3. Color and Label the Brain Parts:
- Color the Brain Parts:
- Use colored paper or markers to color the cerebrum, cerebellum, and brainstem. You can use different colors for each part to make them easily distinguishable.
- Label the Brain Parts:
- Write the names of the brain parts on small pieces of paper or directly on the parts using a marker. Labels should include “Cerebrum,” “Cerebellum,” and “Brainstem.”
4. Assemble the Brain Inside the Head:
- Attach the Brain Parts:
- Glue or tape the brain parts to the head cutout, positioning them correctly:
- Cerebrum: Place it at the top and center.
- Cerebellum: Place it under the cerebrum, towards the back.
- Brainstem: Place it at the bottom, connecting to where the spinal cord would be.
- Glue or tape the brain parts to the head cutout, positioning them correctly:
- Secure the Labels:
- Attach the labels next to the corresponding brain parts using glue or tape.
5. Final Touches:
- Add Details to the Face/Head:
- Draw facial features (eyes, nose, mouth, etc.) on the head cutout to make it more realistic.
- Display the Model:
- Your brain model is now complete. You can display it on a stand or hang it on a wall for educational purposes.
This simple and easy brain model helps visualize the basic structure and parts of the brain, making it a great educational tool for students and educators.

