In this post article we write about making of the Powerful Electric Bell Working Model For Science Project using the waste materials available at home easily

Creating a big and powerful electric bell working model for a science project is a great way to understand the principles mechanics. Below are the detailed steps and materials needed for this project.
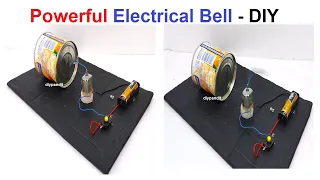
Materials Required
- Metal Box: To serve as the body of the bell.
- DC Motor: For creating the ringing mechanism.
- Nut: To act as the hammer that strikes the bell.
- Cardboard: To use as a base.
- 9V Battery: To power the motor.
- Metal Wire: For the electrical connections.
- Switch: To control the bell.
- Bell: Any metal object that can produce a ringing sound when struck (a small metal bowl can be used).
- Hot Glue Gun or Strong Adhesive: To fix components in place.
Tools
- Screwdriver
- Wire Stripper
- Soldering Iron and Solder (optional for stronger connections)
- Hot Glue Gun
Step by Step Video Guide on Powerful electrical bell
- Prepare the Base:
- Cut a piece of cardboard to serve as the base for your electric bell model.
- Ensure it’s large enough to accommodate the metal box, DC motor, battery, and other components.
- Mount the Metal Box:
- Secure the metal box to the cardboard base using hot glue or screws. The metal box will act as the bell.
- Prepare the DC Motor:
- Attach the nut to the shaft of the DC motor. This nut will act as the hammer that strikes the metal box.
- Make sure the nut is tightly fixed so that it doesn’t come off when the motor is running.
- Position the Motor:
- Place the motor in such a way that the nut will strike the metal box (bell) when the motor is running.
- Secure the motor to the cardboard base using hot glue or screws.
- Wire the Components:
- Connect one end of the electromagnet to one terminal of the switch.
- Connect the other end of the electromagnet to one terminal of the 9V battery.
- Connect the other terminal of the switch to one terminal of the DC motor.
- Connect the other terminal of the DC motor to the remaining terminal of the 9V battery.
- Final Assembly:
- Secure all wires in place using tape or hot glue to ensure there are no loose connections.
- Make sure the switch is easily accessible so you can control the bell.
- Test the Bell:
- Turn on the switch to power the DC motor and the electromagnet.
- The nut attached to the motor should strike the metal box (bell), producing a ringing sound.
- Adjust the position of the motor and the nut if necessary to ensure a clear and loud sound.
This model demonstrates how an electric bell works by converting electrical energy into mechanical energy to produce sound. The DC motor and nut mechanism serve as the actuator, striking the metal box to simulate the ringing bell, while the electromagnet controls the activation of the motor.
#howtomake #bell #powerful #diypandit #workingmodel #scienceproject #scienceexhibition #sciencefair #electricity #electricityproject #soundenergy