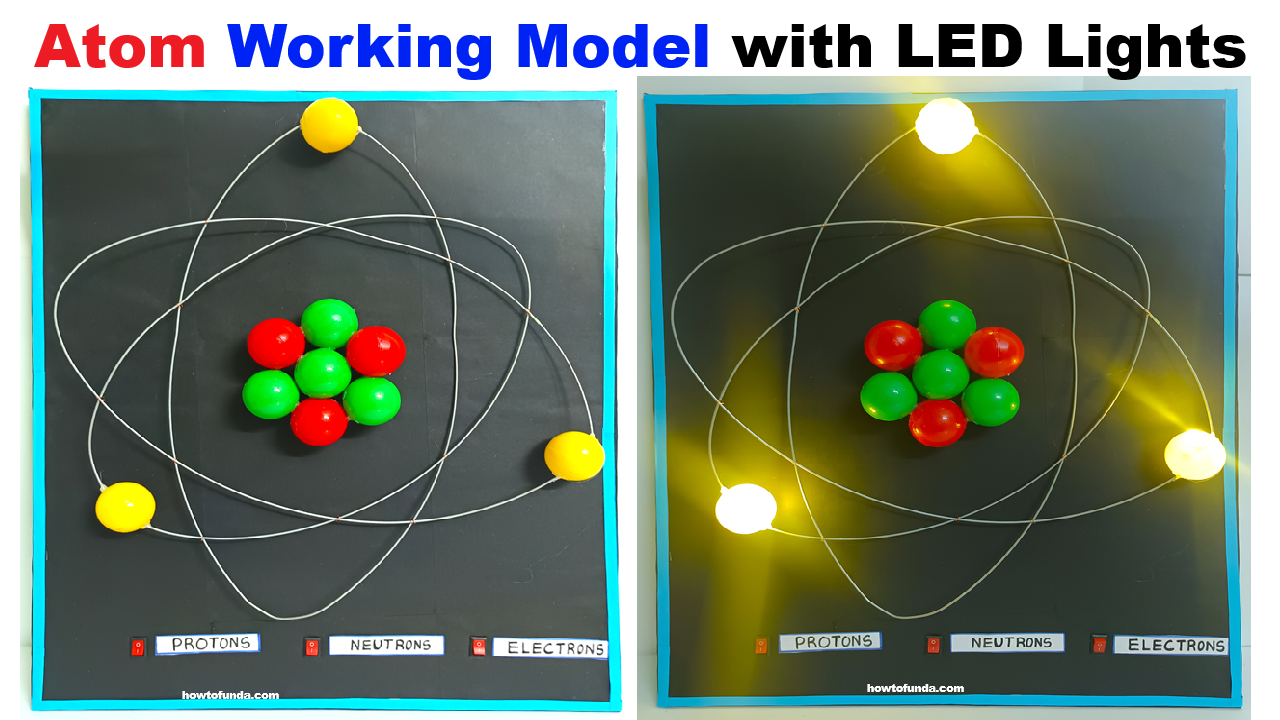
An atom is the smallest unit of matter, consisting of protons, neutrons, and electrons.
- Protons (+) and Neutrons (0) are in the nucleus (center).
- Electrons (-) revolve around the nucleus in orbits (shells).
This model will use plastic balls, GI metal wire, LED lights, and a battery to represent these particles.

Materials Required
- Plastic balls (small & big) → For protons, neutrons, and electrons.
- GI metal wire (galvanized iron wire) → For making electron orbits.
- LED lights (3 colors) → Red (protons), White (neutrons), Blue (electrons).
- 9V battery with connector.
- On/Off switch.
- Wires for connections.
- Glue/Fevicol.
- Cardboard/plywood base for mounting.
- Paint/markers (optional, for labeling).
Step-by-Step Construction
1. Base Preparation
- Take a strong cardboard or plywood board as the base.
- Fix the 9V battery holder and switch on one side of the base.
2. Nucleus (Center of Atom)
- Take 2–3 small plastic balls for protons (paint red, connect LED inside).
- Take 2–3 small plastic balls for neutrons (paint white, LED inside or keep plain).
- Group them together at the center of the base → this represents the nucleus.
3. Electron Orbits
- Use GI metal wire to make circular loops around the nucleus (like rings).
- Fix these loops firmly on the base using glue or tape.
- Each loop represents an electron shell (K, L, M shells).
4. Electrons
- Take small blue plastic balls for electrons.
- Fix LED lights inside or attach LEDs beside them.
- Mount these electrons on the orbits (GI wire).
5. Electrical Circuit
- Connect all LEDs in parallel so they glow with the same brightness.
- Positive terminals of LEDs → connect to battery positive via switch.
- Negative terminals → connect to battery negative.
- Hide the wires neatly along the GI wires or under the base.
6. Finishing
- Paint the base black or blue for contrast.
- Label Protons, Neutrons, Electrons, Nucleus, Orbits with chart paper arrows.
- When the switch is ON → LEDs glow, making the atom look alive.