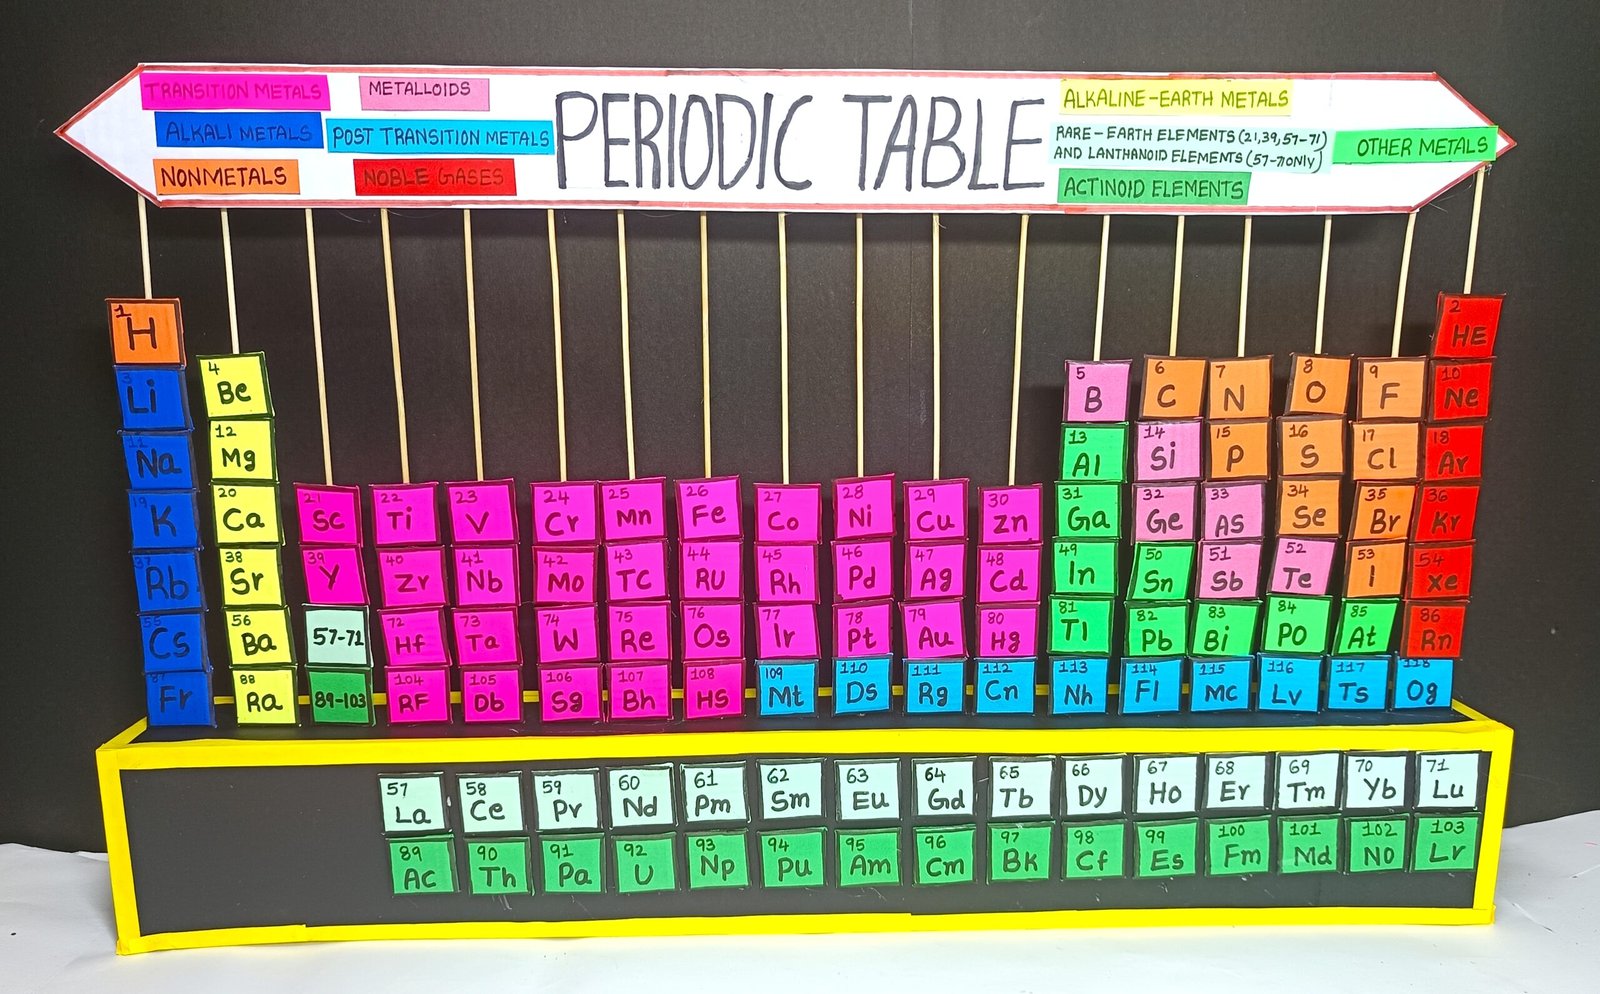
In this creative and easy science project, we build a 3D periodic table model using cardboard, chopsticks (or skewers), and colored paper to represent different element groups like metals, nonmetals, noble gases, and more!

This model visually represents all 118 elements in their correct positions using vertical chopsticks for a 3D effect, making it an ideal chemistry project for school exhibitions and practical learning.
Materials Needed:
- Large cardboard base (for the table layout)
- Chopsticks or skewers (for vertical element stands)
- Colored paper (different colors for different element groups)
- White A4 sheets (for element symbols and info)
- Fevicol/Glue, scissors, marker pens, tape
How to Make – Step-by-Step:
1. Prepare the Base (Cardboard):
- Cut a rectangle (approx. A2 size) to represent the base.
- Draw a grid of the periodic table (1 to 18 groups, and 7 periods).
- Leave extra space for Lanthanides & Actinides below.
2. Prepare Element Cards:
- Cut small squares or rectangles (approx. 3cm × 3cm) using color paper.
- Write element symbol, atomic number, and atomic mass on each.
- Color-code by group:
- Yellow – Alkali metals
- Orange – Alkaline earth metals
- Blue – Nonmetals
- Green – Metalloids
- Pink – Halogens
- Red – Noble gases
- etc.
3. Create 3D Structure:
- Tape or glue one end of each chopstick to the base cardboard at each element’s position.
- Attach the element card at the top of each chopstick – making it stand vertically.
- This gives a 3D look and helps visualize group and period structure.
4. Labeling and Final Touches:
- Add titles like “3D Periodic Table” at the top.
- Use colored tape or markers to add group numbers (1 to 18) and periods (1 to 7).
- You can also add a key/legend for the color codes.