Earthquakes are natural phenomena that result from the sudden release of energy within the Earth’s crust, leading to ground shaking and sometimes catastrophic consequences.
The purpose of studying earthquakes is to understand their causes, effects, and patterns, which are crucial for mitigating risks, improving infrastructure resilience, and safeguarding human lives and property.
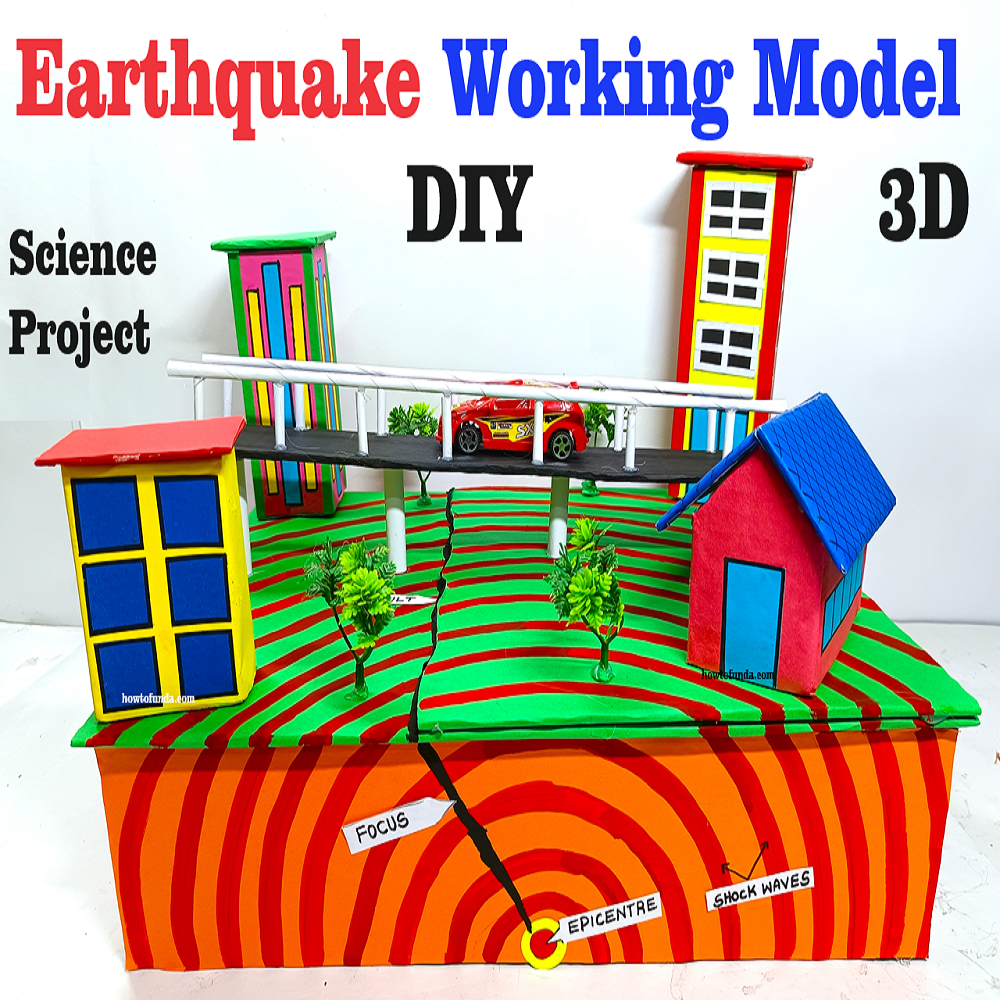
Creating an earthquake working model for a science exhibition that demonstrates the epicenter, crust, and land breakage using a DC motor is an engaging project.

Here’s a step-by-step guide to help you build it:
Materials Needed:
- Cardboard: For the base, buildings, and other structures
- DC motor: To simulate the earthquake
- Battery: To power the DC motor
- Switch: To control the motor
- Wires: For connecting the motor, switch, and battery
- Glue: Hot glue or strong adhesive
- Scissors/Cutter: For cutting cardboard
- Paints/Markers: For coloring and labeling the model
- Ruler: For measurements
- Small plastic or toy buildings: To represent buildings (or you can make them from cardboard)
- Springs or rubber bands: To create the shaking effect
- Foam board: For a sturdier base
- Thin plywood or thick cardboard: For the moving platform
- Nails or screws: To attach the motor to the base
Step by Step Video Instructions:
1. Prepare the Base:
- Cut a large rectangular piece of foam board or thick cardboard (about 18×12 inches) for the base.
2. Create the Moving Platform:
- Cut a piece of thin plywood or thick cardboard slightly smaller than the base to act as the moving platform.
- This platform will simulate the movement of the Earth’s crust during an earthquake.
3. Attach the DC Motor:
- Securely attach the DC motor to the base using nails or screws. Position it so the shaft of the motor can move the platform back and forth.
- Attach an off-center cam (a small piece of wood or thick cardboard) to the motor shaft to convert the rotary motion into linear motion.
4. Create the Earthquake Mechanism:
- Connect the moving platform to the cam on the motor shaft using a spring or rubber band. This will create the shaking effect when the motor is turned on.
5. Prepare the Buildings:
- Either use small toy buildings or create buildings from cardboard. Paint and decorate them to look like real buildings.
- Attach the buildings to the moving platform using glue. Ensure they are securely attached but can show movement when the platform shakes.
6. Simulate the Land and Epicenter:
- On the base, draw and paint the Earth’s crust, including fault lines and the epicenter.
- Use markers to illustrate the crust and different geological features.
- Show the epicenter by marking a point on the base where the motor is located.
7. Connect the Electrical Components:
- Connect the DC motor to the battery and switch using wires. Ensure all connections are secure.
- Attach the switch to the side of the base for easy operation.
8. Final Assembly:
- Place the moving platform with buildings on the base, ensuring the cam on the motor shaft can move it.
- Test the motor to ensure it creates the desired shaking effect.
- Make adjustments if necessary to improve the movement.
9. Decorate and Label:
- Label the different parts of the model, including the epicenter, crust, and buildings.
- Add any additional decorations to enhance the visual appeal.